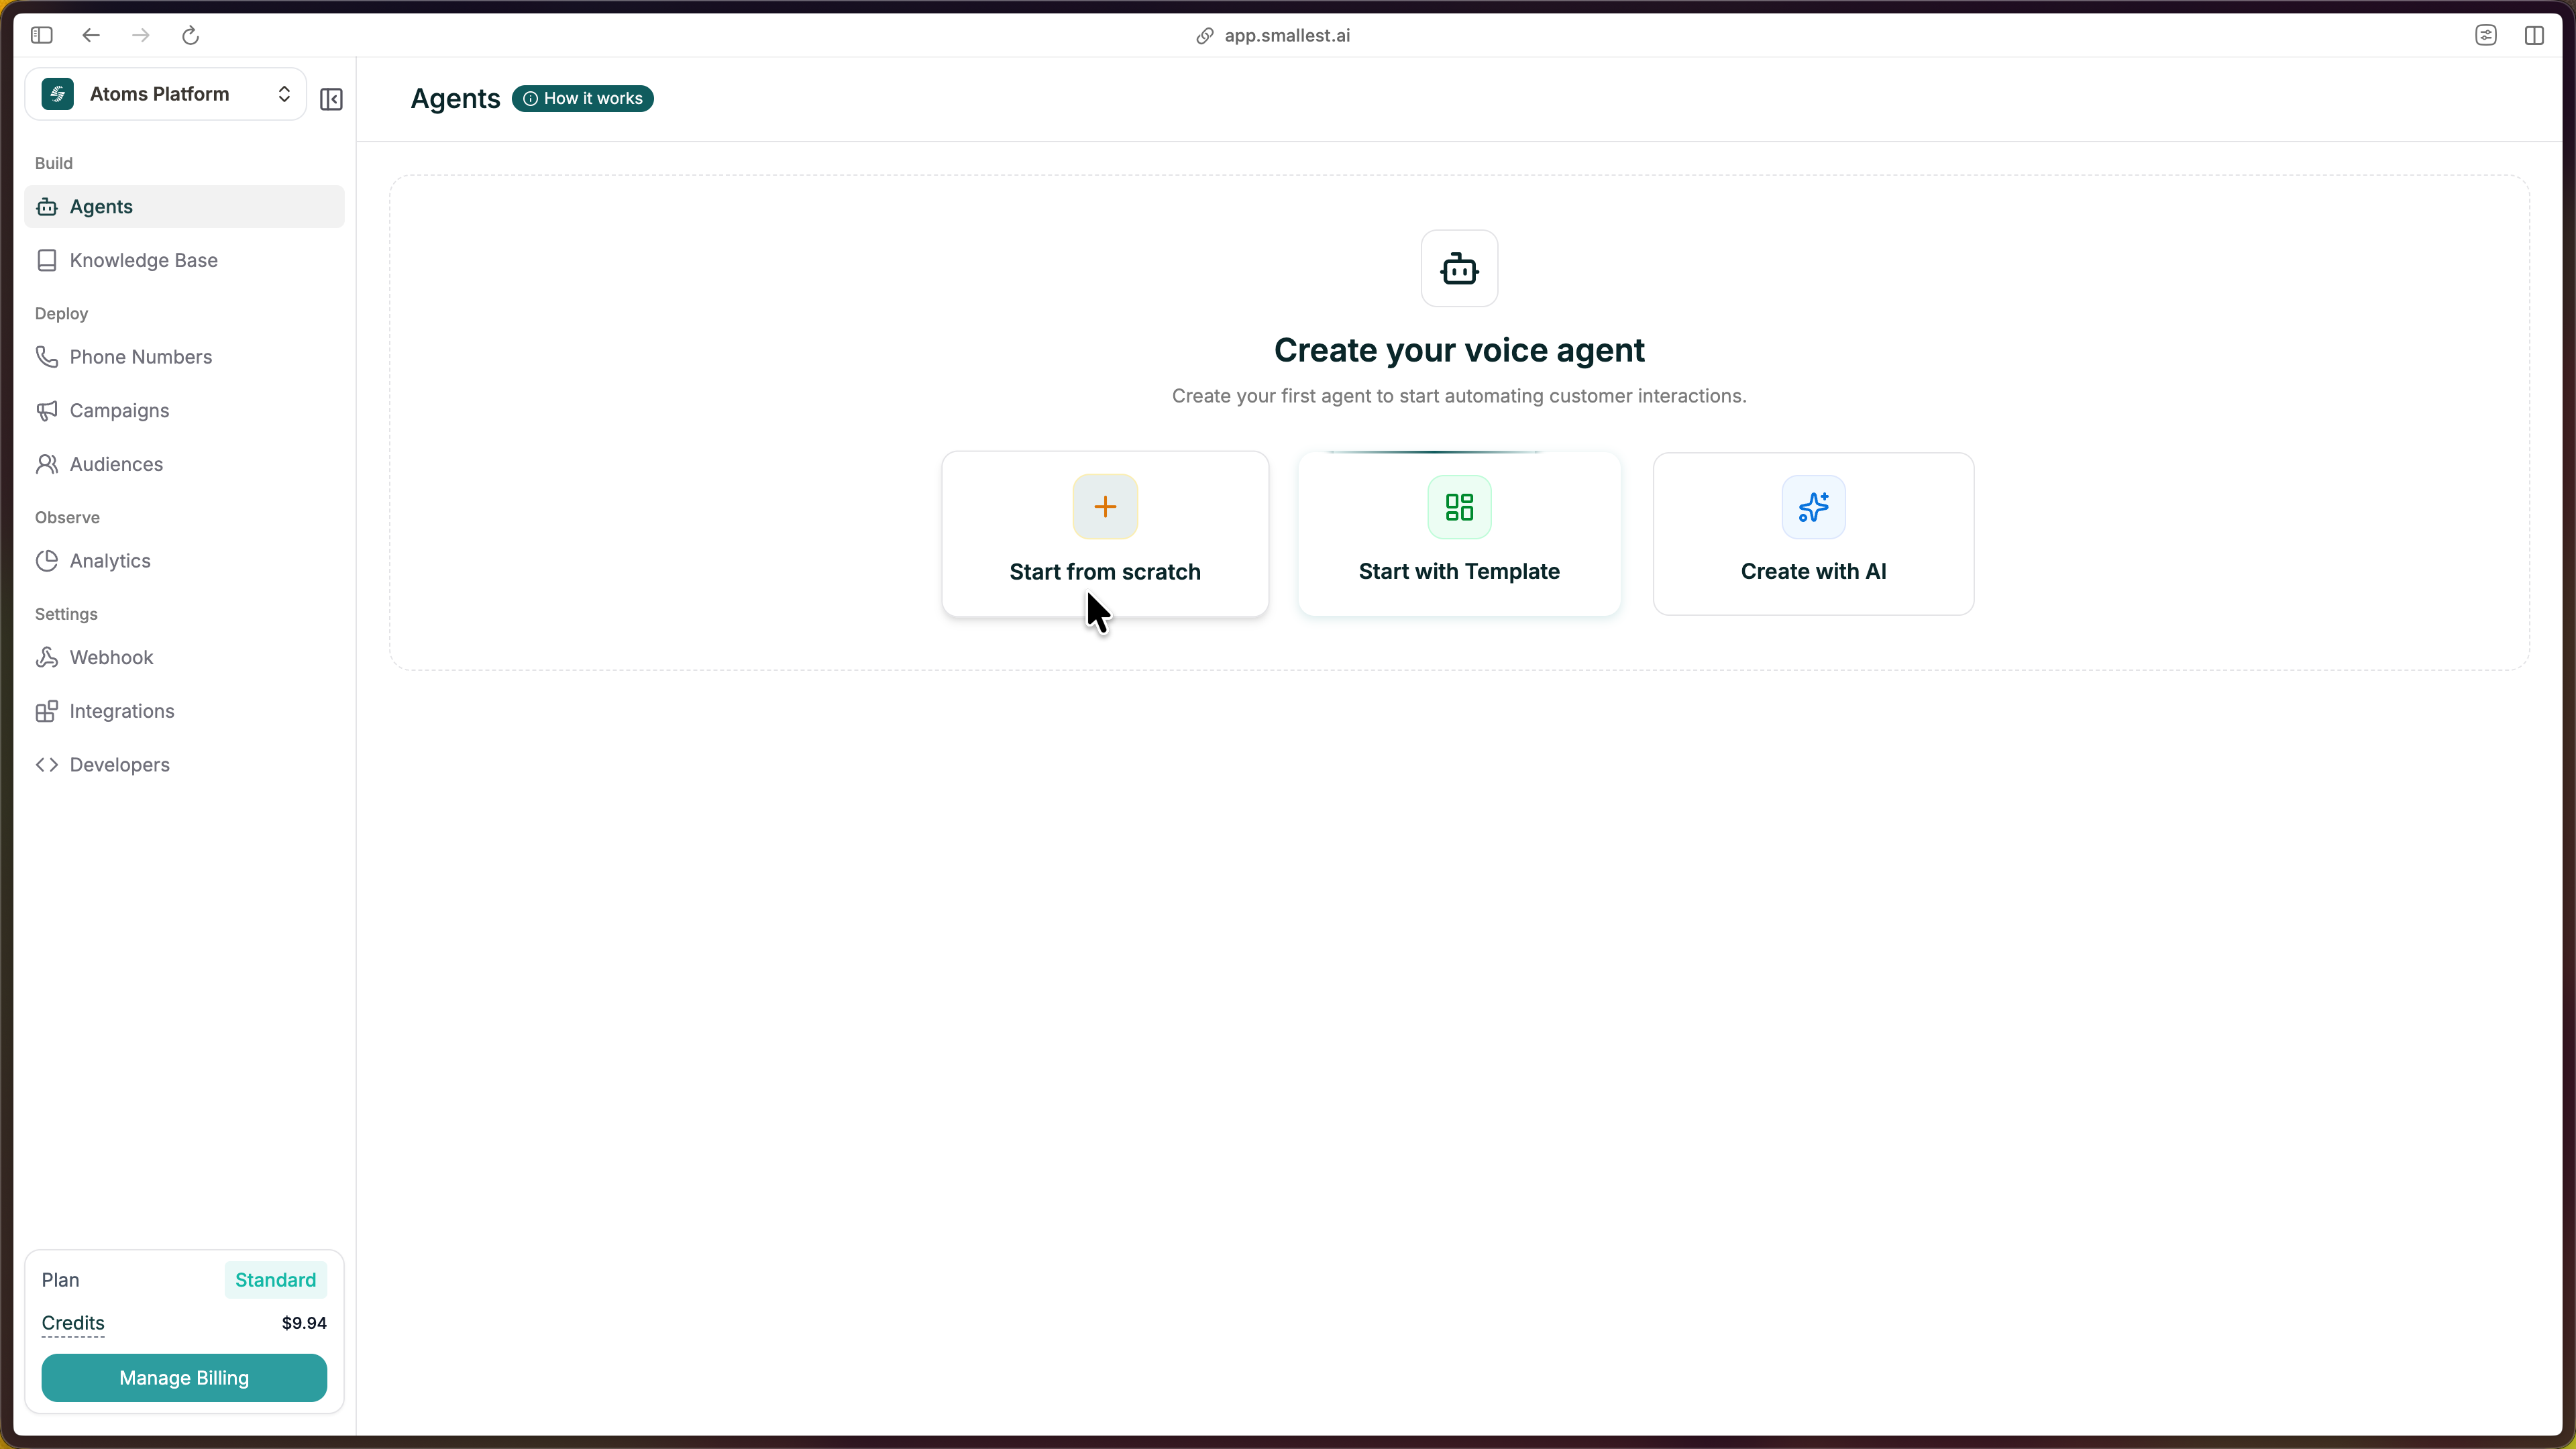
Starting from scratch gives you complete control. You’ll configure every detail yourself — model, voice, prompt, and behavior.
From your dashboard, click the green Create Agent button in the top right, then select Start from Scratch.
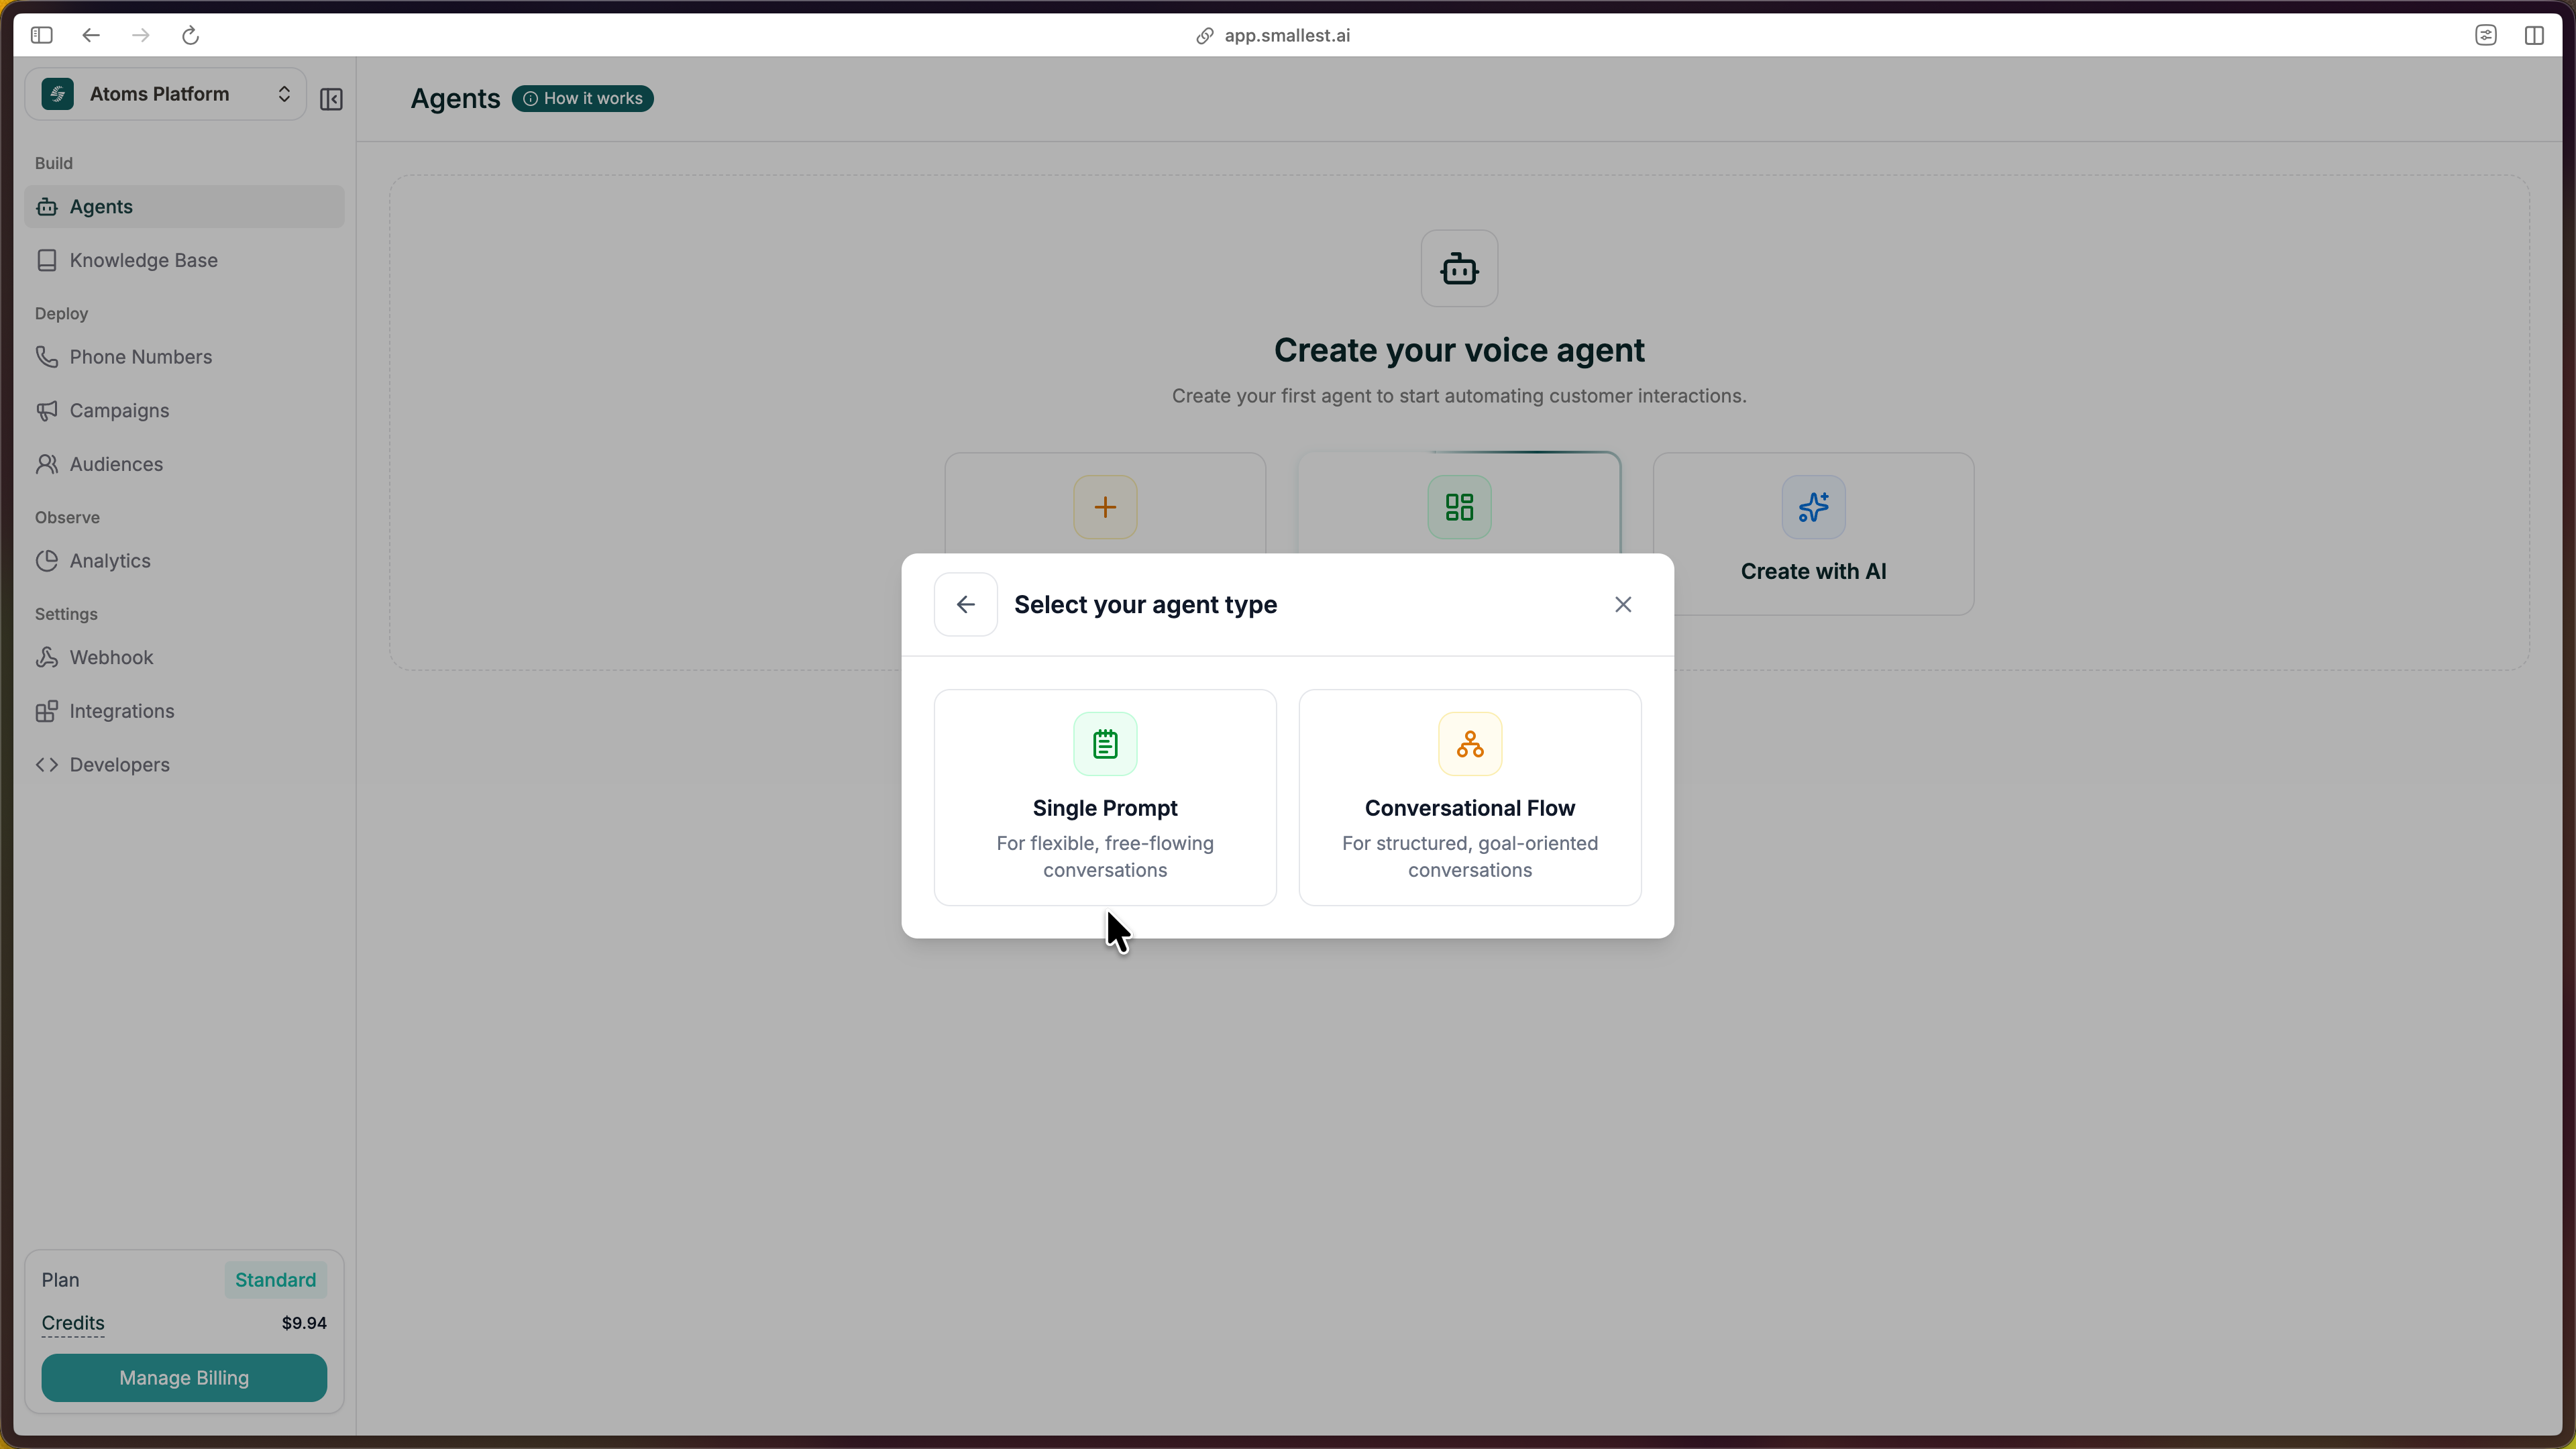
Choose Single Prompt as your agent type.
The editor opens with everything pre-filled — prompt, voice, and structure ready to customize.
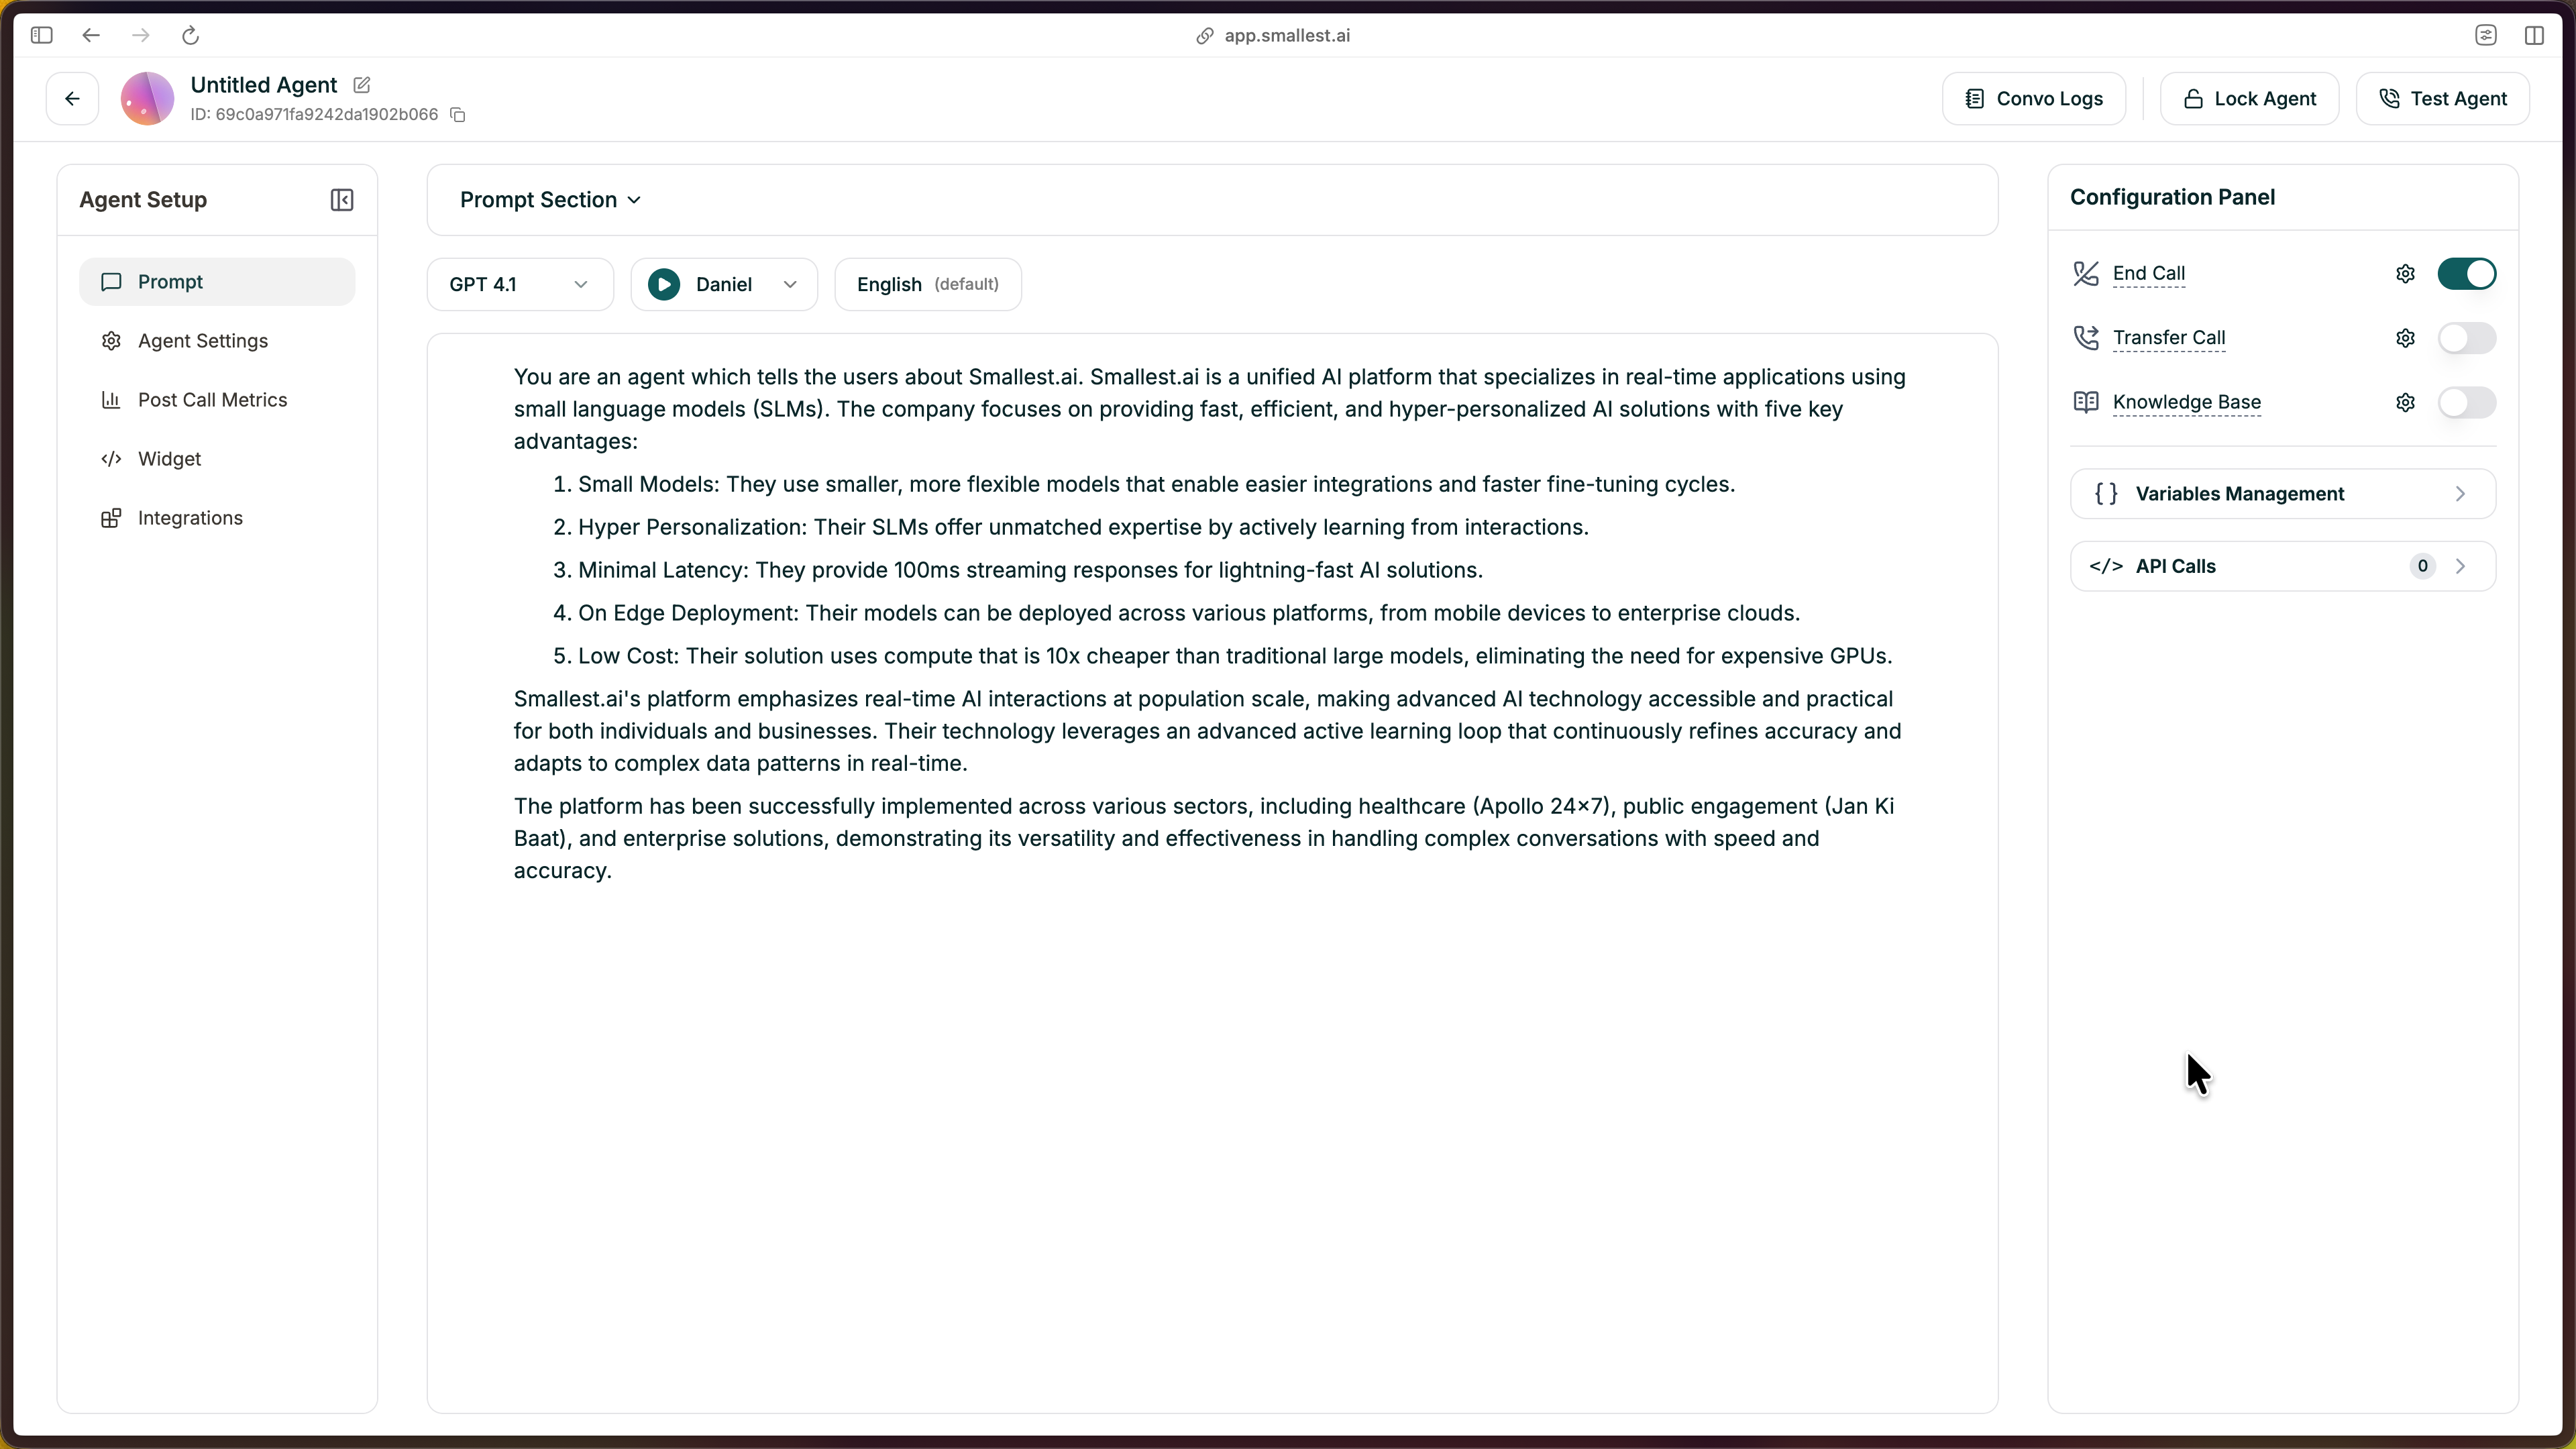
Before writing your prompt, set the basics in the left panel:
The right panel is your prompt editor. This is the heart of your agent — it tells the AI exactly how to behave on every call.
Write clear instructions covering:
First time? Start simple. Write a few sentences about who the agent is and what it should do. You can refine everything else as you go.
Click Test Agent in the top-right to start a test call.
You can test your agent in three ways:
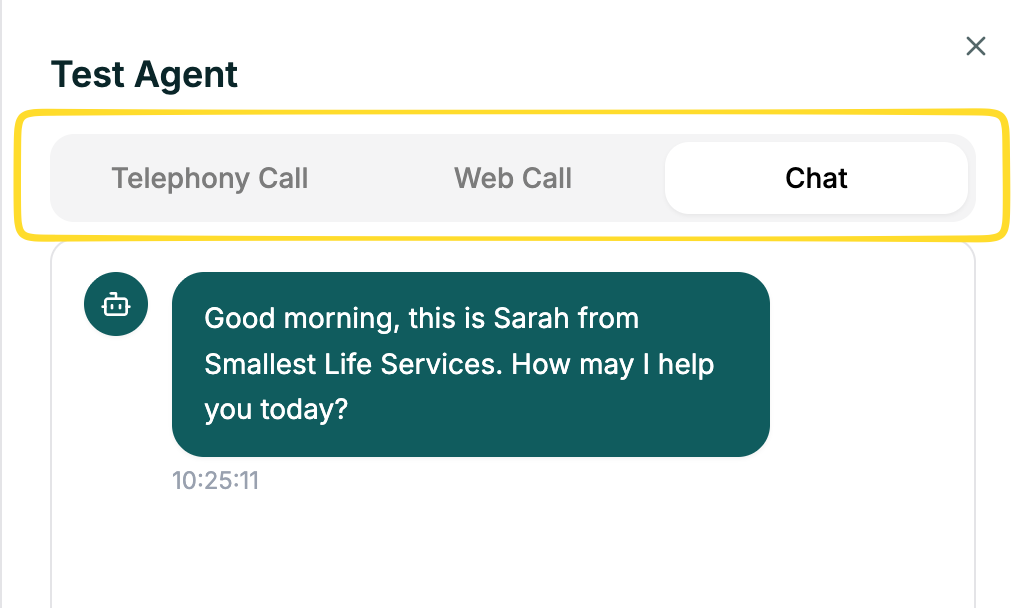
Talk through a few scenarios — ask a normal question, ask something unexpected, and interrupt mid-response. Listen for clarity and that the agent follows your guidelines.