
Quickstart Crew CLI
The smallestai agent-crew CLI is built for rapid iteration. Test your crew locally with a single command, then deploy to the cloud when ready. No configuration files, no Docker, no infrastructure management.
Local-first development: Run and test your agent entirely on your machine. Deploy only when you’re satisfied.
Building in the dashboard instead, or want the design model for an agent (which settings to configure, in what order, and why)? See Build your agent. This quickstart is the code path; that guide is the platform path.
Installation
The CLI comes bundled with the SDK:
Verify the installation:
You’ll need a Smallest API key (from app.smallest.ai/dashboard/api-keys) for the CLI and SDK helpers. Export it:
Plus an LLM for the example below. The Atoms Crews SDK ships an OpenAIClient that accepts any OpenAI-compatible endpoint - pick one:
Electron (Smallest)
OpenAI
Smallest’s voice-optimized SLM. Reuses SMALLEST_API_KEY - no separate LLM key required.
The Atoms Crews OpenAIClient is async - call sites use await llm.chat(messages=[...]) inside a crew node’s generate_response() method (which already runs in an event loop). It does not expose the OpenAI-Python-SDK shape llm.chat.completions.create(...); the call surface is await llm.chat(messages, stream=False, tools=None, ...) returning a ChatResponse with .content and .tool_calls.
Test connectivity outside a crew
For a one-off sanity check (verify your key works, the endpoint responds), use the standard openai Python SDK - Electron is OpenAI-compatible, so the official client works as a drop-in by overriding base_url:
Same code works against OpenAI itself by dropping base_url and swapping model to gpt-4o-mini (and using OPENAI_API_KEY). Use this pattern for backend scripts or smoke tests that aren’t inside a crew node.
Create Your First Agent Crew
Before the CLI has anything to connect to, you need a Python file that defines a crew and starts a WebSocket server. Pick one of the two patterns below and pull the example folder straight from the cookbook - the tar command drops a getting_started/ or background_agent/ directory into your cwd, ready to cd into. For local development, no .env is needed - the examples read SMALLEST_API_KEY (and optionally OPENAI_API_KEY) straight from your shell. For cloud deployment, you’ll need a .env file (see the Ship env vars in a .env step further down). Each folder ships a one-line requirements.txt pinning smallestai, which the cloud build also uses when you deploy.
Single-node crew
A minimal, single-node crew that streams chat completions from an LLM and greets the caller on join - copied from the cookbook’s getting_started.
server.py is the entry point - it boots an AtomsCrewApp on ws://localhost:8080/ws. assistant.py contains the OutputCrewNode subclass that streams the LLM response; extend it with your own prompt, tools, and logic.
Project layout: a flat directory (server.py + requirements.txt at the root,
like the cookbook examples) is the simplest and best-tested shape. A src/ layout
with a pyproject.toml also builds and deploys; if you go that route, declare every
runtime dependency in the pyproject.toml.
Multi-node crew with background processing
A two-node example from background_agent - a support agent talking to the user, and a sentiment analyzer running silently in parallel that flags frustration and triggers auto-escalation.
app.py wires both nodes into a single CrewSession. support_agent.py is the user-facing OutputCrewNode; it can query the sibling sentiment node mid-conversation. sentiment_analyzer.py is a BackgroundCrewNode - it listens to every transcript event, classifies sentiment, and updates state the support agent reads.
What you’re working with:
OutputCrewNode- base class for nodes that produce user-facing output. Overridegenerate_response()to define what the agent says.BackgroundCrewNode- base class for nodes that observe events silently. Overrideprocess_event()to react. No audio output, no interrupts.CrewSession- the runtime that owns the WebSocket connection and runs your nodes in parallel for each call.AtomsCrewApp- the FastAPI WebSocket server that the CLI’schatcommand, and the production Atoms orchestrator, connect to.
Local Development Workflow
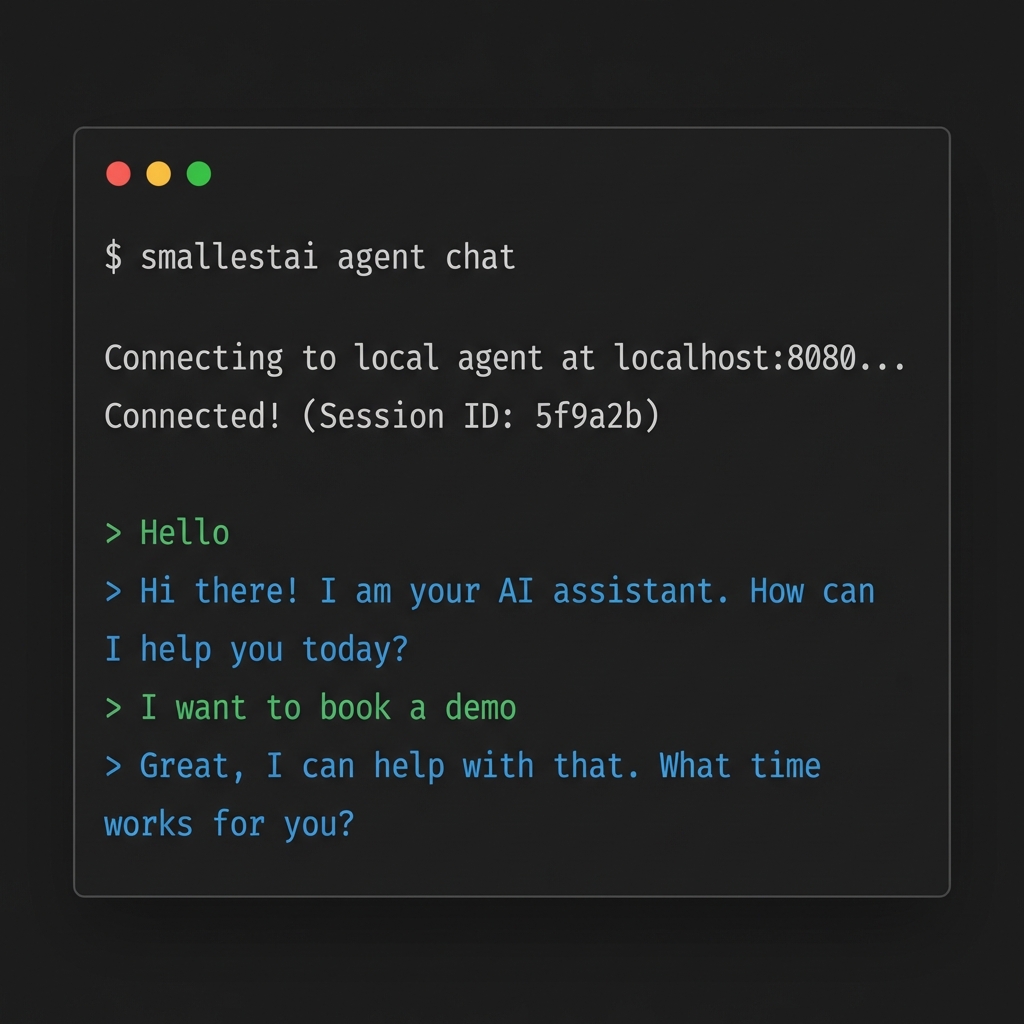
The CLI’s best feature is instant local testing. No need to deploy to test changes.
Start Your Agent Server
Run the entry point to start a local WebSocket server:
This spins up a server on localhost:8080 that mimics the production environment.
Cloud Deployment
When you’re ready for production, deploy to Smallest AI’s managed infrastructure.
Prerequisite: You need an existing agent on the Atoms platform - agent-crew init links your local code to it. Create one from the dashboard, or programmatically via the SDK:
Authenticate
Prompts for your Smallest API key (paste it from app.smallest.ai/dashboard/api-keys). The key is stored at ~/.smallestai/credentials.json with 0600 permissions.
Already have SMALLEST_API_KEY exported? Pipe it in:
Link to Platform Agent
Interactive picker - choose which agent from app.smallest.ai to link to. Requires a TTY.
No TTY? init just writes one file. Create .smallestai/config.toml yourself:
Ship env vars in a .env (required)
Platform-side secrets injection isn’t built yet. The deploy zip does not carry your shell environment.
How .env works on the cloud: the zip ships every file in your dir except __pycache__/, .venv/, etc. - .env is not excluded. The cookbook’s assistant.py calls load_dotenv() at import time, so on the cloud it reads .env from the same directory. Keys defined locally end up available to os.getenv(...) in the cloud agent.
Create one next to server.py:
Command Reference
Authentication
Agent Management
Common Options
Build Management
Deployments are not live by default. This gives you a safety buffer.
One Live Build Per Agent: Making a new build live automatically takes down the previous one.
To promote a build:
- Run
smallestai agent-crew builds - Select the desired build
- Choose Make Live
To roll back:
- Run
smallestai agent-crew builds - Select the previous build
- Choose Make Live
To take down completely:
- Run
smallestai agent-crew builds - Select the LIVE build
- Choose Take Down
Running the CLI in CI / non-interactive environments
A few commands prompt you for input (an agent picker, a build picker, a password field). These only work in a real terminal. The table below shows which commands work non-interactively and how to substitute for the ones that don’t.
Skipping init in CI
init exists to write .smallestai/config.toml with your agent ID. In CI you can write the same file yourself before running deploy:
Promoting and rolling back builds in CI
builds calls the same endpoint for both Make Live and Take Down. You can call it directly:
The build ID is printed by deploy on success, and is also available from GET /atoms/v1/sdk/agents/{agentId}/builds.
Only one build per agent can be live at a time. Setting isLive: true on a new build automatically takes down the previously-live one.
Error handling
When deployed code raises, the SDK auto-records the error on the call (in calllog.errors[], the Events tab, and webhooks) - you don’t need to wire anything up to get this. The deploy command also warns about env vars your code references before zip upload, and the pod’s /ready endpoint blocks traffic until your crew’s __init__ succeeds. See Error Handling for severity semantics, graceful-fallback patterns, and how to emit your own application-level errors.
FAQ
What does my crew code own, and where do STT and TTS come from?
Your crew node owns the LLM turn only: it receives the transcript as messages and yields text. Speech-to-text (Pulse / Pulse Pro) and text-to-speech (Lightning) are set on the agent in the dashboard, not in code, and run platform-side. Turn-taking, interrupts, and telephony are platform-side too. So the pipeline is:
You never write STT or TTS code. You pick them in agent settings; your node just generates the words.
Can I use my own LLM or runtime instead of an OpenAI model?
Yes, and it is the default, not a special mode. OpenAIClient accepts any
OpenAI-compatible endpoint via base_url. Point it at your runtime:
It needs the Chat Completions shape (/v1/chat/completions), streaming, and tool-calling
if you use tools. Not OpenAI-shaped? Put a thin proxy in front. Nothing else changes: you
still get Smallest STT and TTS on the same agent.
Can I build a multi-agent crew, or is it one agent per call?
Multi-agent is supported. A CrewSession runs multiple nodes in parallel for one call:
OutputCrewNode: user-facing, produces speech. You can have more than one (for example a router that hands off).BackgroundCrewNode: observes every event silently (no audio), for example live sentiment, compliance checks, or logging. Output nodes can read a background node’s state mid-call.
The background_agent
example shows a support agent plus a sentiment analyzer that triggers auto-escalation.
Start single-node (getting_started),
add nodes as you need them.
Can I test a full turn without a phone call?
Yes. Run python server.py, then smallestai agent-crew chat in a second terminal for a
text REPL against your local crew: real session lifecycle, your real LLM, no telephony.
Iterate there, then deploy.
How do I set environment variables in production?
Platform-level env injection isn’t available yet. The working path is to keep a .env
file at your project root and load it at startup:
The .env ships in the deploy bundle and is loaded in the pod, so os.getenv(...)
finds your variables in the cloud the same way it does locally. The cookbook examples
all follow this pattern.
The env-var warning printed by smallestai agent-crew deploy is a reminder to
populate .env before uploading. It doesn’t block the deploy.
What project layout does the cloud build expect?
Flat directory. Entry file (server.py) and requirements.txt at the root, with
node files alongside:
A src/ layout will not work. The cloud build copies your pyproject.toml and
runs pip install . before it copies the rest of your source, so with a src/ layout
the package isn’t on disk yet. The install fails and the build stops (visible as a
deploy stuck in QUEUED).
Two ways to avoid this:
- Flat layout (recommended). Keep
server.py+ node files at the root, as above. - Add a
requirements.txtif you want to keep apyproject.tomlfor local tooling or editable installs. When both are present the builder usesrequirements.txtand skipspip install .entirely.
More examples
The two crews above are the starting points. The Smallest AI cookbook ships ~15 ready-to-run voice-agent examples covering tool calling, call control, multi-language support, knowledge-base grounding, real banking / scheduling / IVR flows, observability, and more - each in its own directory with the same curl-and-run shape.
Browse the full set of crews on GitHub.
STT, TTS, voice-agents, mobile, integrations - everything Smallest AI in one repo.