Webhooks
Webhooks notify your systems in real-time during the call lifecycle. Atoms sends an HTTP POST to your URL for each event you subscribe to.
Three events fire per call:
All three events share the same callId — use it as the join key when correlating events for the same call.
Managing Webhooks
All webhooks are created and managed from the dashboard.
Location: Left Sidebar → Settings → Webhook
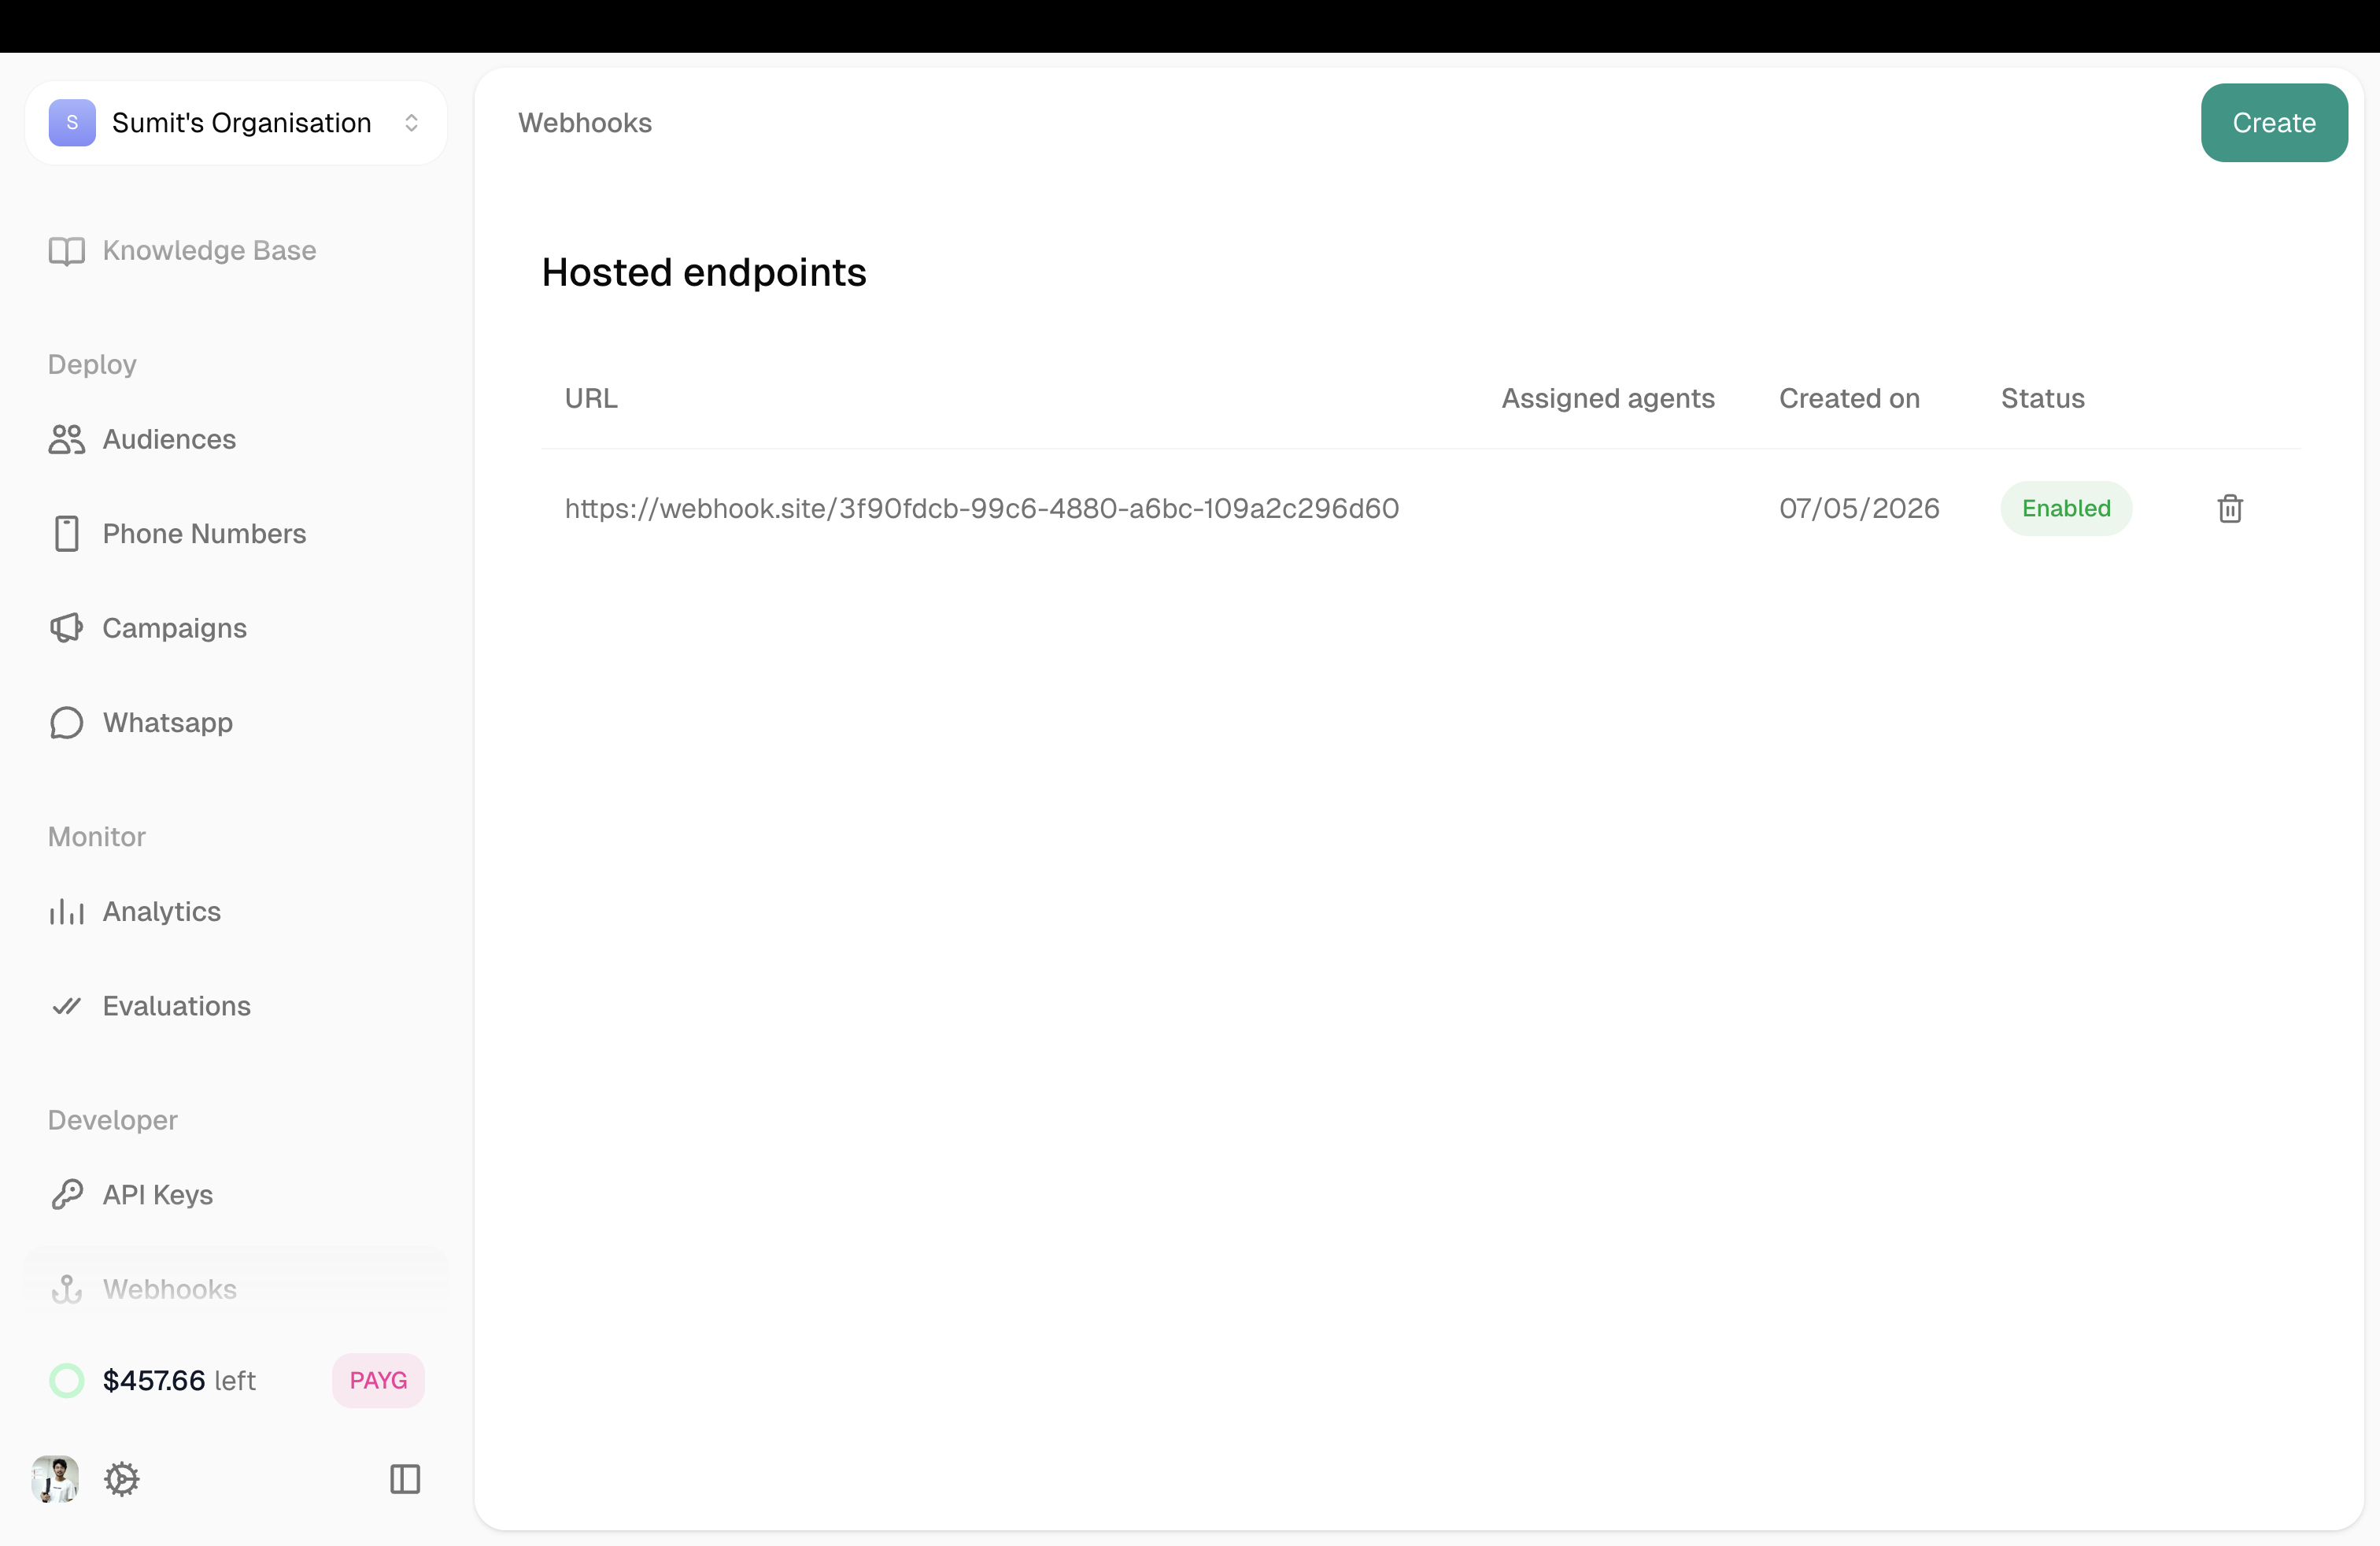
The table shows all your webhooks with their URL, assigned agents, created date, and status.
Creating a Webhook
Click Create to add a new webhook endpoint.
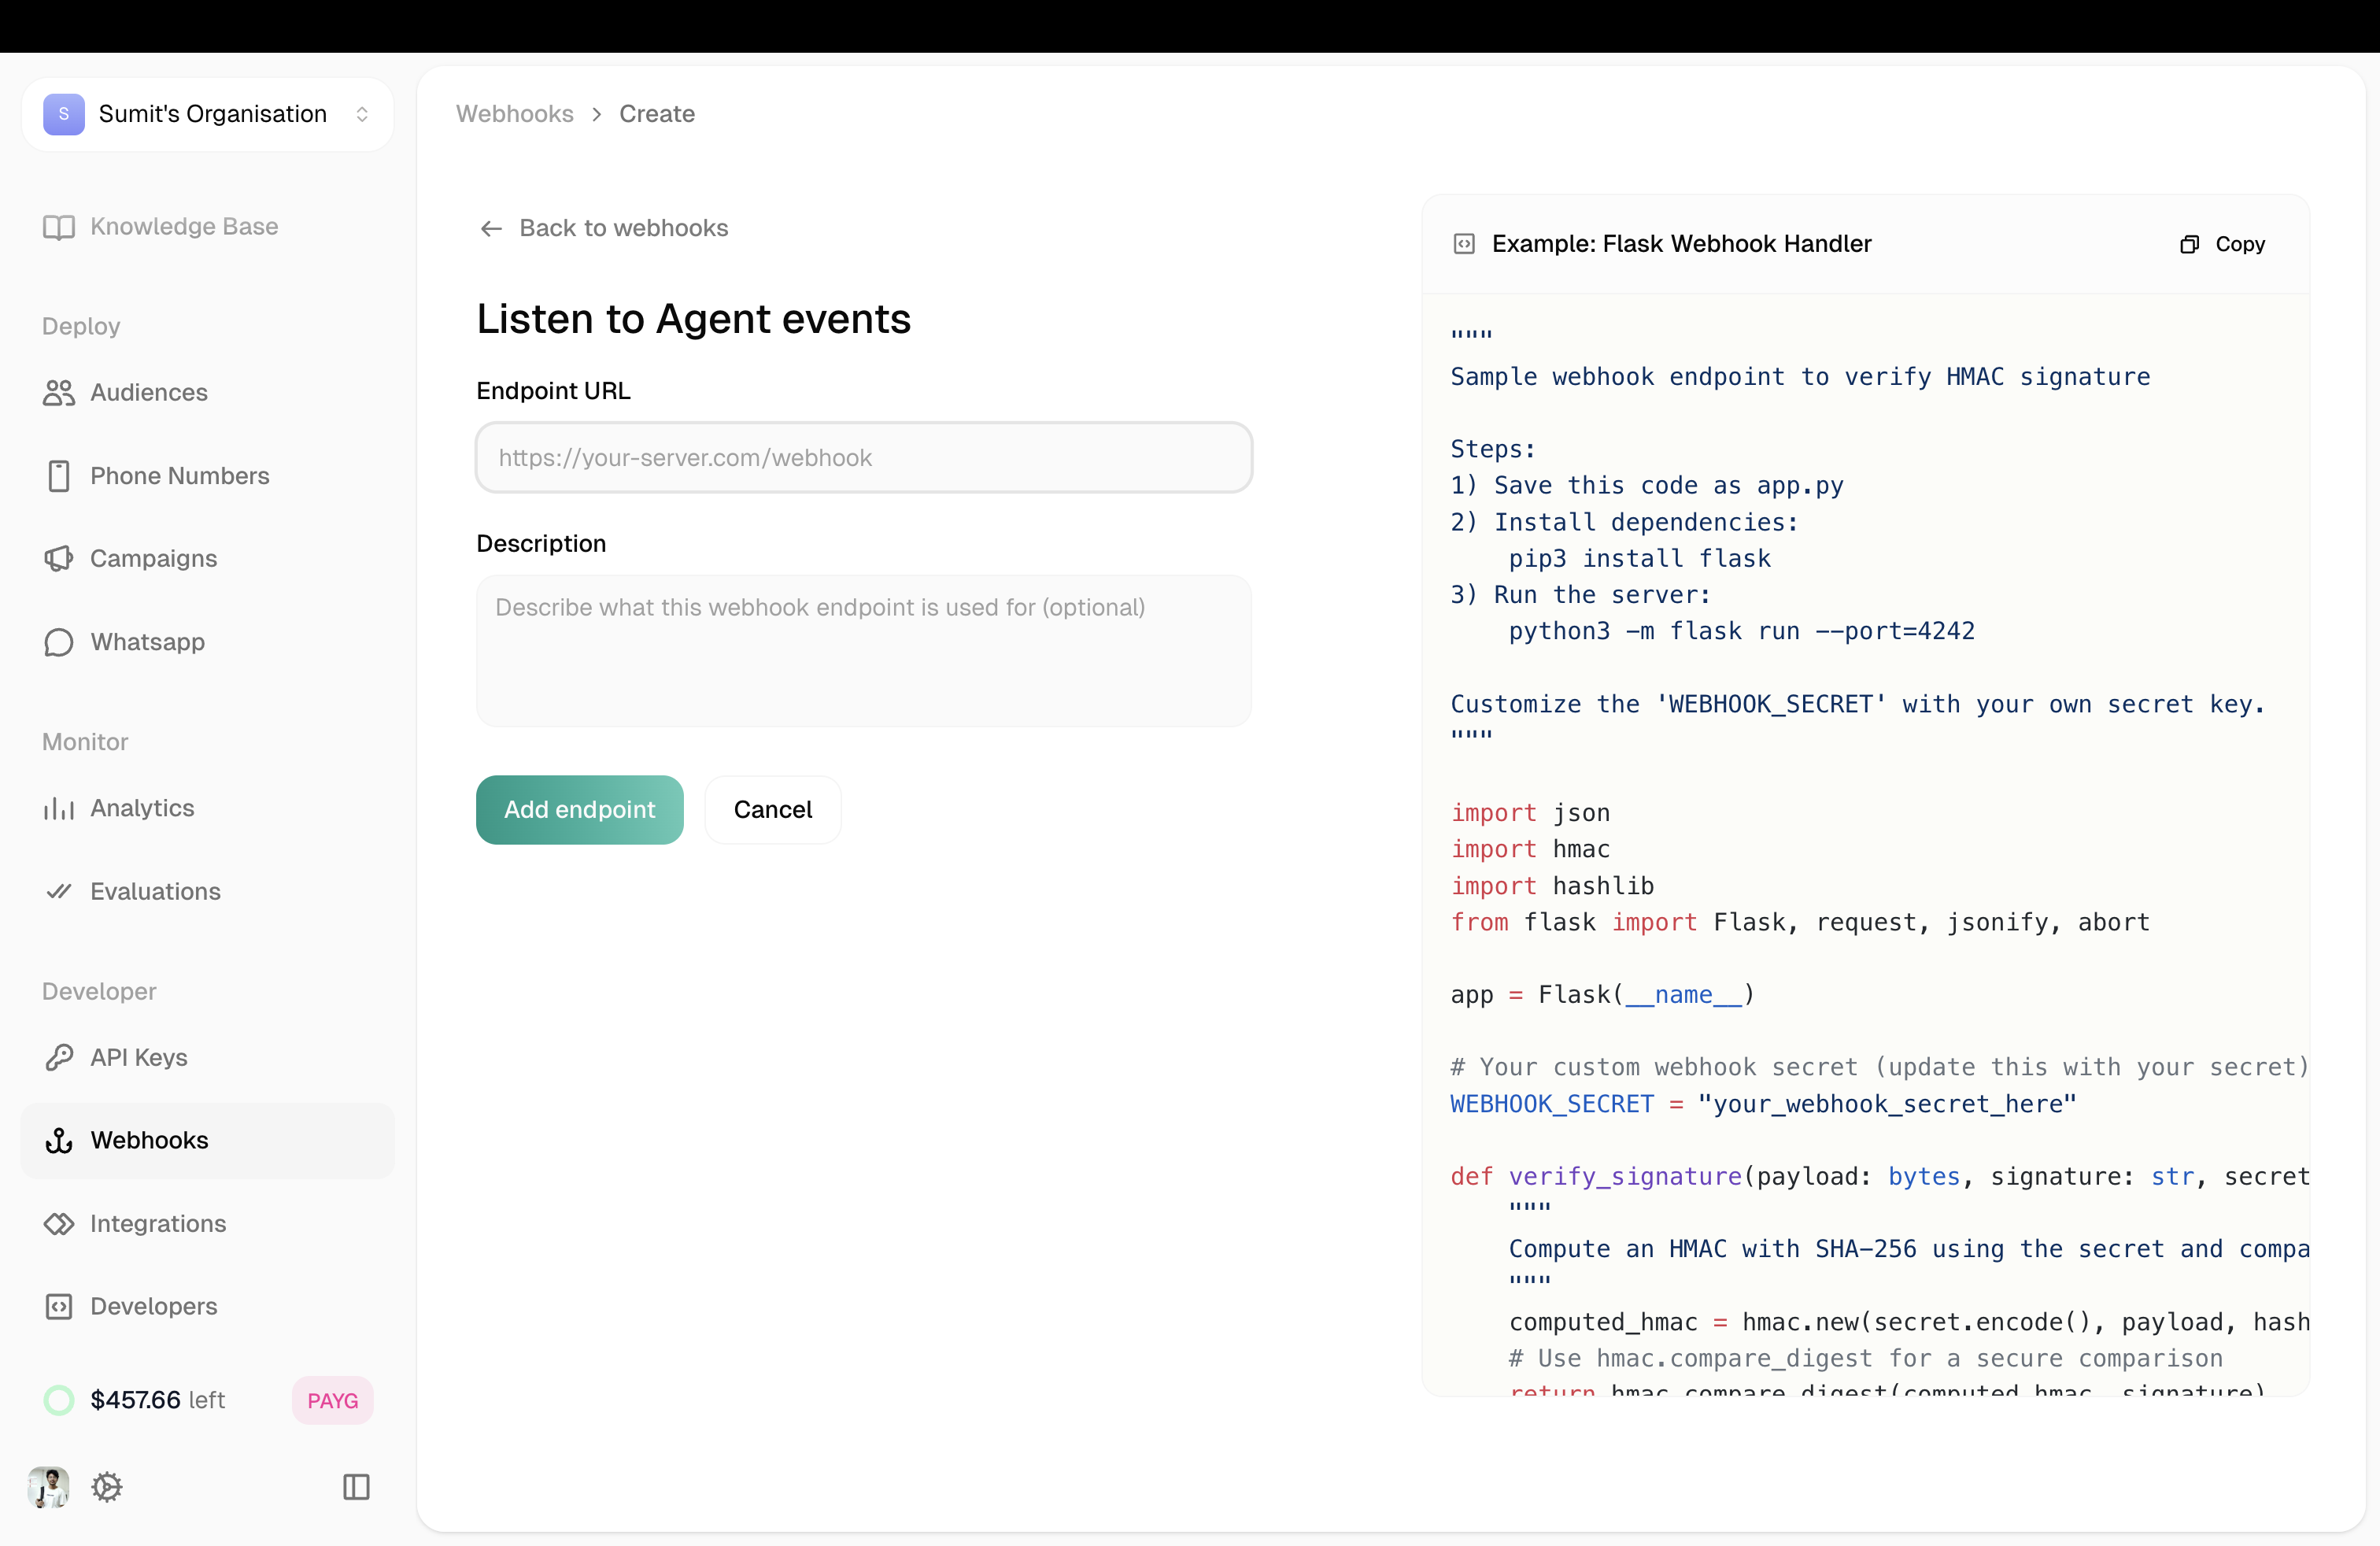
The right panel shows example Flask code for handling webhooks with HMAC signature verification.
Click Add endpoint to save.
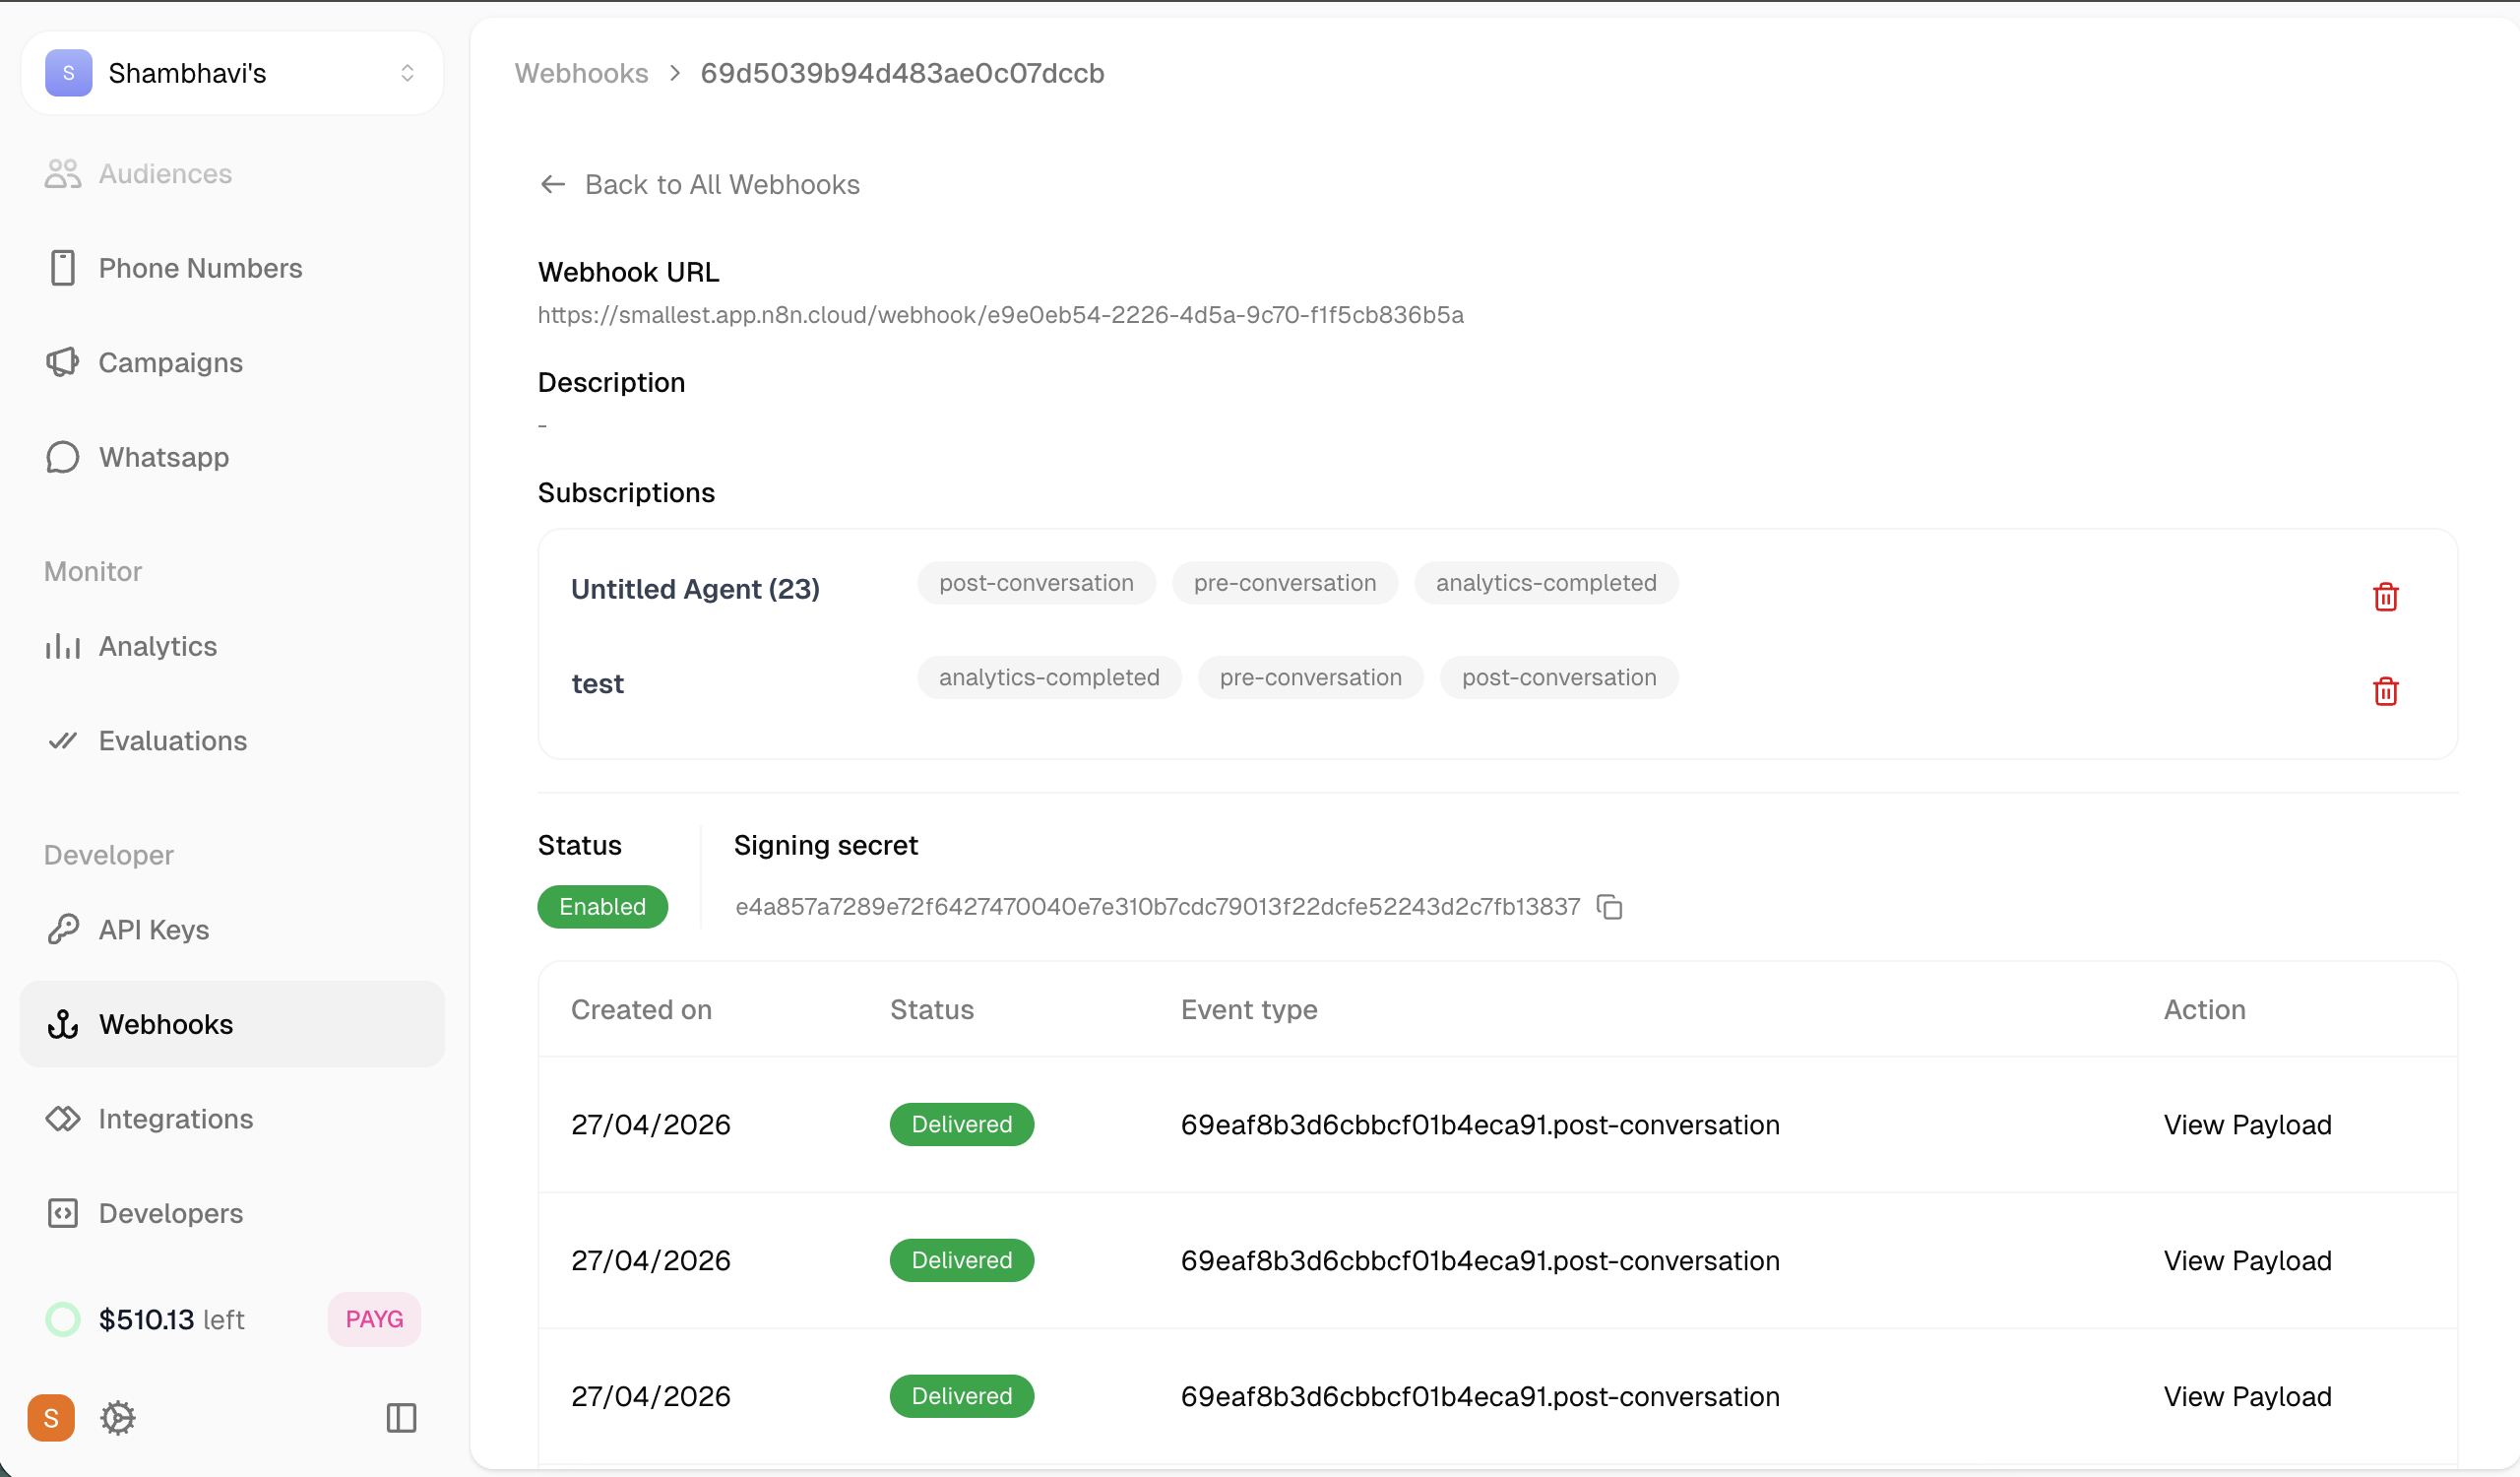
Webhook Details
Click any webhook to see its details and subscriptions.
Adding to an Agent
Once a webhook exists, connect it to your agent.
Location: Agent Editor → Agent Settings → Webhook tab
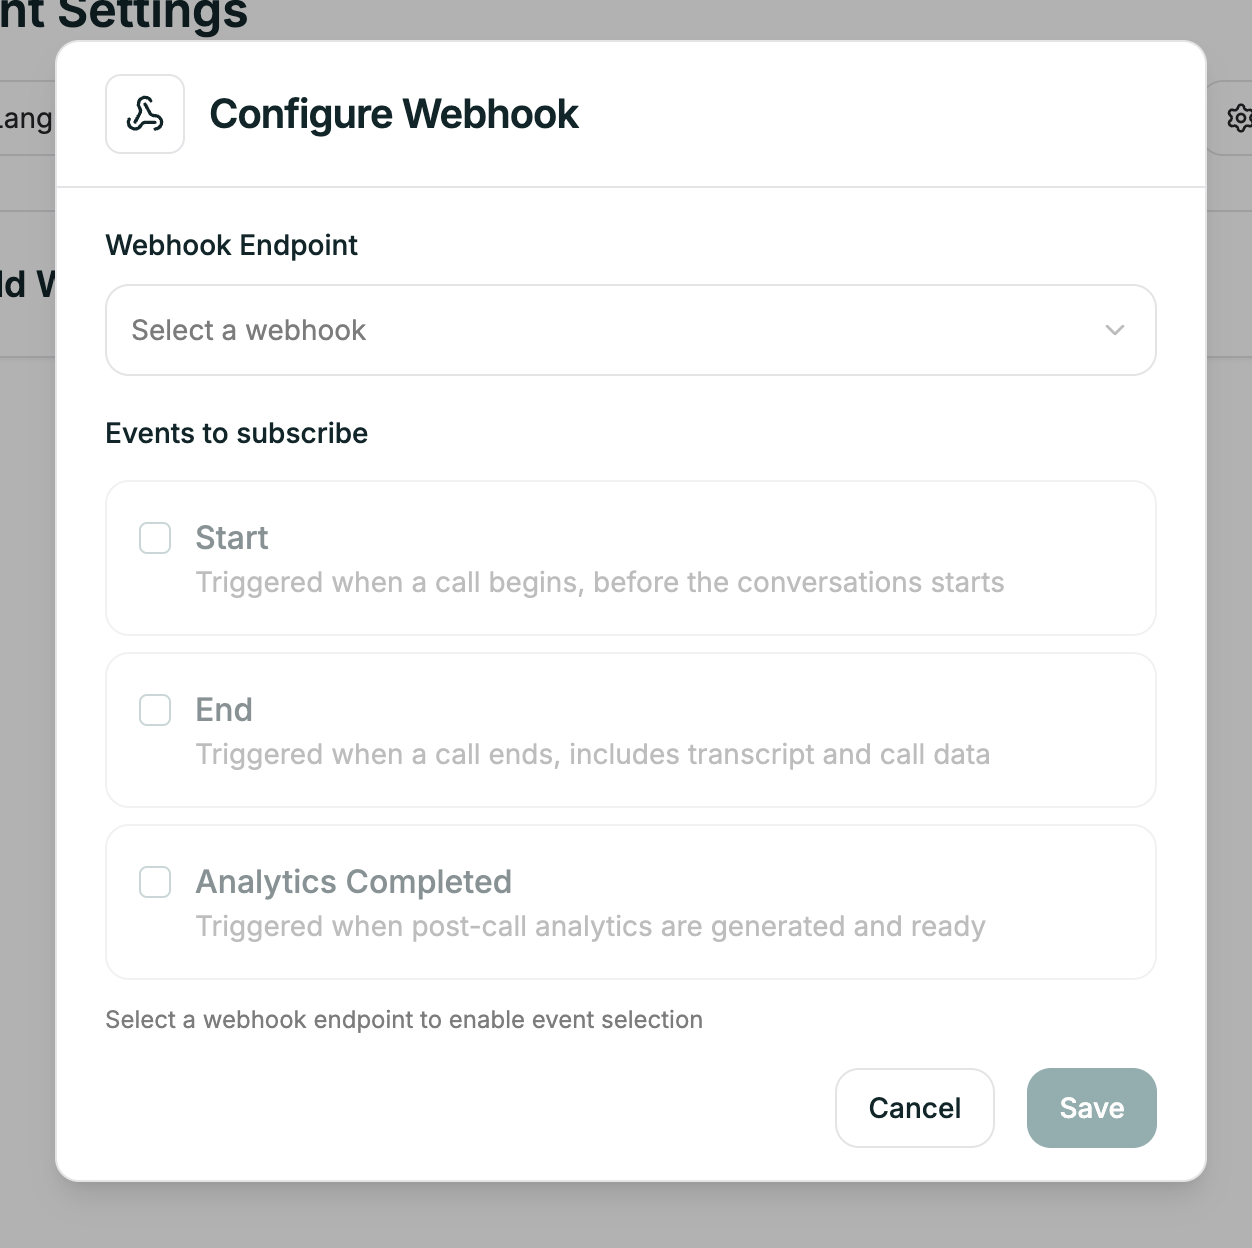
Select your webhook from the list, then check which events (pre-conversation, post-conversation, analytics-completed) you want to receive. The agent will now POST to that endpoint for each subscribed event.
Event envelope
Every webhook event shares the same top-level envelope:
Common metadata fields (present in all events)
1. pre-conversation
Fired before the agent begins speaking. Use this to enrich CRM data, log call attempts, or gate outbound calls.
metadata fields
Example body
pre-conversation does not contain callData, transcript, variables, analytics, or recordingUrl.
2. post-conversation
Fired after the call ends. Contains the full transcript, call metadata, recording URL, and all agent variables that were in scope during the conversation.
metadata fields
metadata.callData
metadata.transcript[] (array of objects)
Each element represents one speaking turn.
metadata.variables
A flat key-value object. Keys and values are entirely determined by the agent configuration; they are not fixed by the platform. Common examples include agent_name, customer_name, current_date, default_language, plus any domain-specific variables your agent uses (e.g. due_amount, bank_name, total_loan_amount).
The variables object is fully dynamic. New keys can appear at any time depending on the agent’s prompt configuration. Your code should handle unknown keys gracefully — store them in a generic JSON column rather than mapping each to a fixed column.
Example body
3. analytics-completed
Fired after Atoms finishes running the configured disposition and success metrics on the transcript. Arrives some time after post-conversation.
metadata fields
metadata.analytics
analytics.dispositionMetrics[] and analytics.successMetrics[]
Each metric is a self-describing object. The set of metrics is configured per-agent and can vary.
Example body
Event lifecycle and ordering
All three events share the same callId — use it as the join key.
Integration notes
variablesis dynamic — never hard-code column mappings. Store as JSON or iterate keys.dispositionMetrics/successMetricsare agent-configured — the set of identifiers and their types will differ across agents.pre-conversationusestoPhone/fromPhonewhilepost-conversationandanalytics-completedusetoNumber/fromNumber— normalize these in your ingestion layer.- Timestamps are always UTC ISO 8601 strings.
callDurationis a float representing seconds (not milliseconds).recordingUrlonly appears inpost-conversation.transcriptonly appears inpost-conversation.analytics(summary + metrics) only appears inanalytics-completed.
Tips
Verify signatures
Use the signing secret to verify requests actually come from Atoms. The example code in the Create modal shows how.
Handle failures gracefully
If your endpoint is down, events may be lost. Log everything and consider retry logic.
One webhook, multiple agents
You can connect the same webhook to multiple agents. The metadata.agentId field tells you which agent sent the event.