Quick Start
Talk to your voice agents, debug calls, transcribe audio, and view analytics — all without leaving your editor.
The Smallest MCP Server connects your AI editor to the Smallest AI platform. No console tab-switching — just type what you want in natural language.
Prerequisites
The MCP server runs via npx, which requires Node.js installed on your machine. Pick your experience level:
I'm non-technical
I'm a developer
This is a one-time setup that takes about 5 minutes. Pick your computer type:
Mac
Windows
Open Terminal
Press Cmd + Space to open Spotlight, type Terminal, and press Enter. A window with a blinking cursor will appear — this is where you’ll paste commands.
Install Homebrew
Homebrew is a free tool that helps install software on Mac. Copy this entire line and paste it into Terminal, then press Enter:
It will ask for your Mac password (the one you use to log in). Type it and press Enter — you won’t see any characters appear while typing, that’s normal.
Wait for it to finish (1-2 minutes).
If it says “Homebrew is already installed” — great, skip to the next step.
Important for newer Macs (M1/M2/M3/M4): After Homebrew finishes, it will show a “Next steps” section with two commands. Copy and paste them one at a time:
Stuck? If anything fails, the simplest alternative is to go to nodejs.org, click the big green LTS button, download the .pkg file, and double-click it to install.
Setup
Get your API key
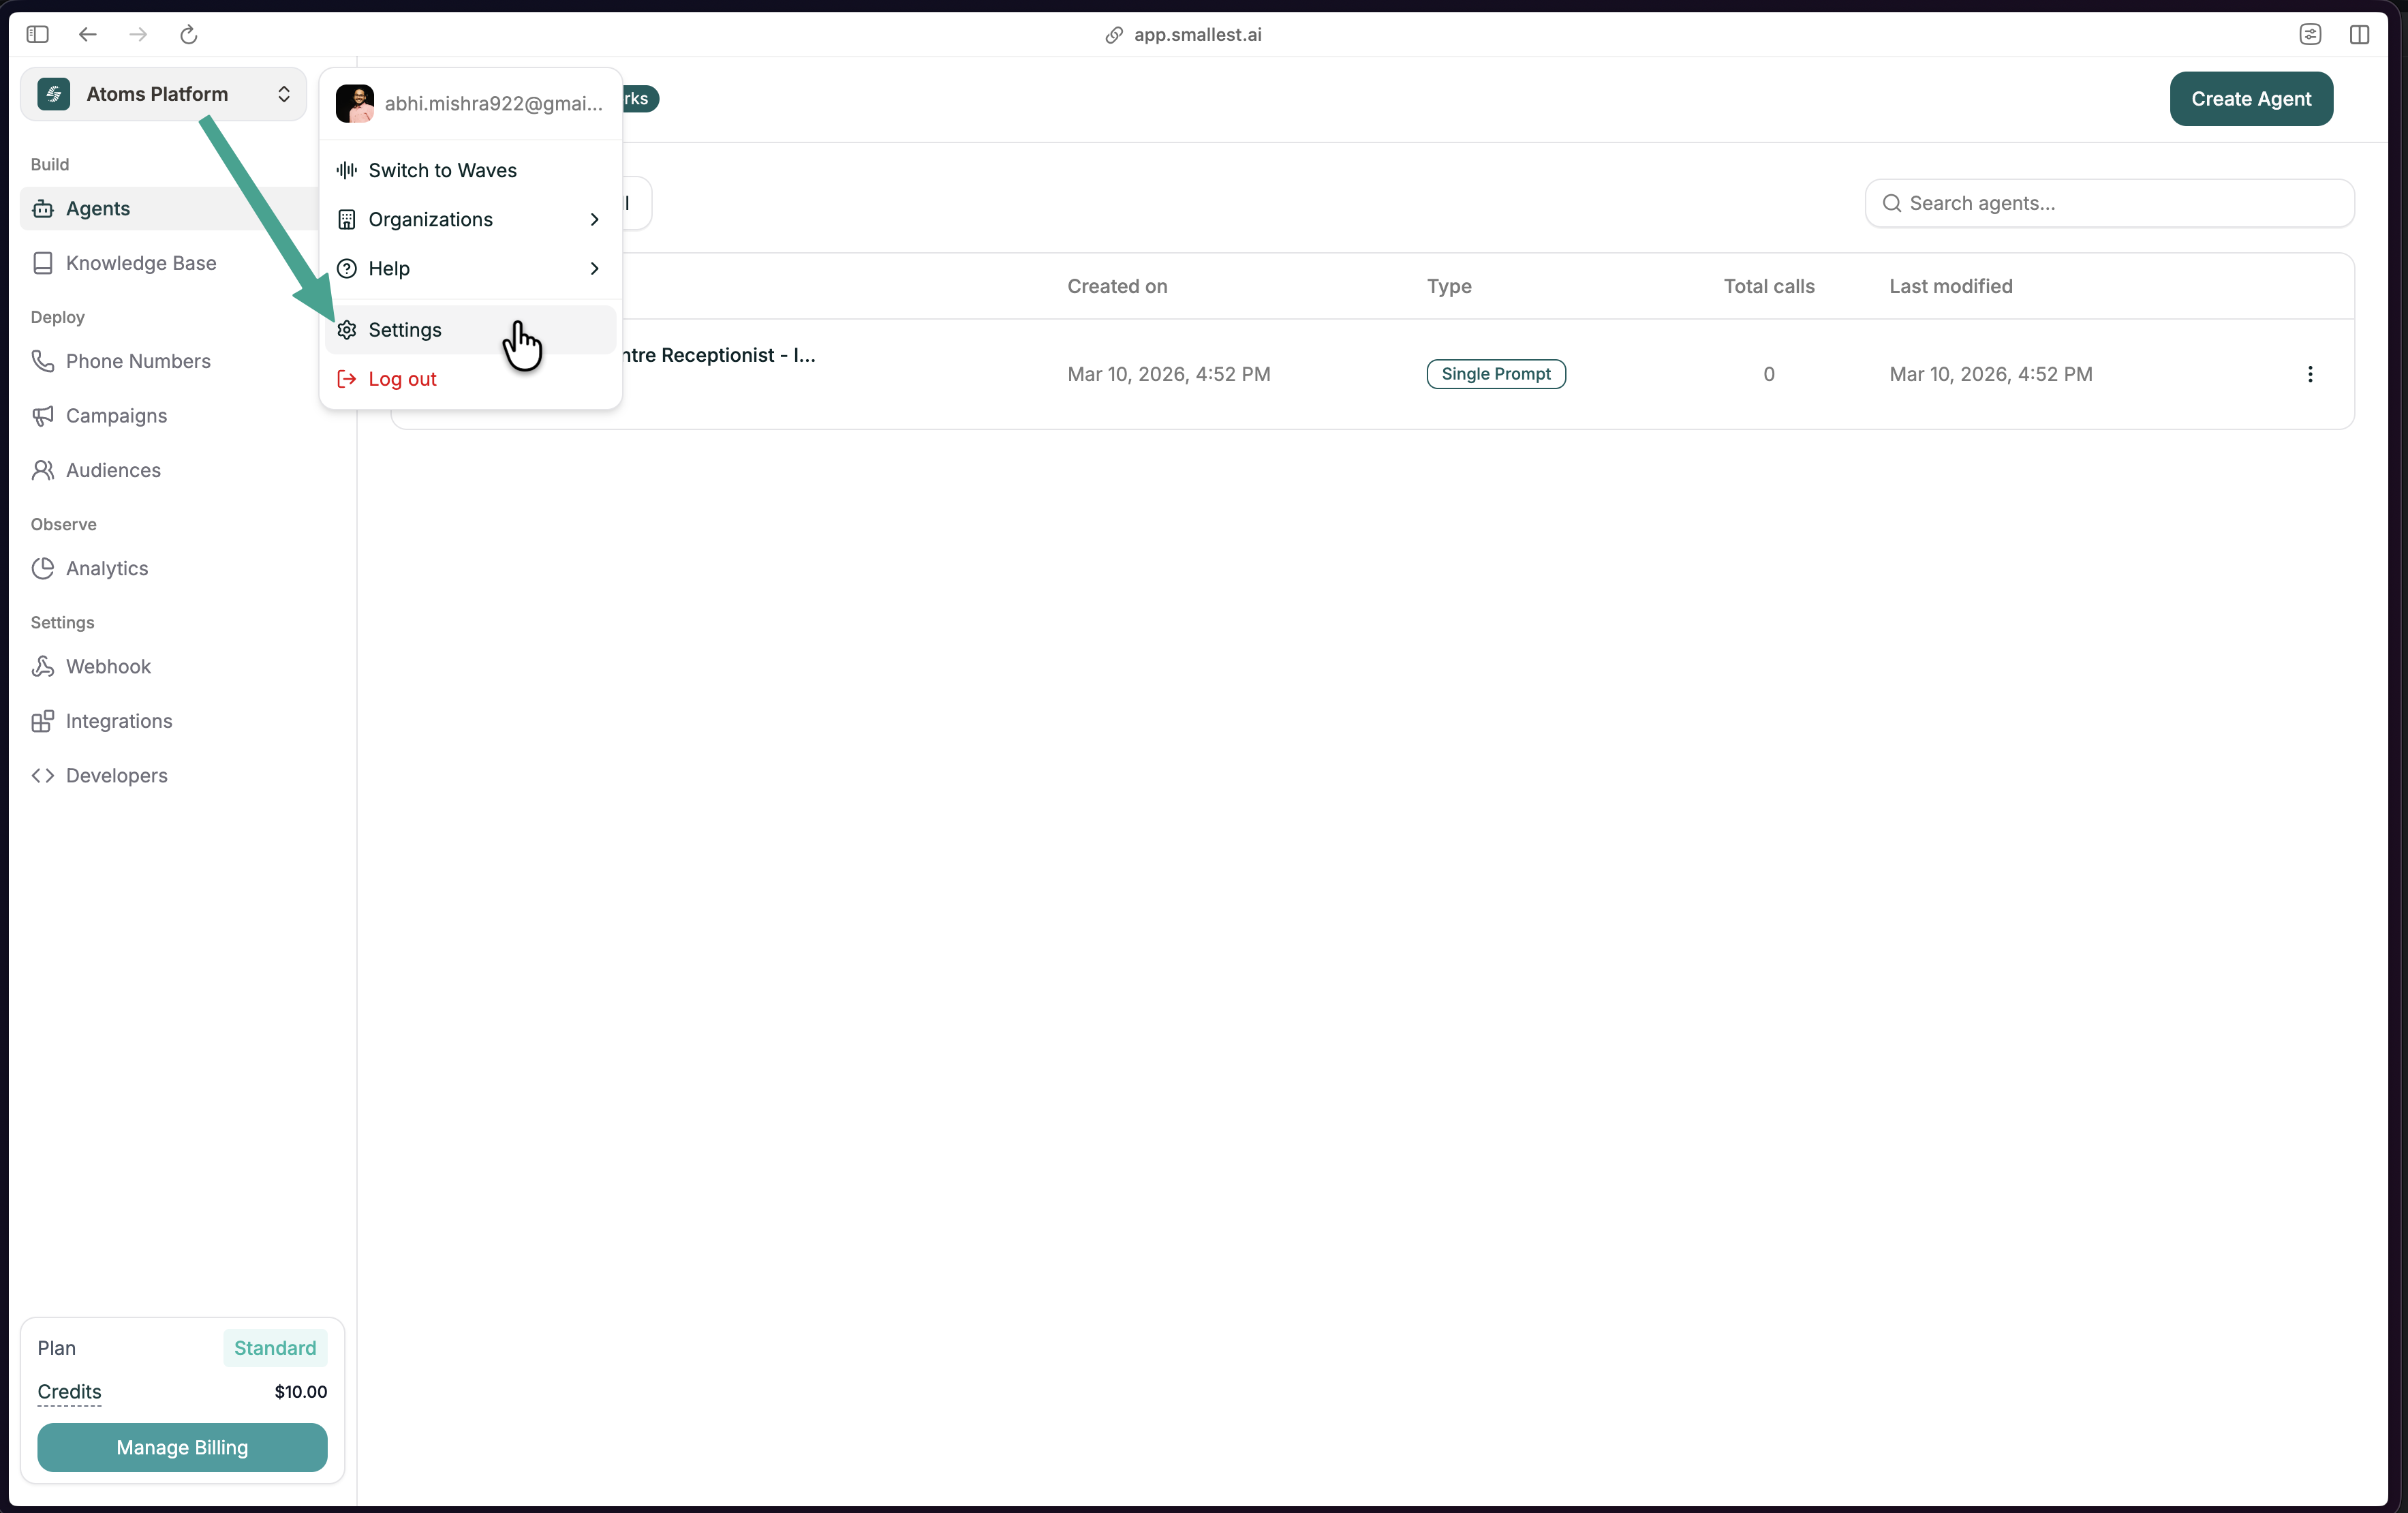
Open app.smallest.ai, click your profile in the top-left, and go to Settings.
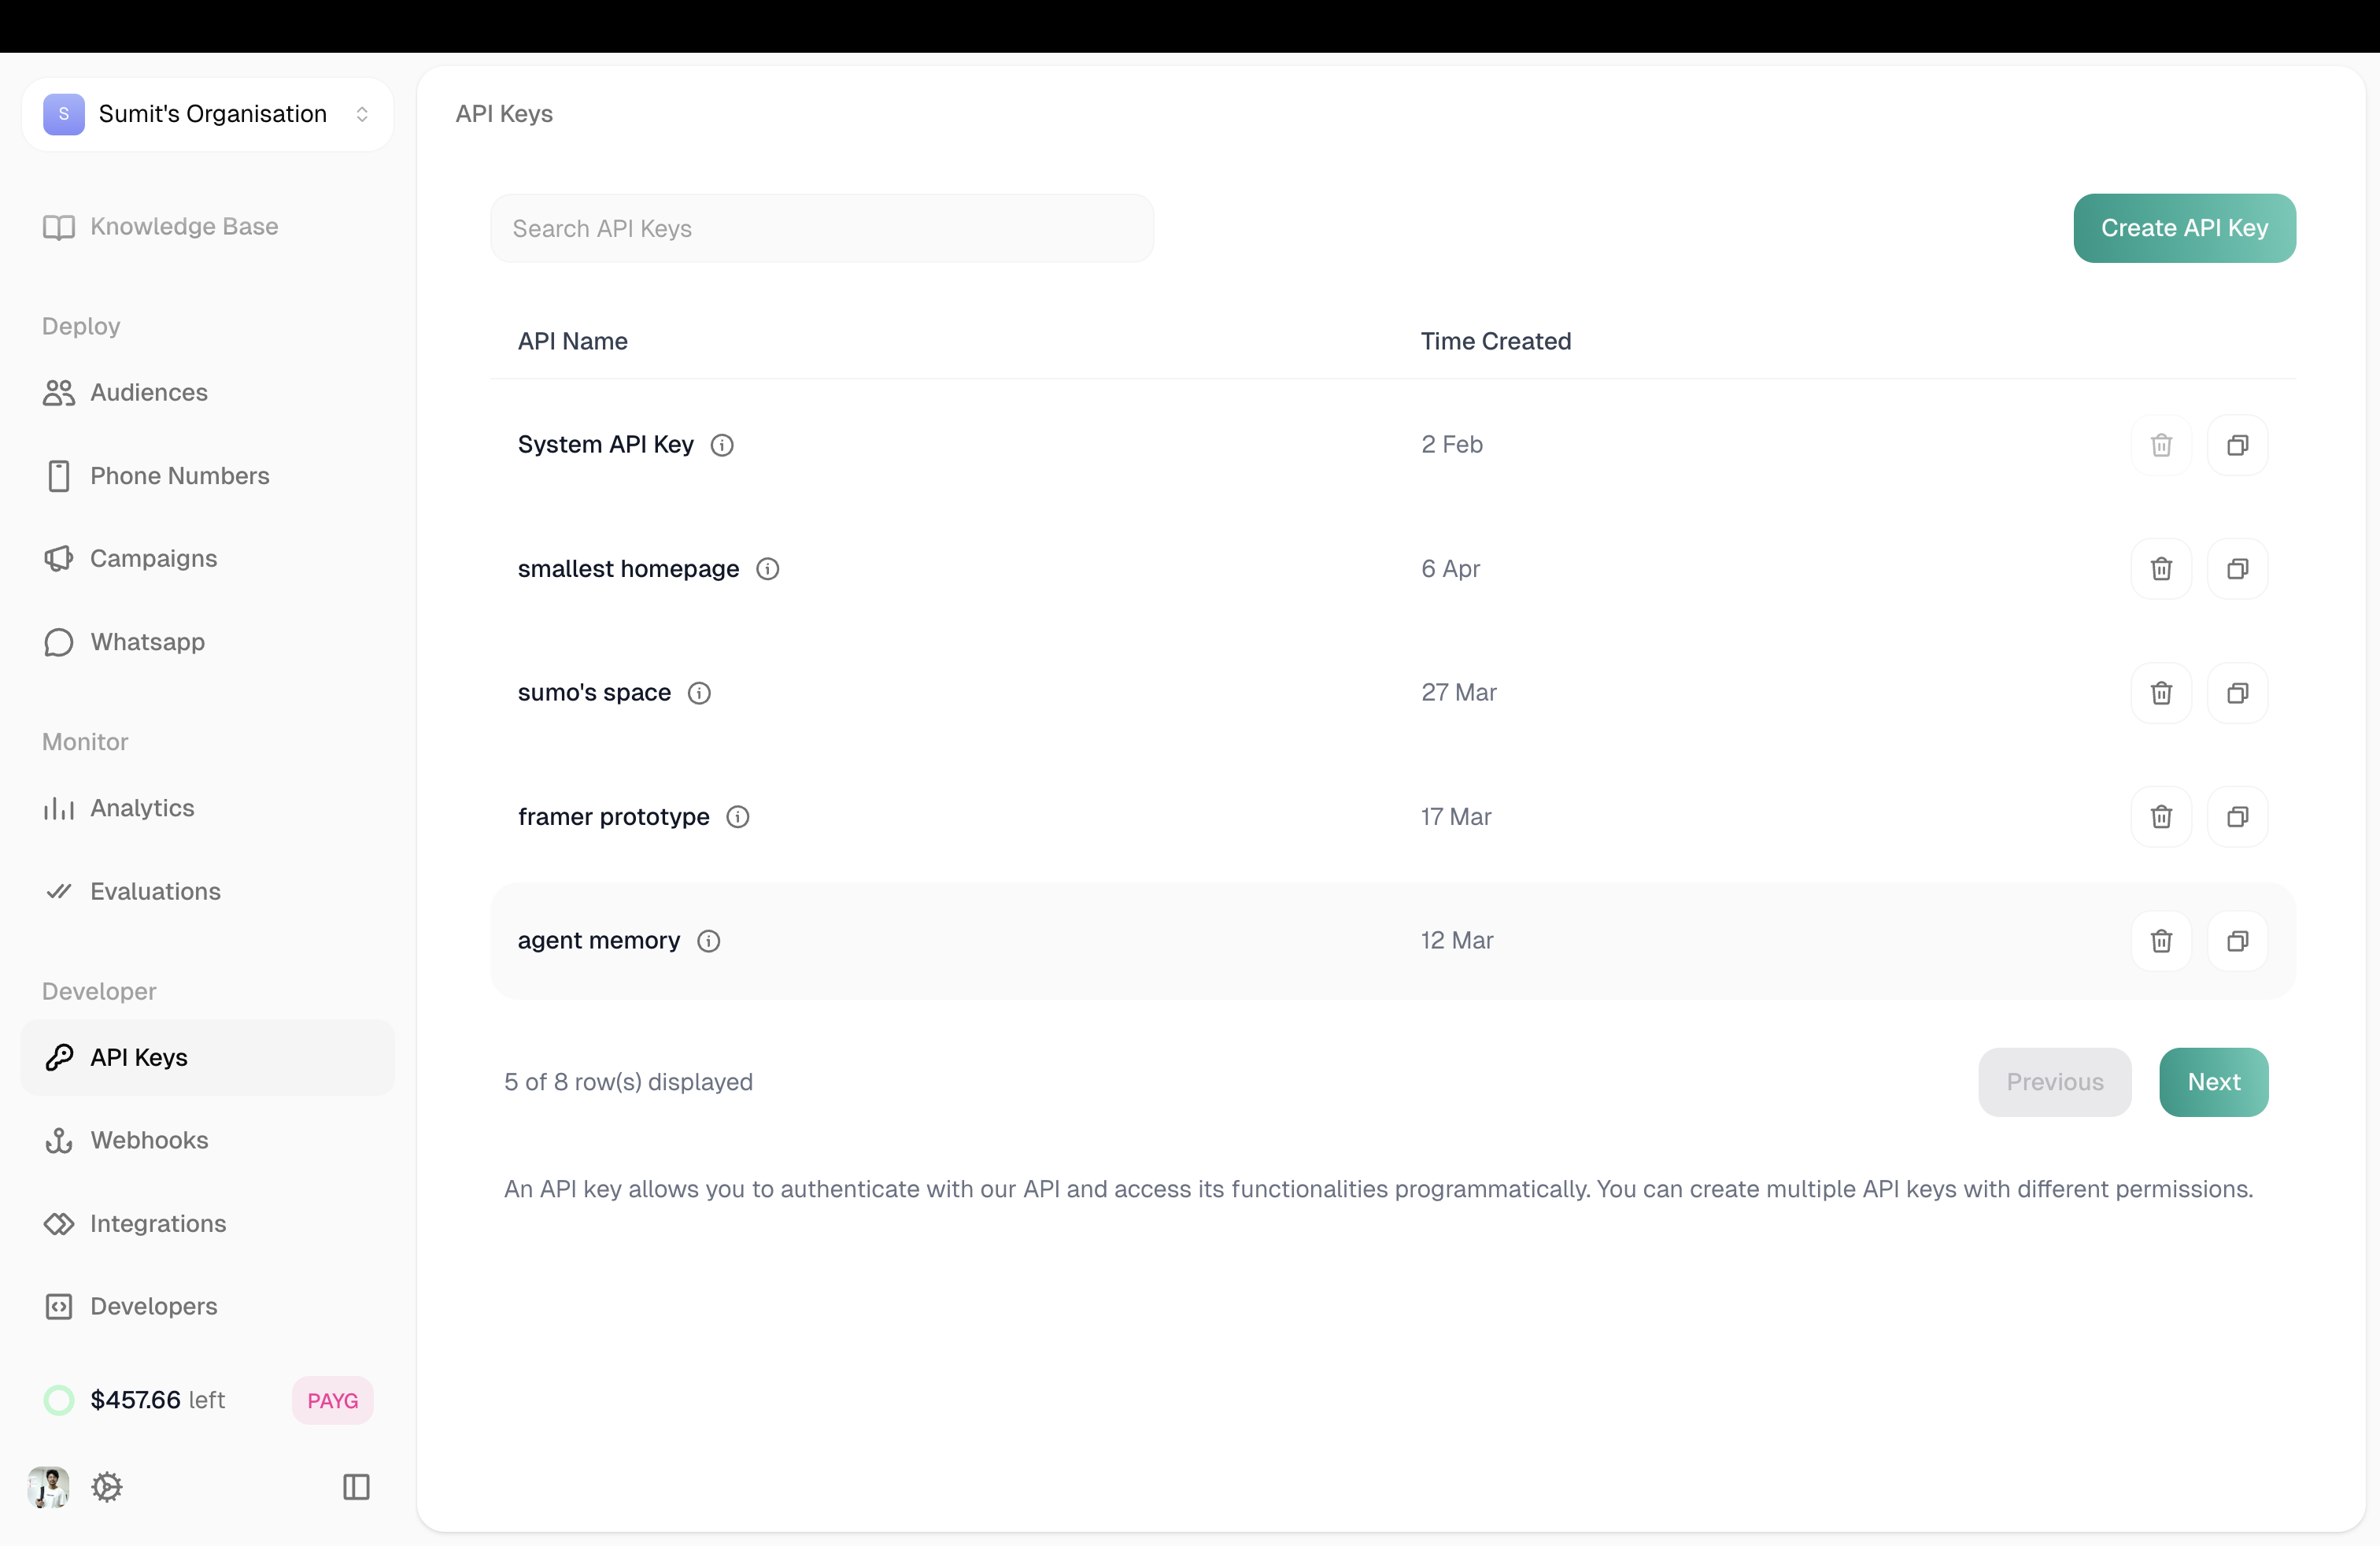
Click API Keys in the sidebar, then Create API Key.
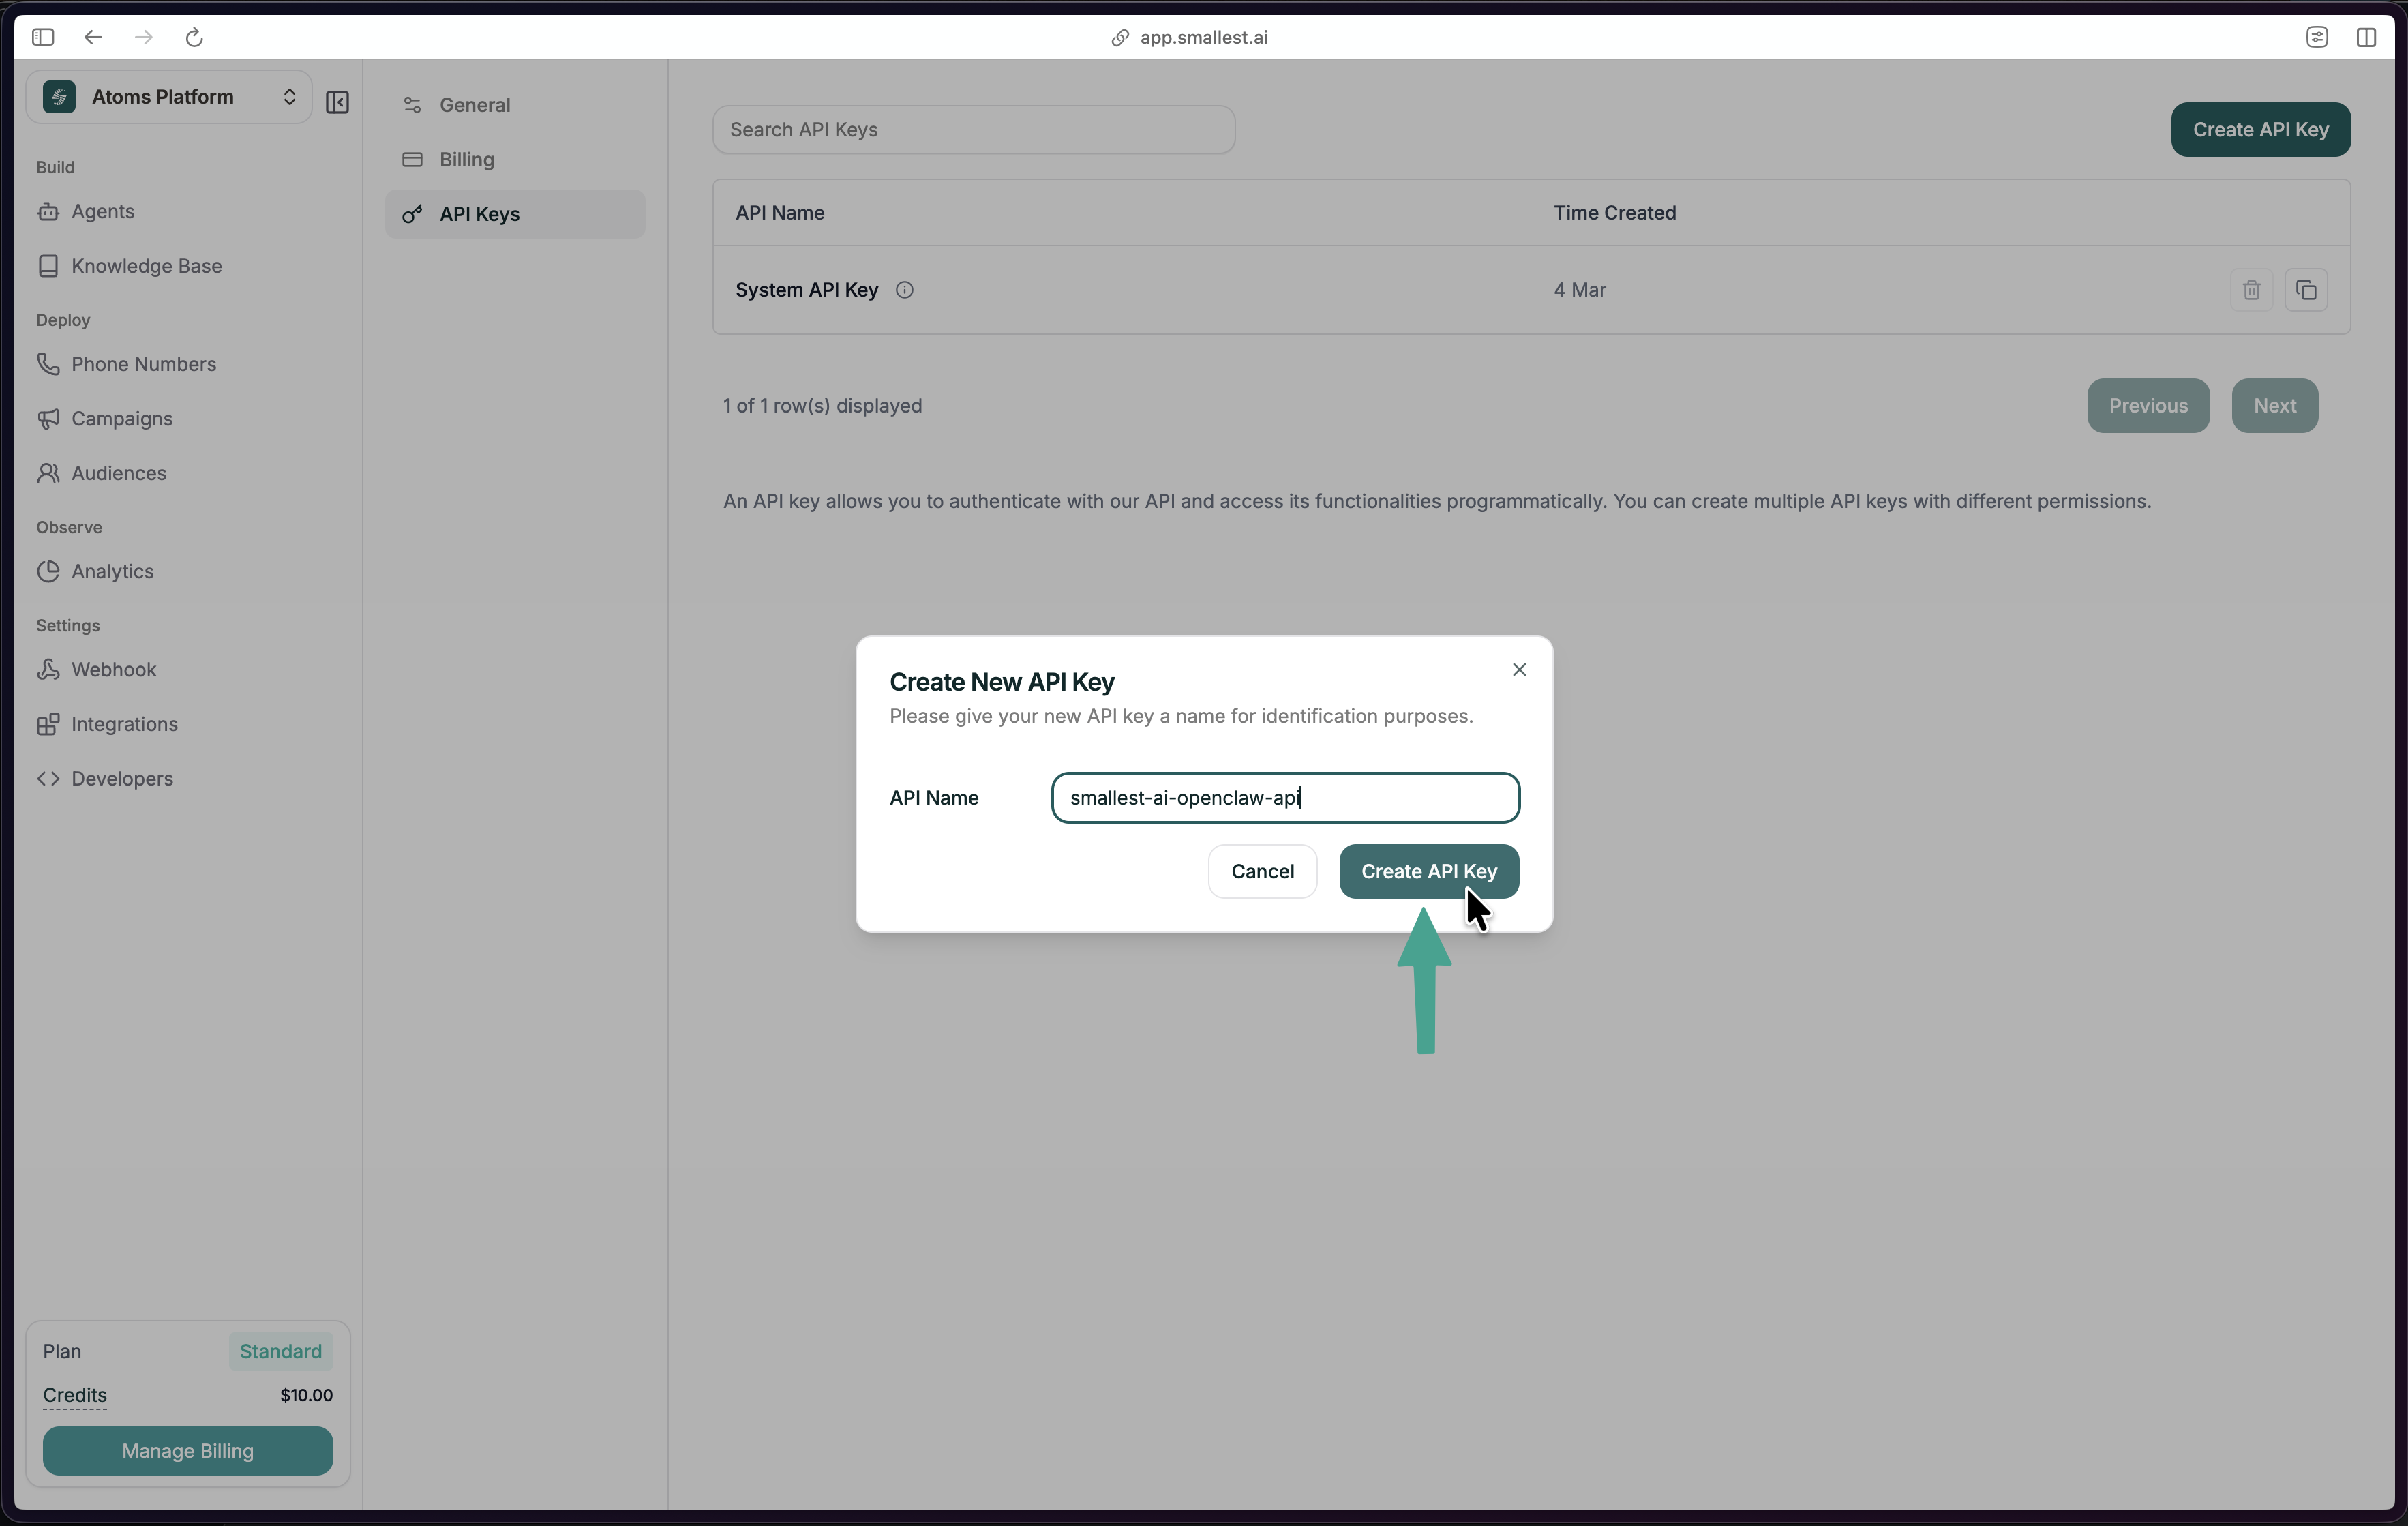
Name your key and click Create API Key. Copy it — it starts with sk_.
Configure your editor
Claude Desktop
Cursor
Claude Code
Open the config
Open Claude Desktop → click the Settings gear icon (bottom-left) → Developer → Edit Config
This opens a file in your text editor.
Don’t share your API key or commit it to git.
What can you do?
Just type in your editor’s chat — the AI picks the right tool:
View data
Debug
Build
Call
TTS & STT
Analytics
See the full list in the Prompt Cookbook.