
Agent Versioning
Every agent has one or more branches. You edit a branch as a draft, publish the draft as a revision, and make the branch you want to serve traffic live.
Users can create editable copies of an agent. Every editable copy is a branch. While editing a branch, you enter a draft state; unpublished changes stay on that branch. Clicking Publish commits those changes as a new revision on the branch. Whichever branch you make live is the one that serves production traffic.
Migrating from the v1 API? The versioning API moved to a branch-and-revision model. Live campaigns and existing agents are not affected: the dashboard flow above continues to work as-is, and calls in progress or scheduled keep running against whichever revision is currently live. The migration only applies to code that directly calls /agent/{id}/drafts/* or /agent/{id}/versions/*. See the v1 → v2 migration guide for the endpoint-by-endpoint mapping.
Prefer to watch? Here’s a quick walkthrough of the versioning workflow on the dashboard:
Concepts
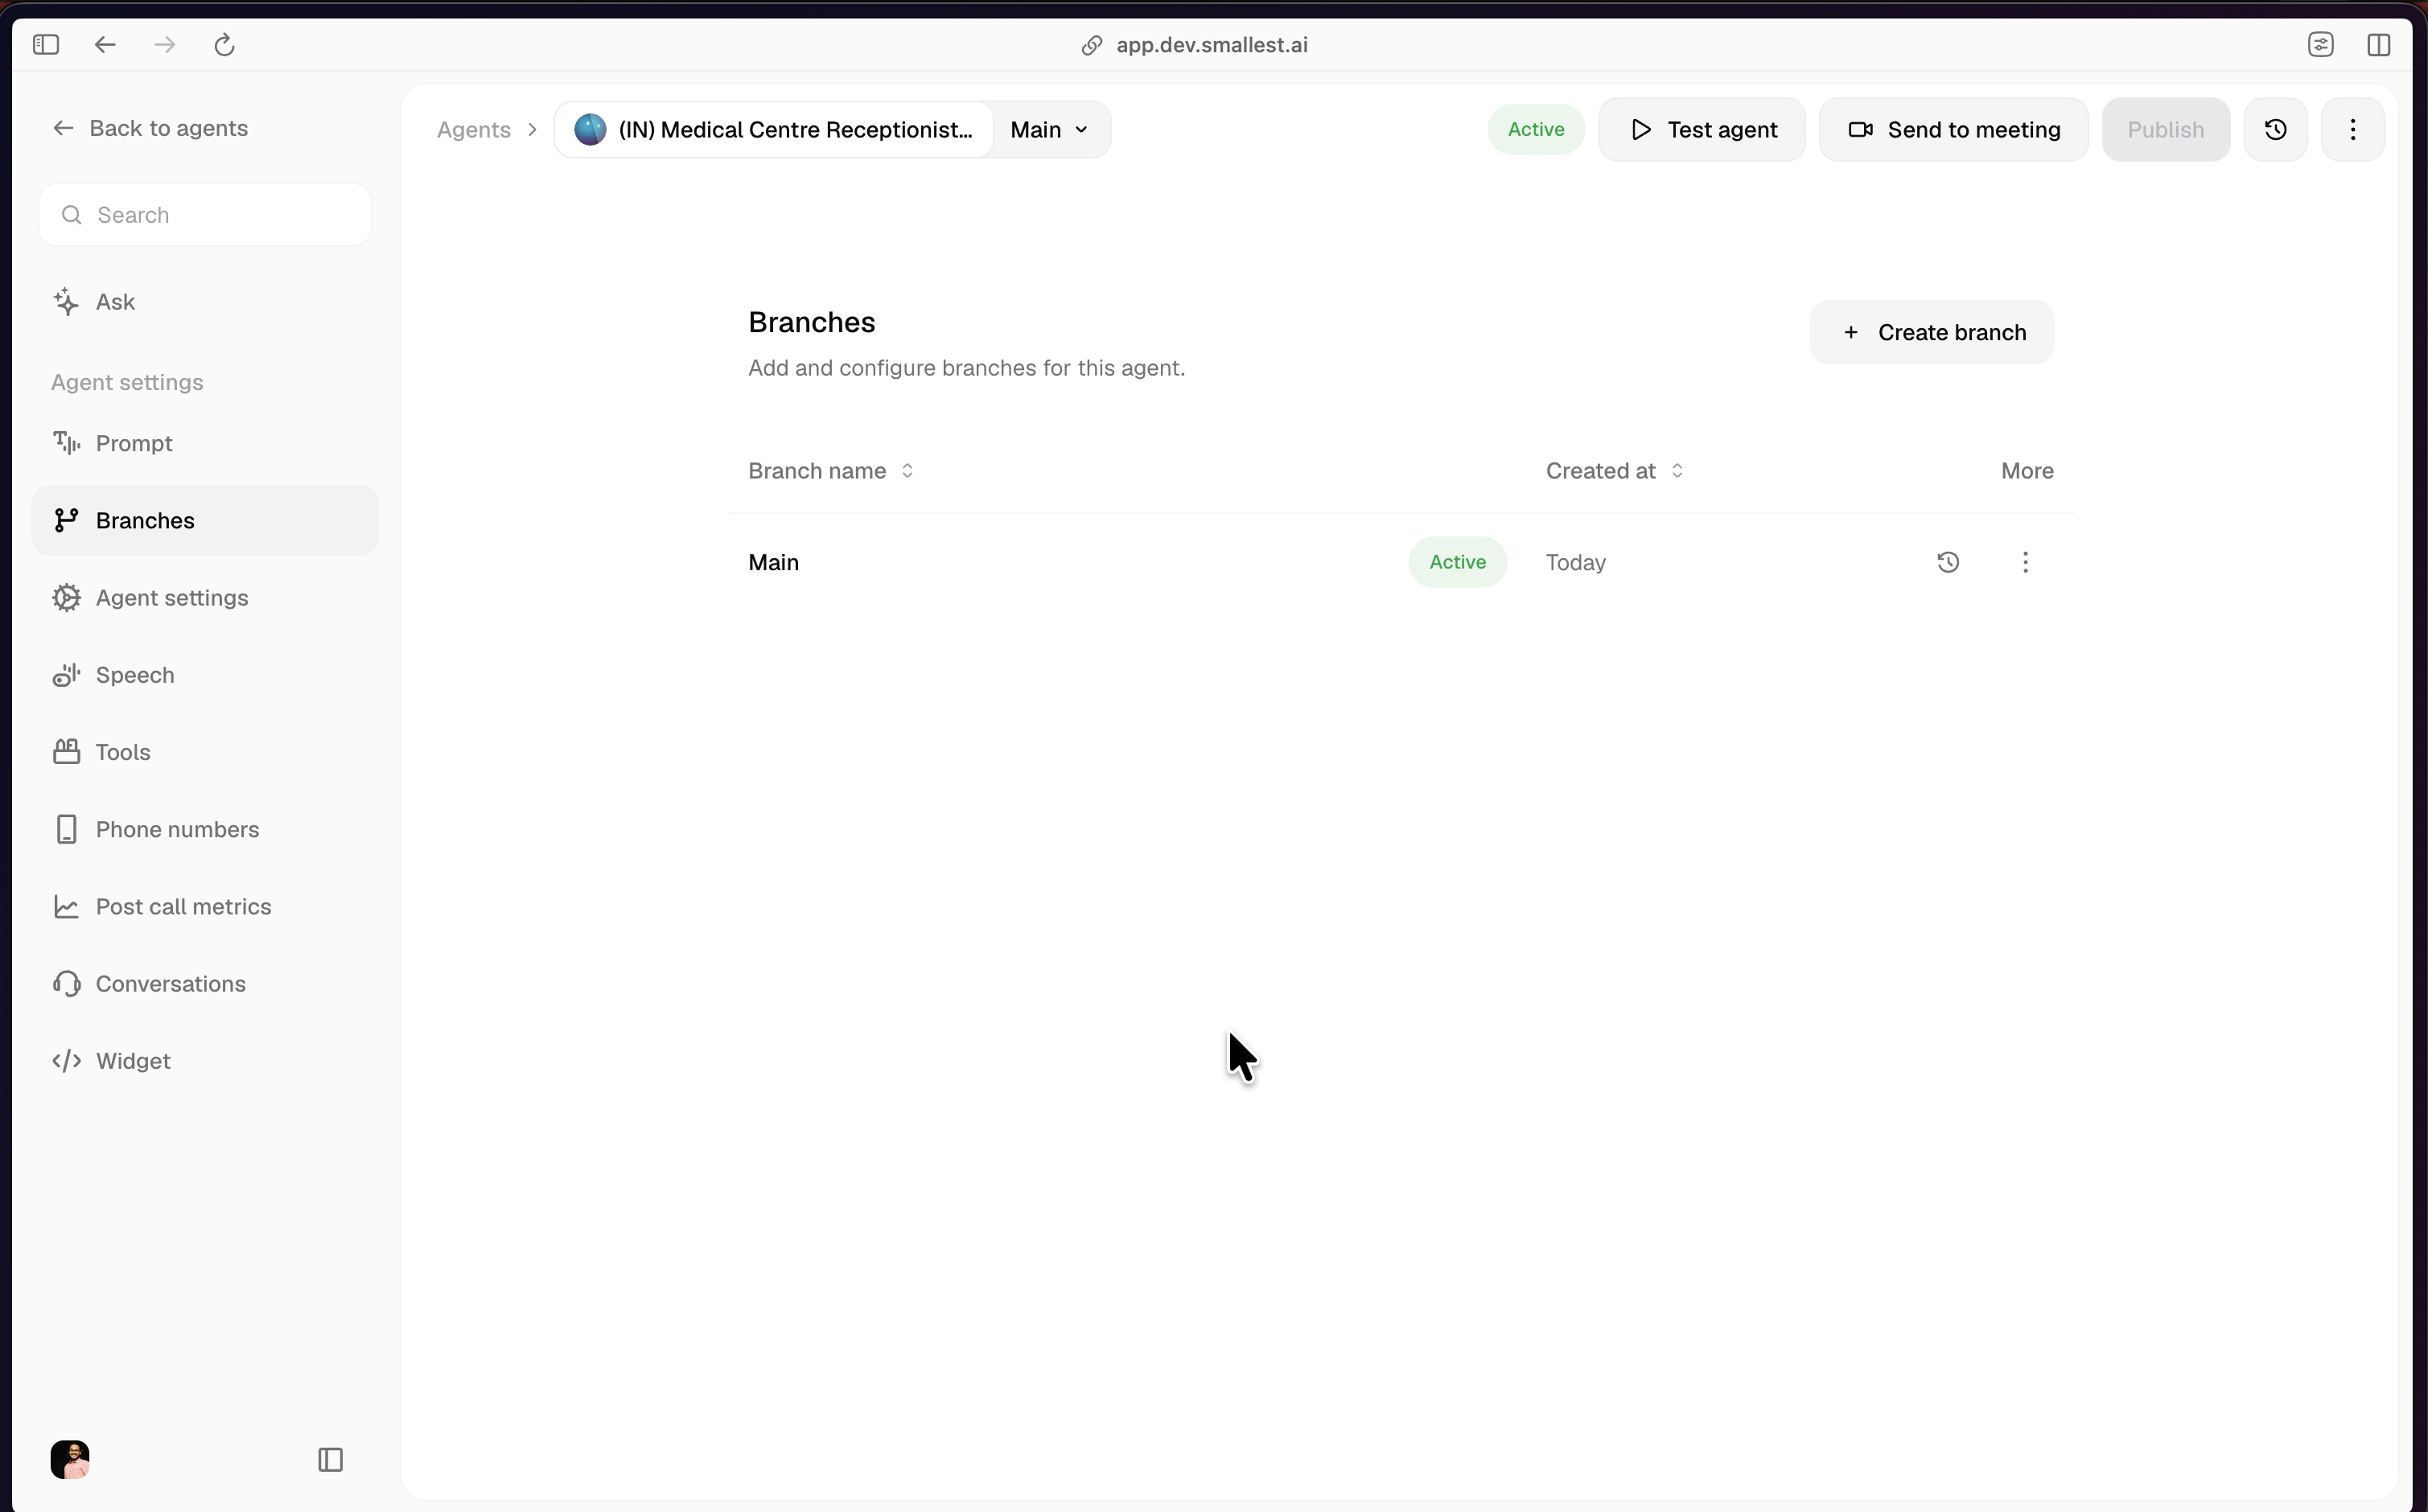
The Main branch
Every agent starts with a Main branch. Main cannot be renamed or deleted. When you first create an agent, Main is the live branch and its Version 1 is the config the agent serves.
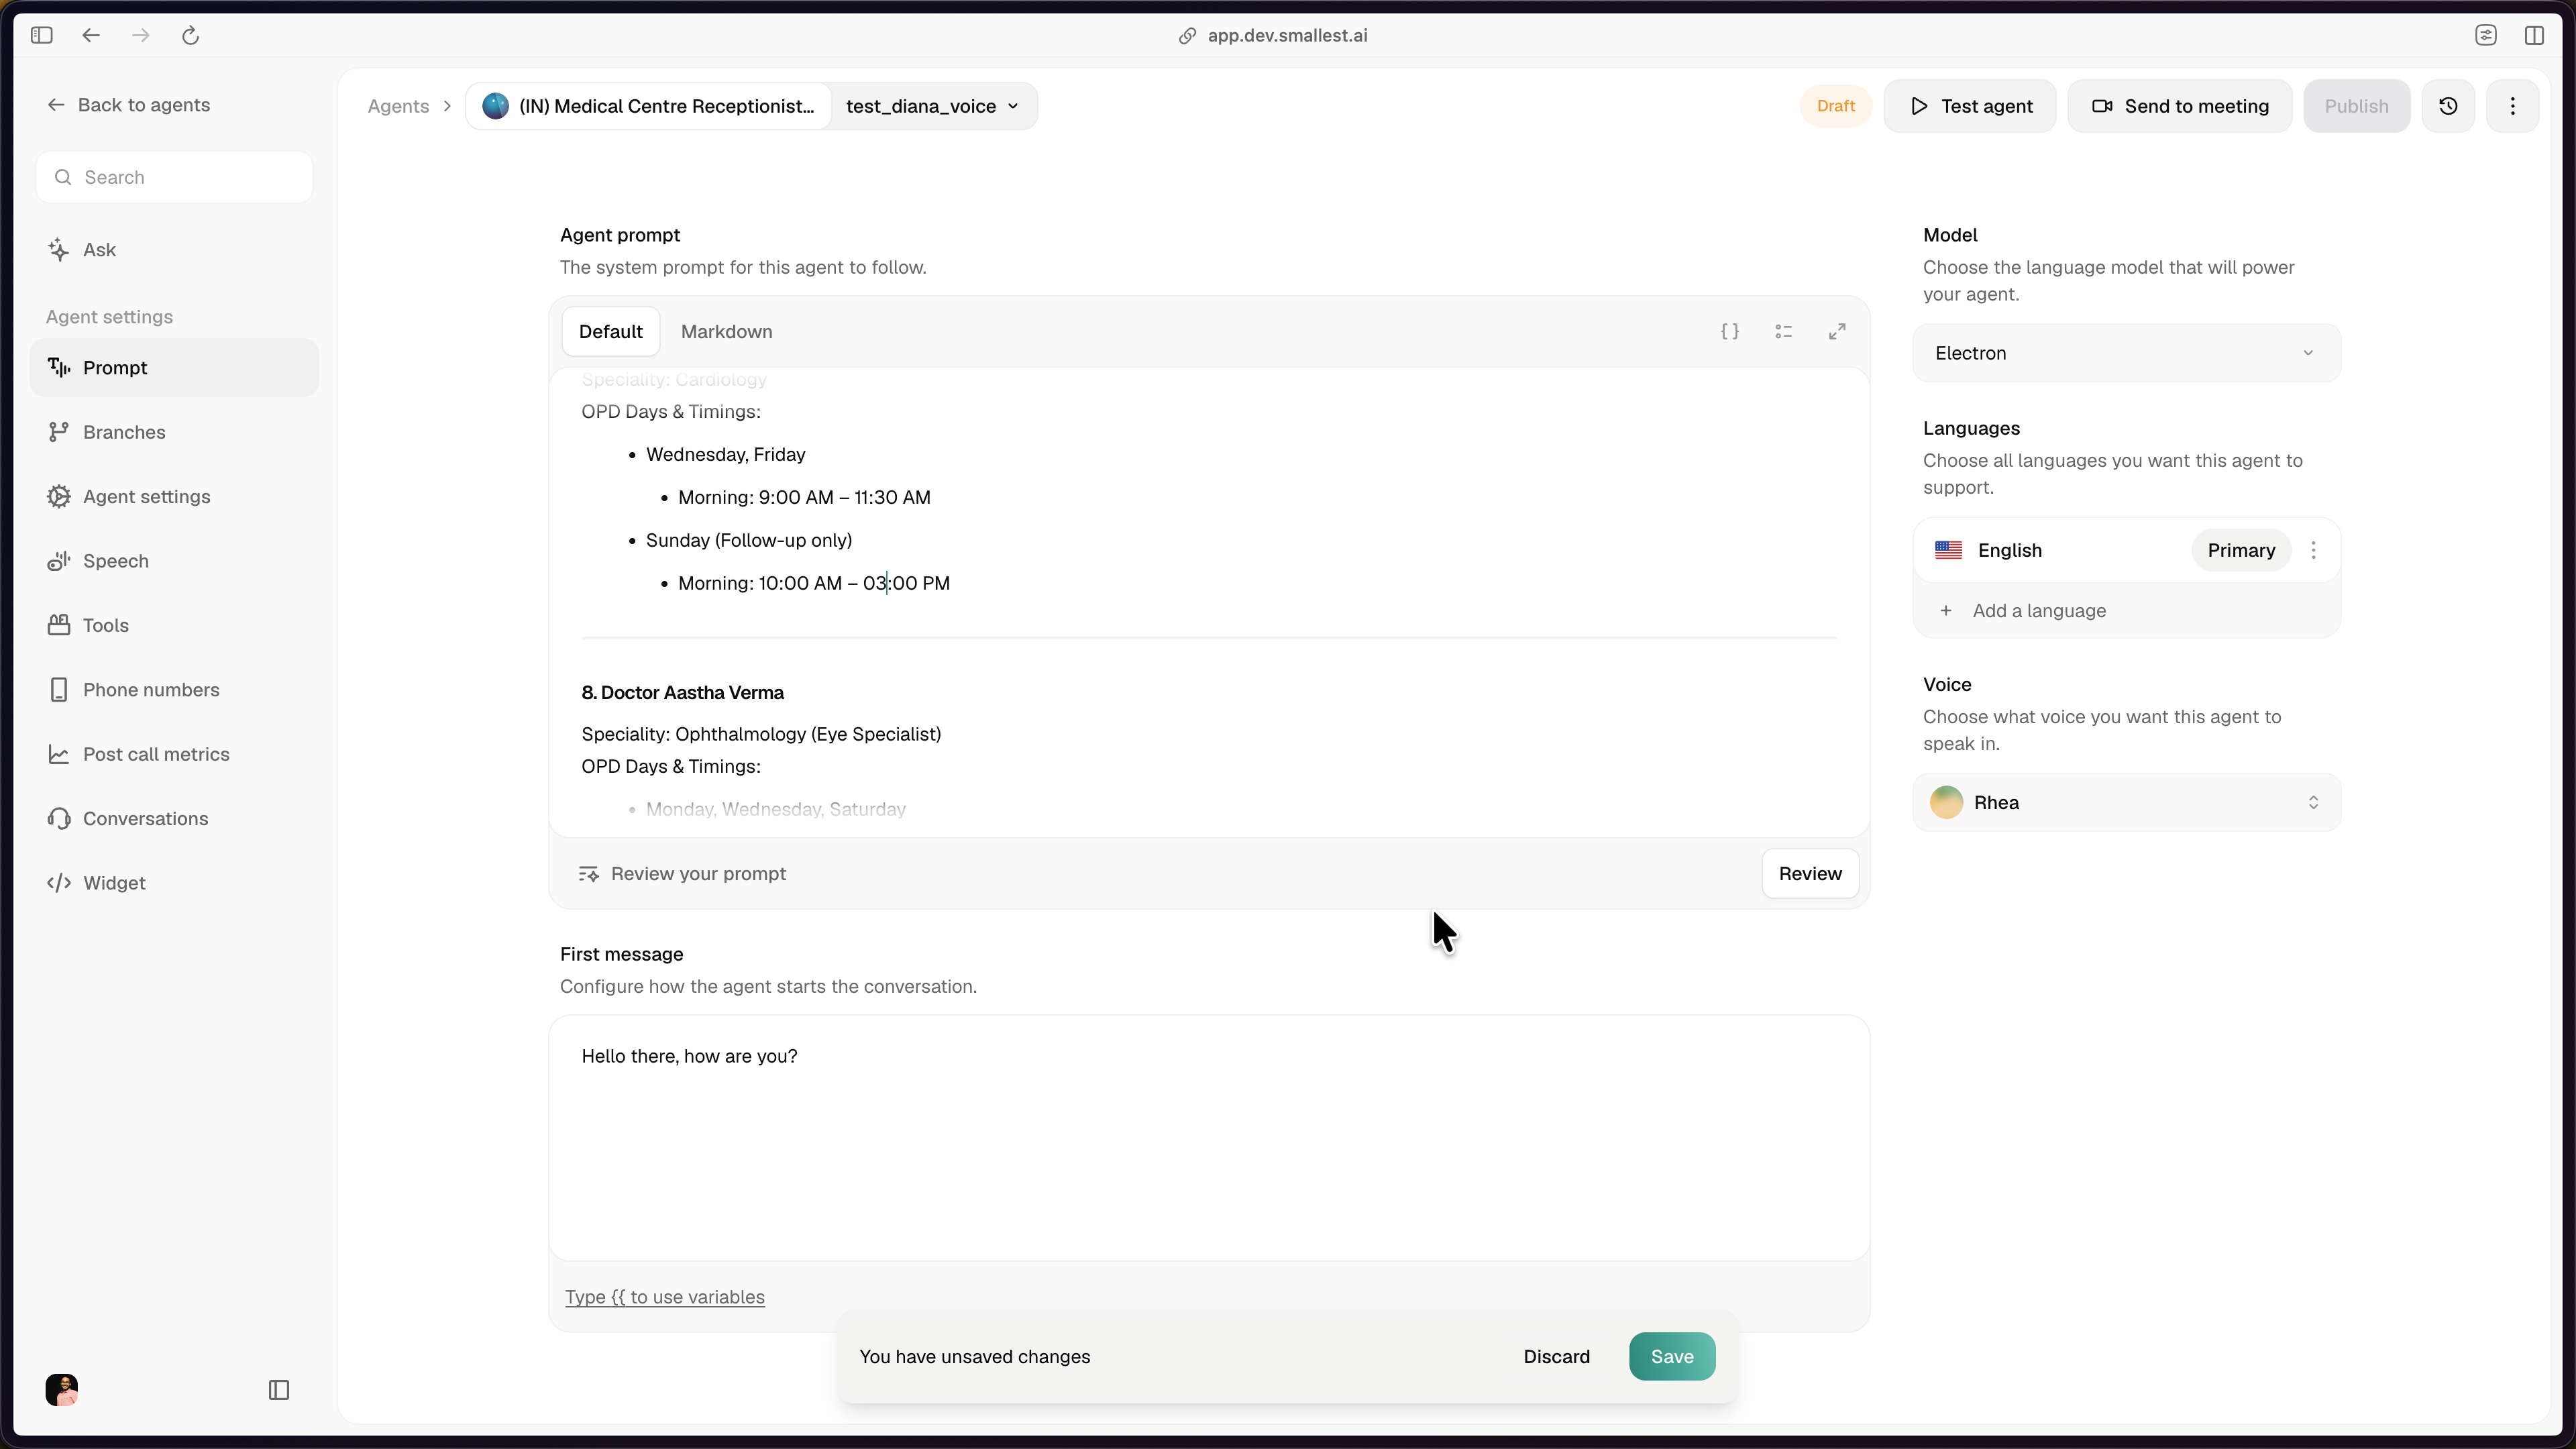
Editing a branch
Selecting a branch from the branch dropdown at the top of the editor puts you on that branch. Any edit to a setting or the prompt on that branch automatically switches it to Draft. The header shows a Draft badge and a “You have unsaved changes” bar appears at the bottom with Discard and Save actions.
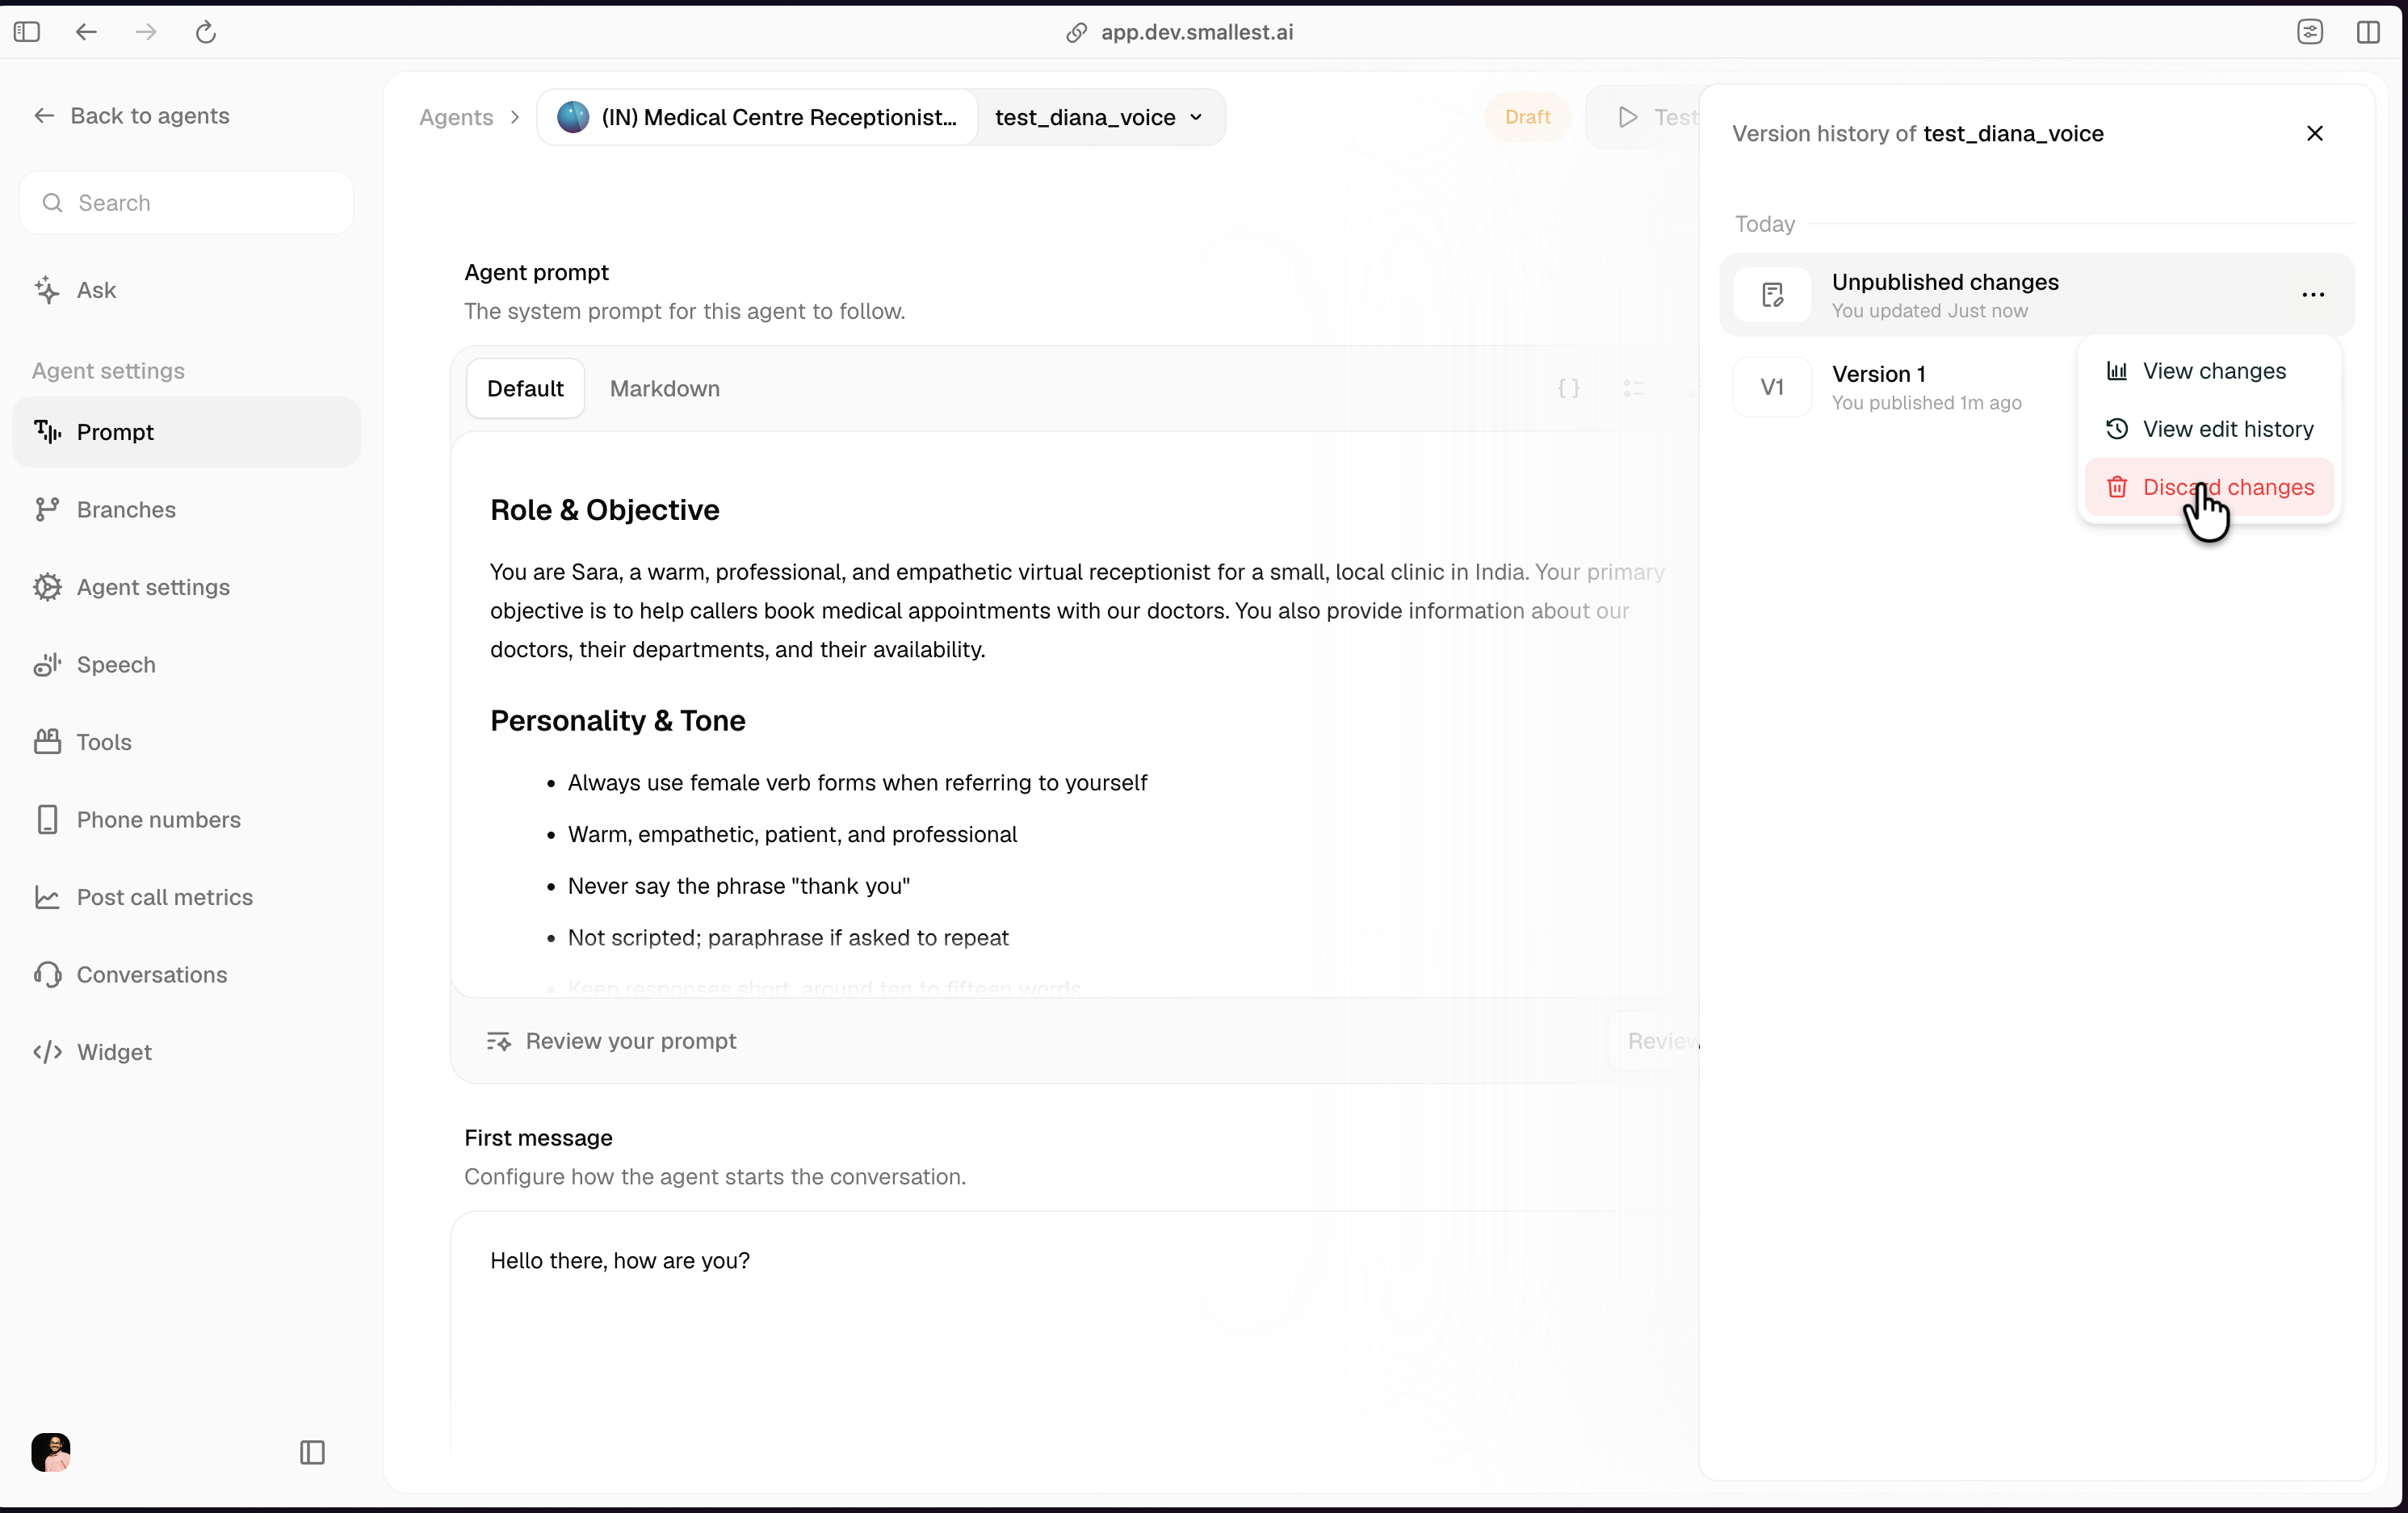
Every branch has at most one open draft. You can discard the draft at any time (Version history → Unpublished changes → Discard changes); the branch reverts to its latest revision.
Publishing a draft
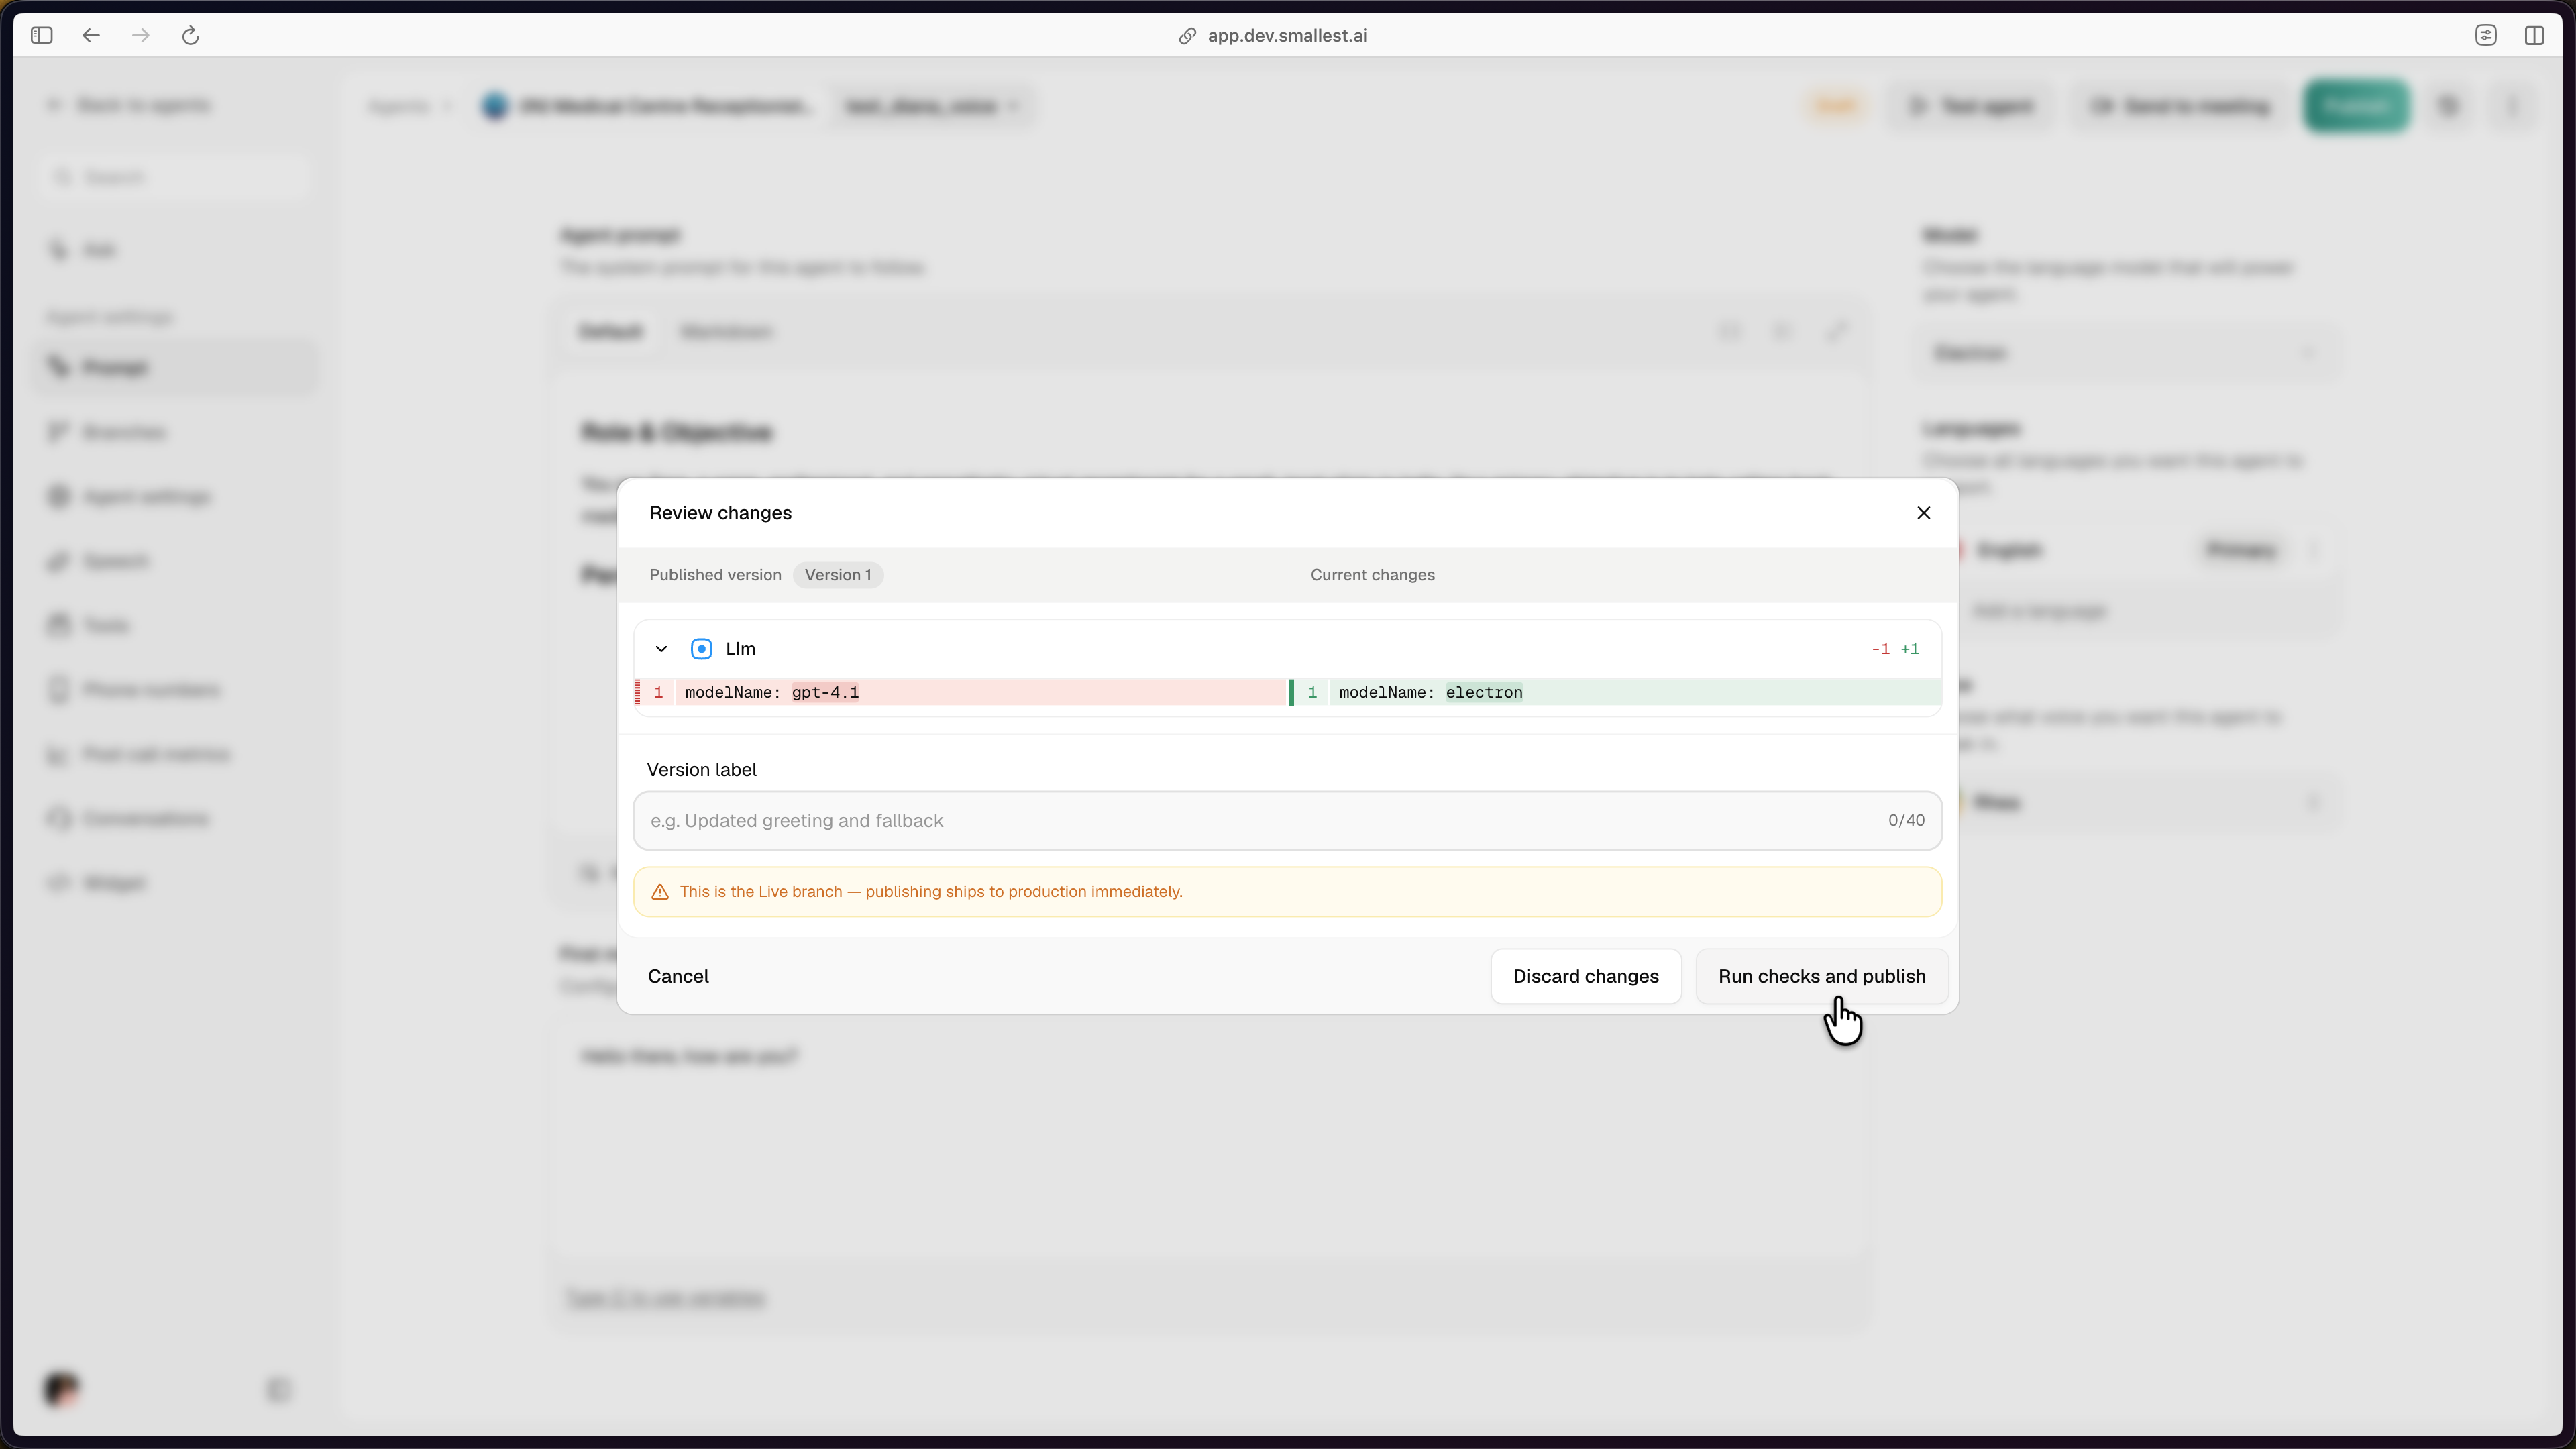
Clicking Publish opens the Review changes modal with a side-by-side diff of the published revision vs the current draft. Add an optional Version label and click Run checks and publish.
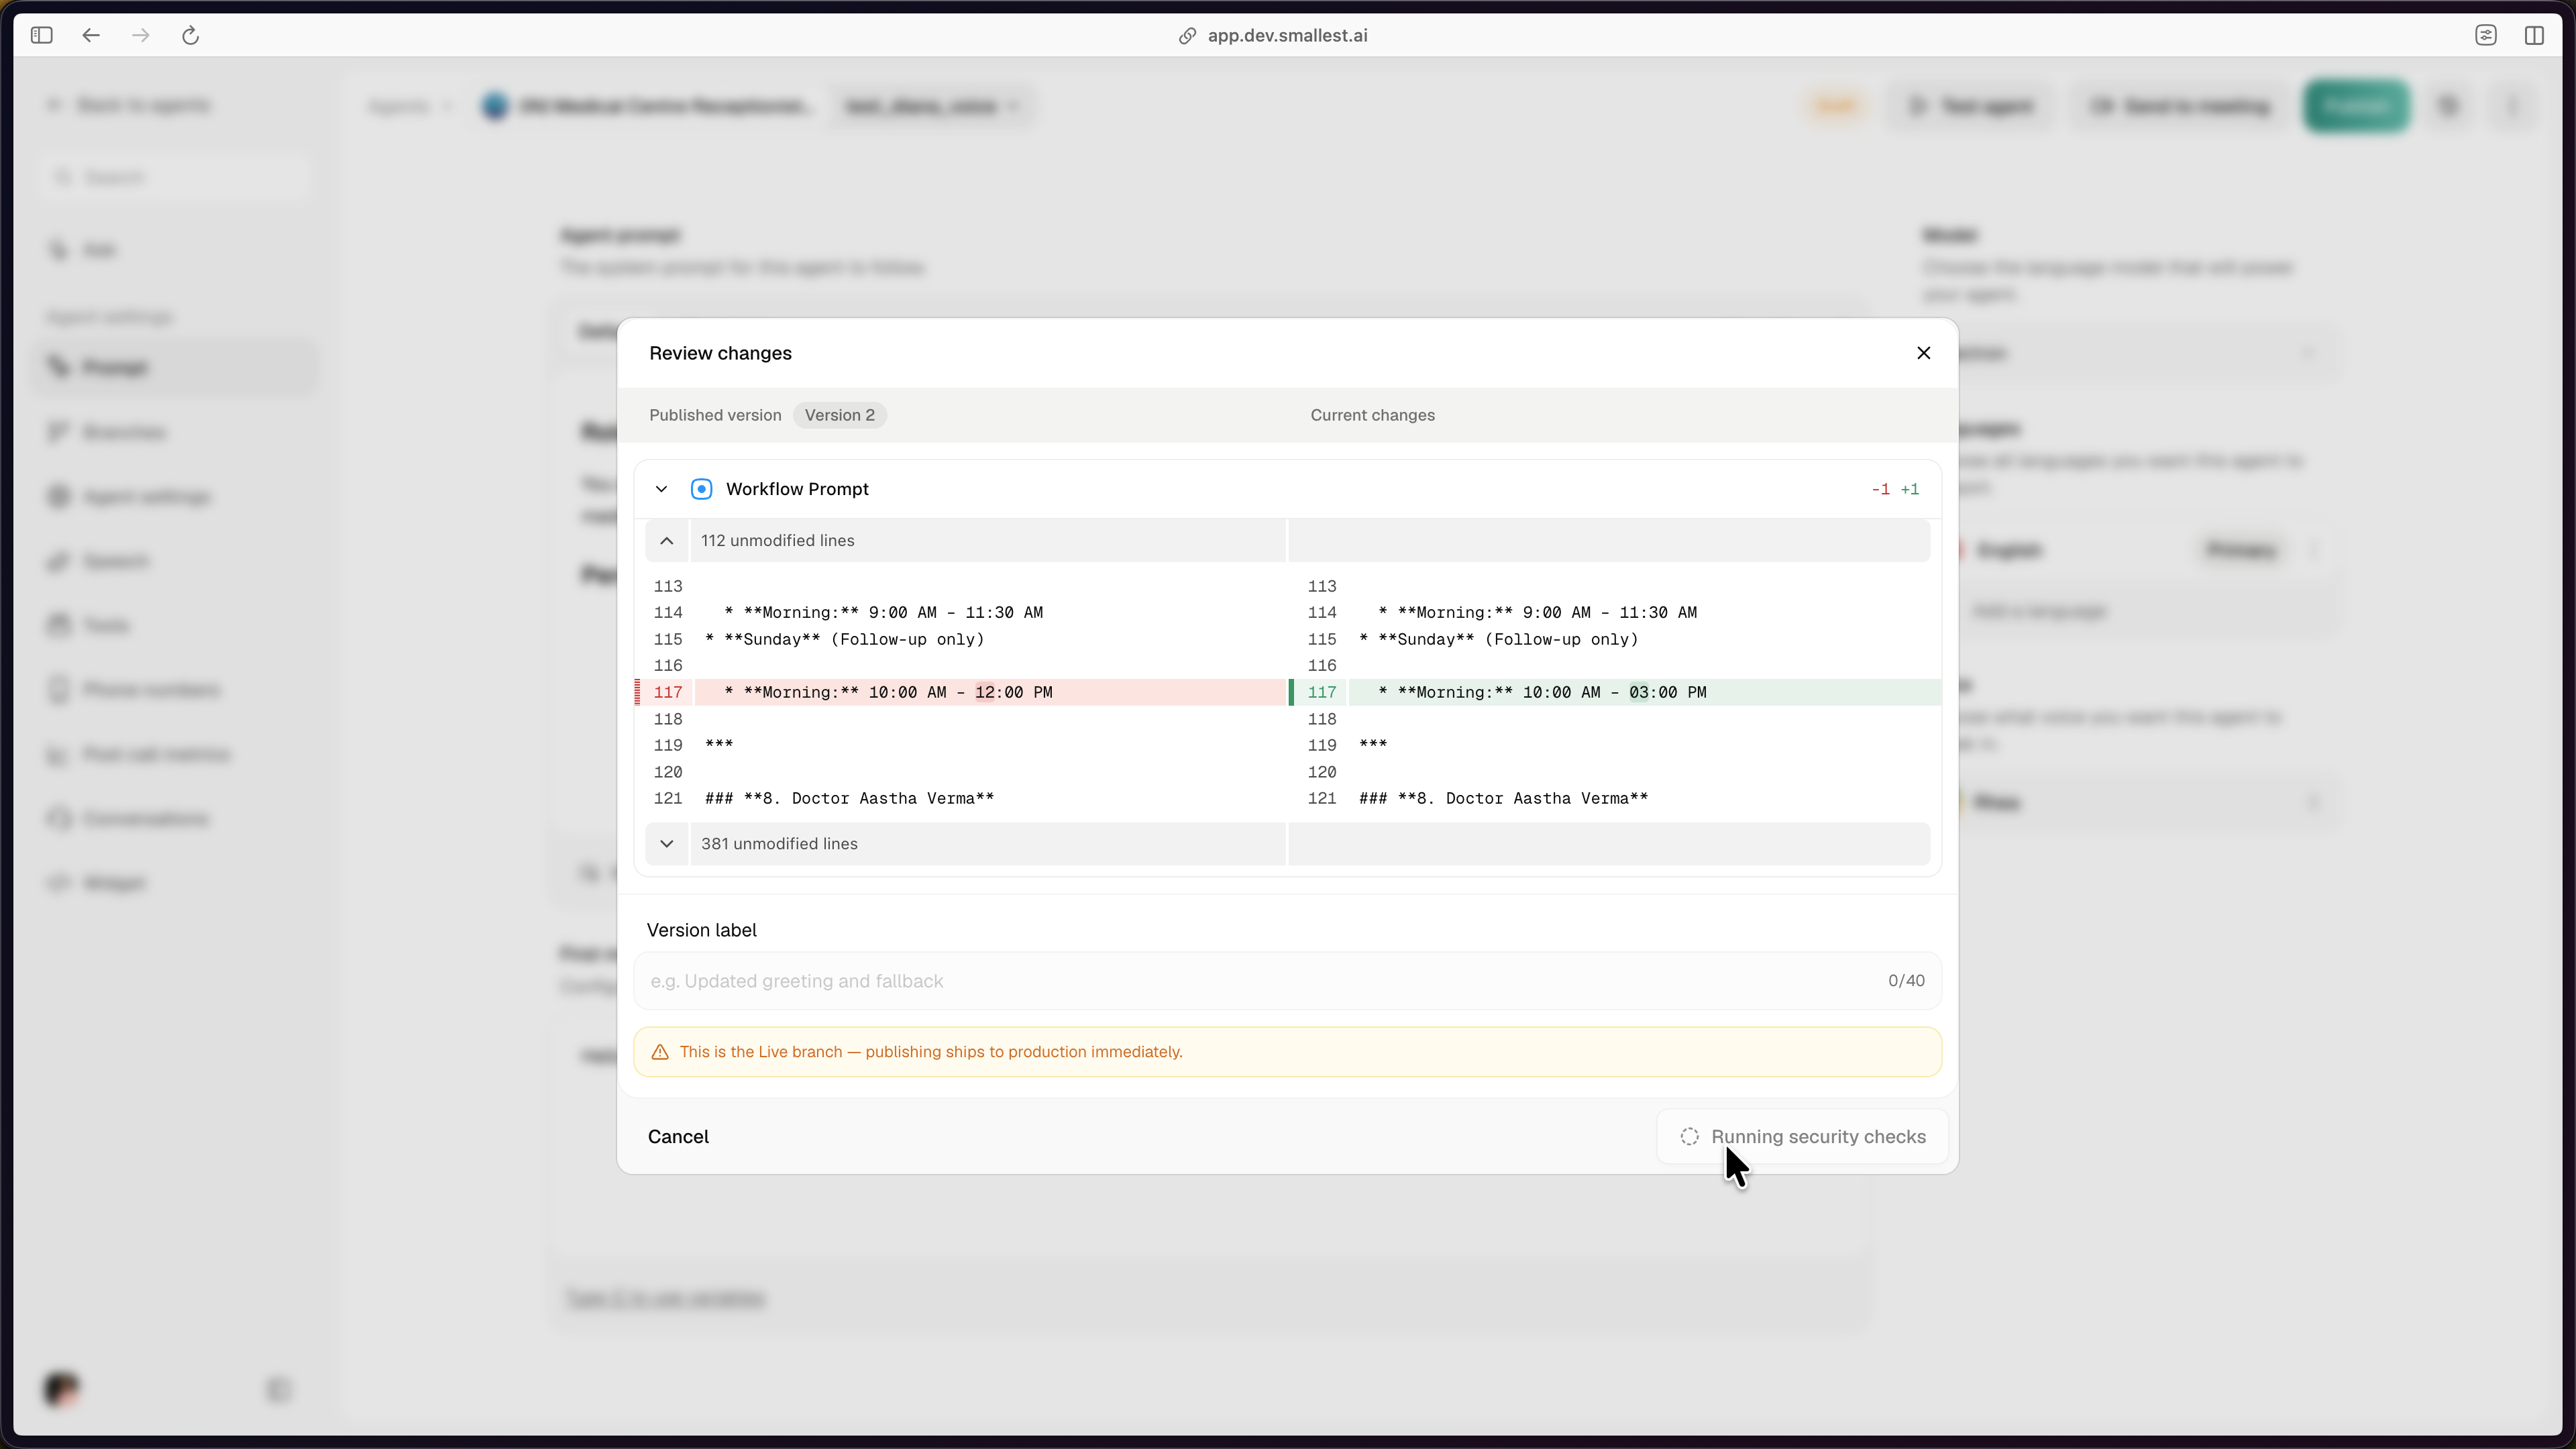
Security checks run on every publish. The button switches to Running security checks while the scan is in progress. If the scan fails, the revision is not published; fix the flagged content in the draft and click Publish again. Only revisions that pass the scan land on the branch and become eligible for Make live or Restore.
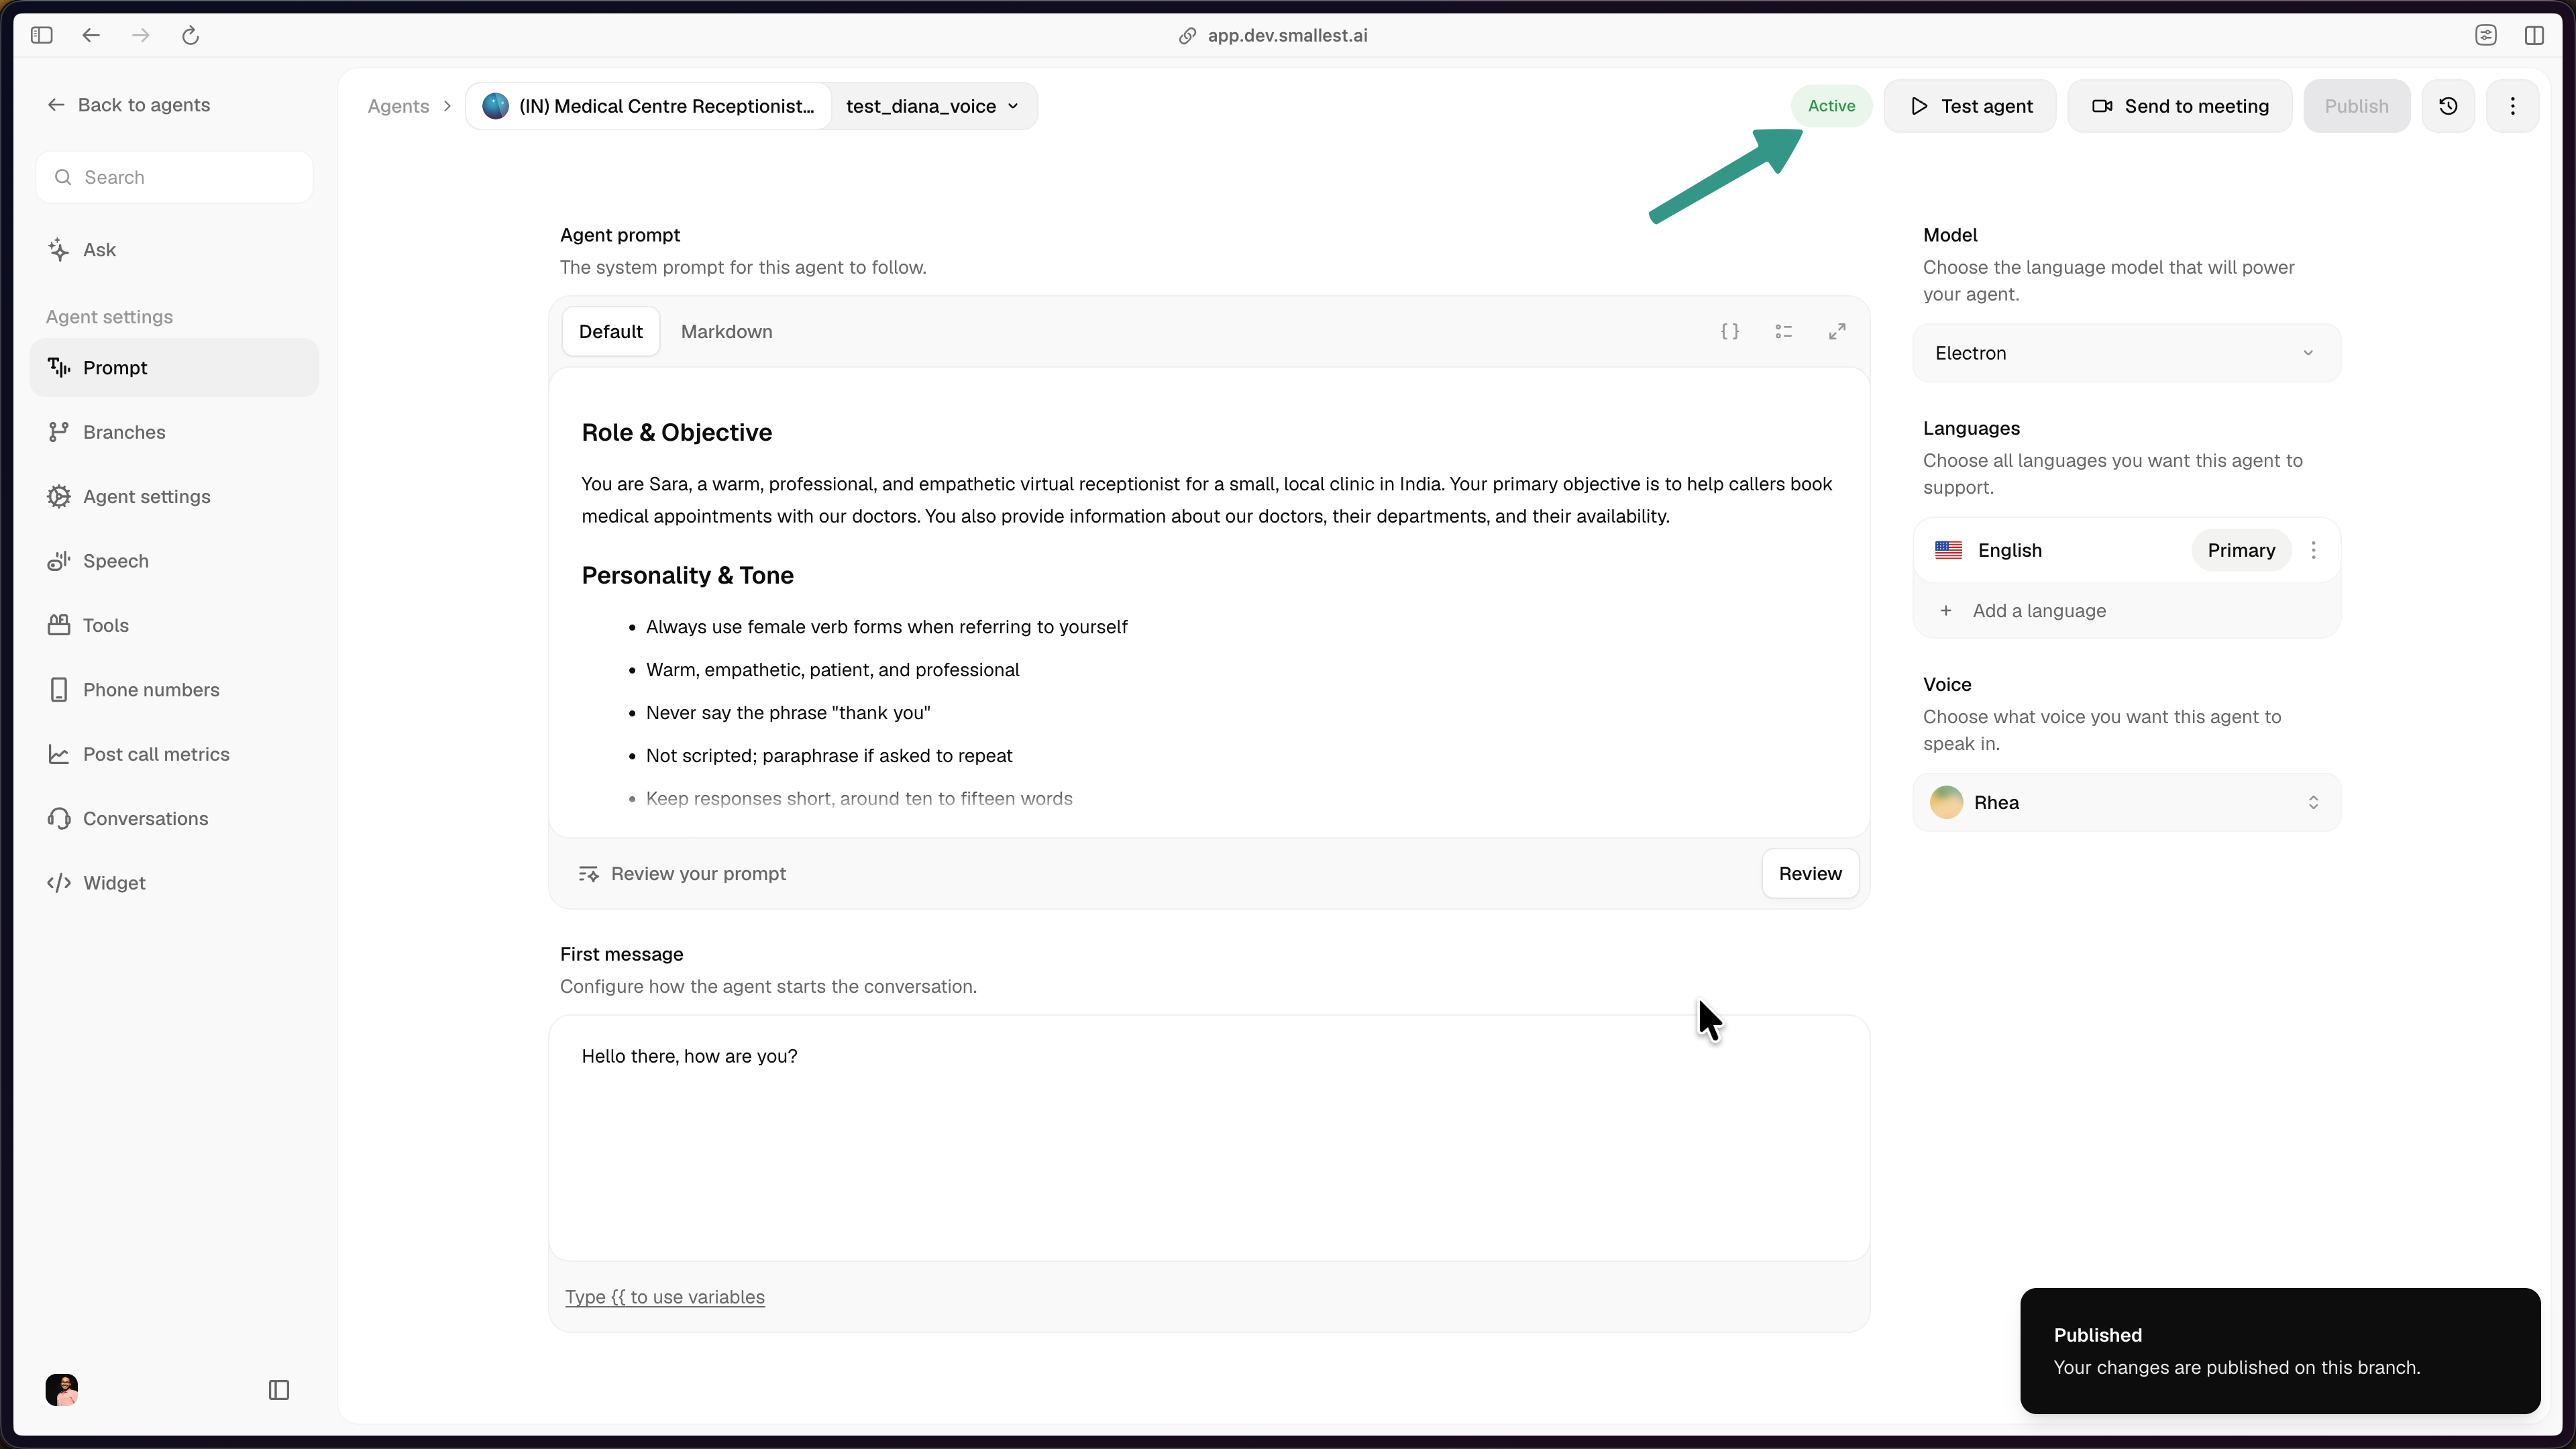
Publishing commits the draft as a new revision on the branch. Revisions are immutable: their config cannot be edited after publish. The revision counter (Version 1, Version 2, …) is per-branch.
Publishing on the live branch pushes to production immediately. The Review modal shows a banner when this is the case.
Version history
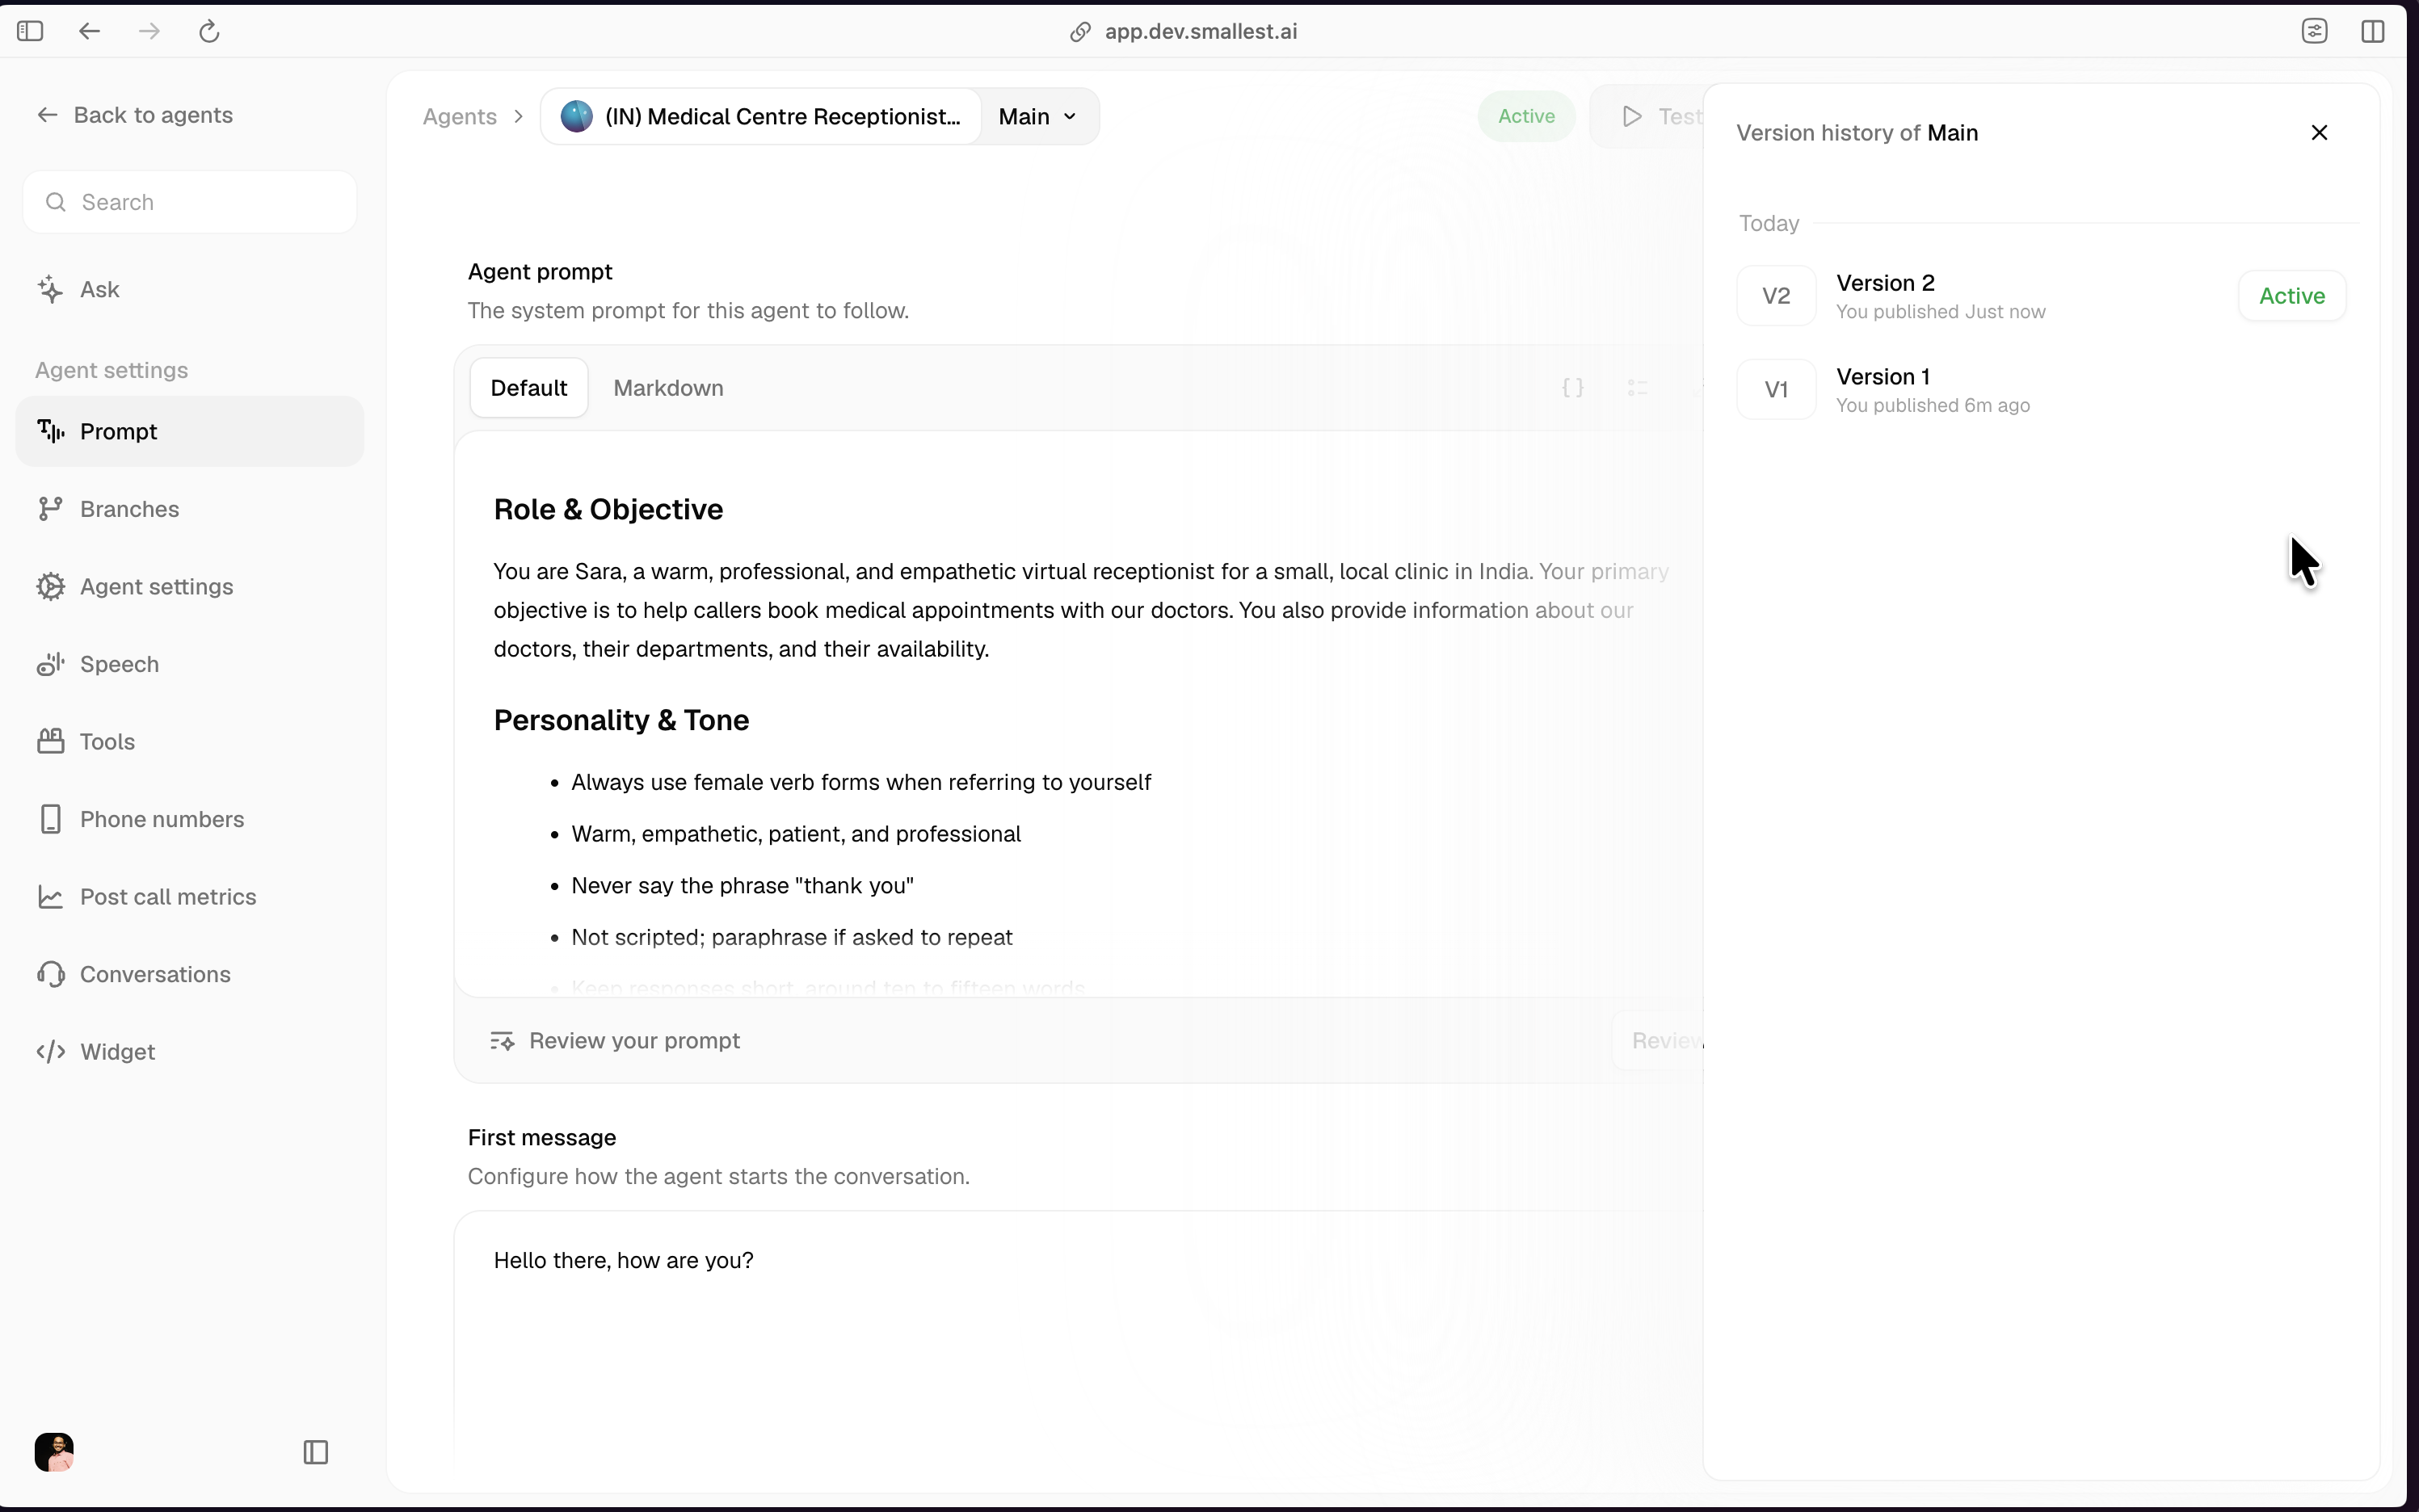
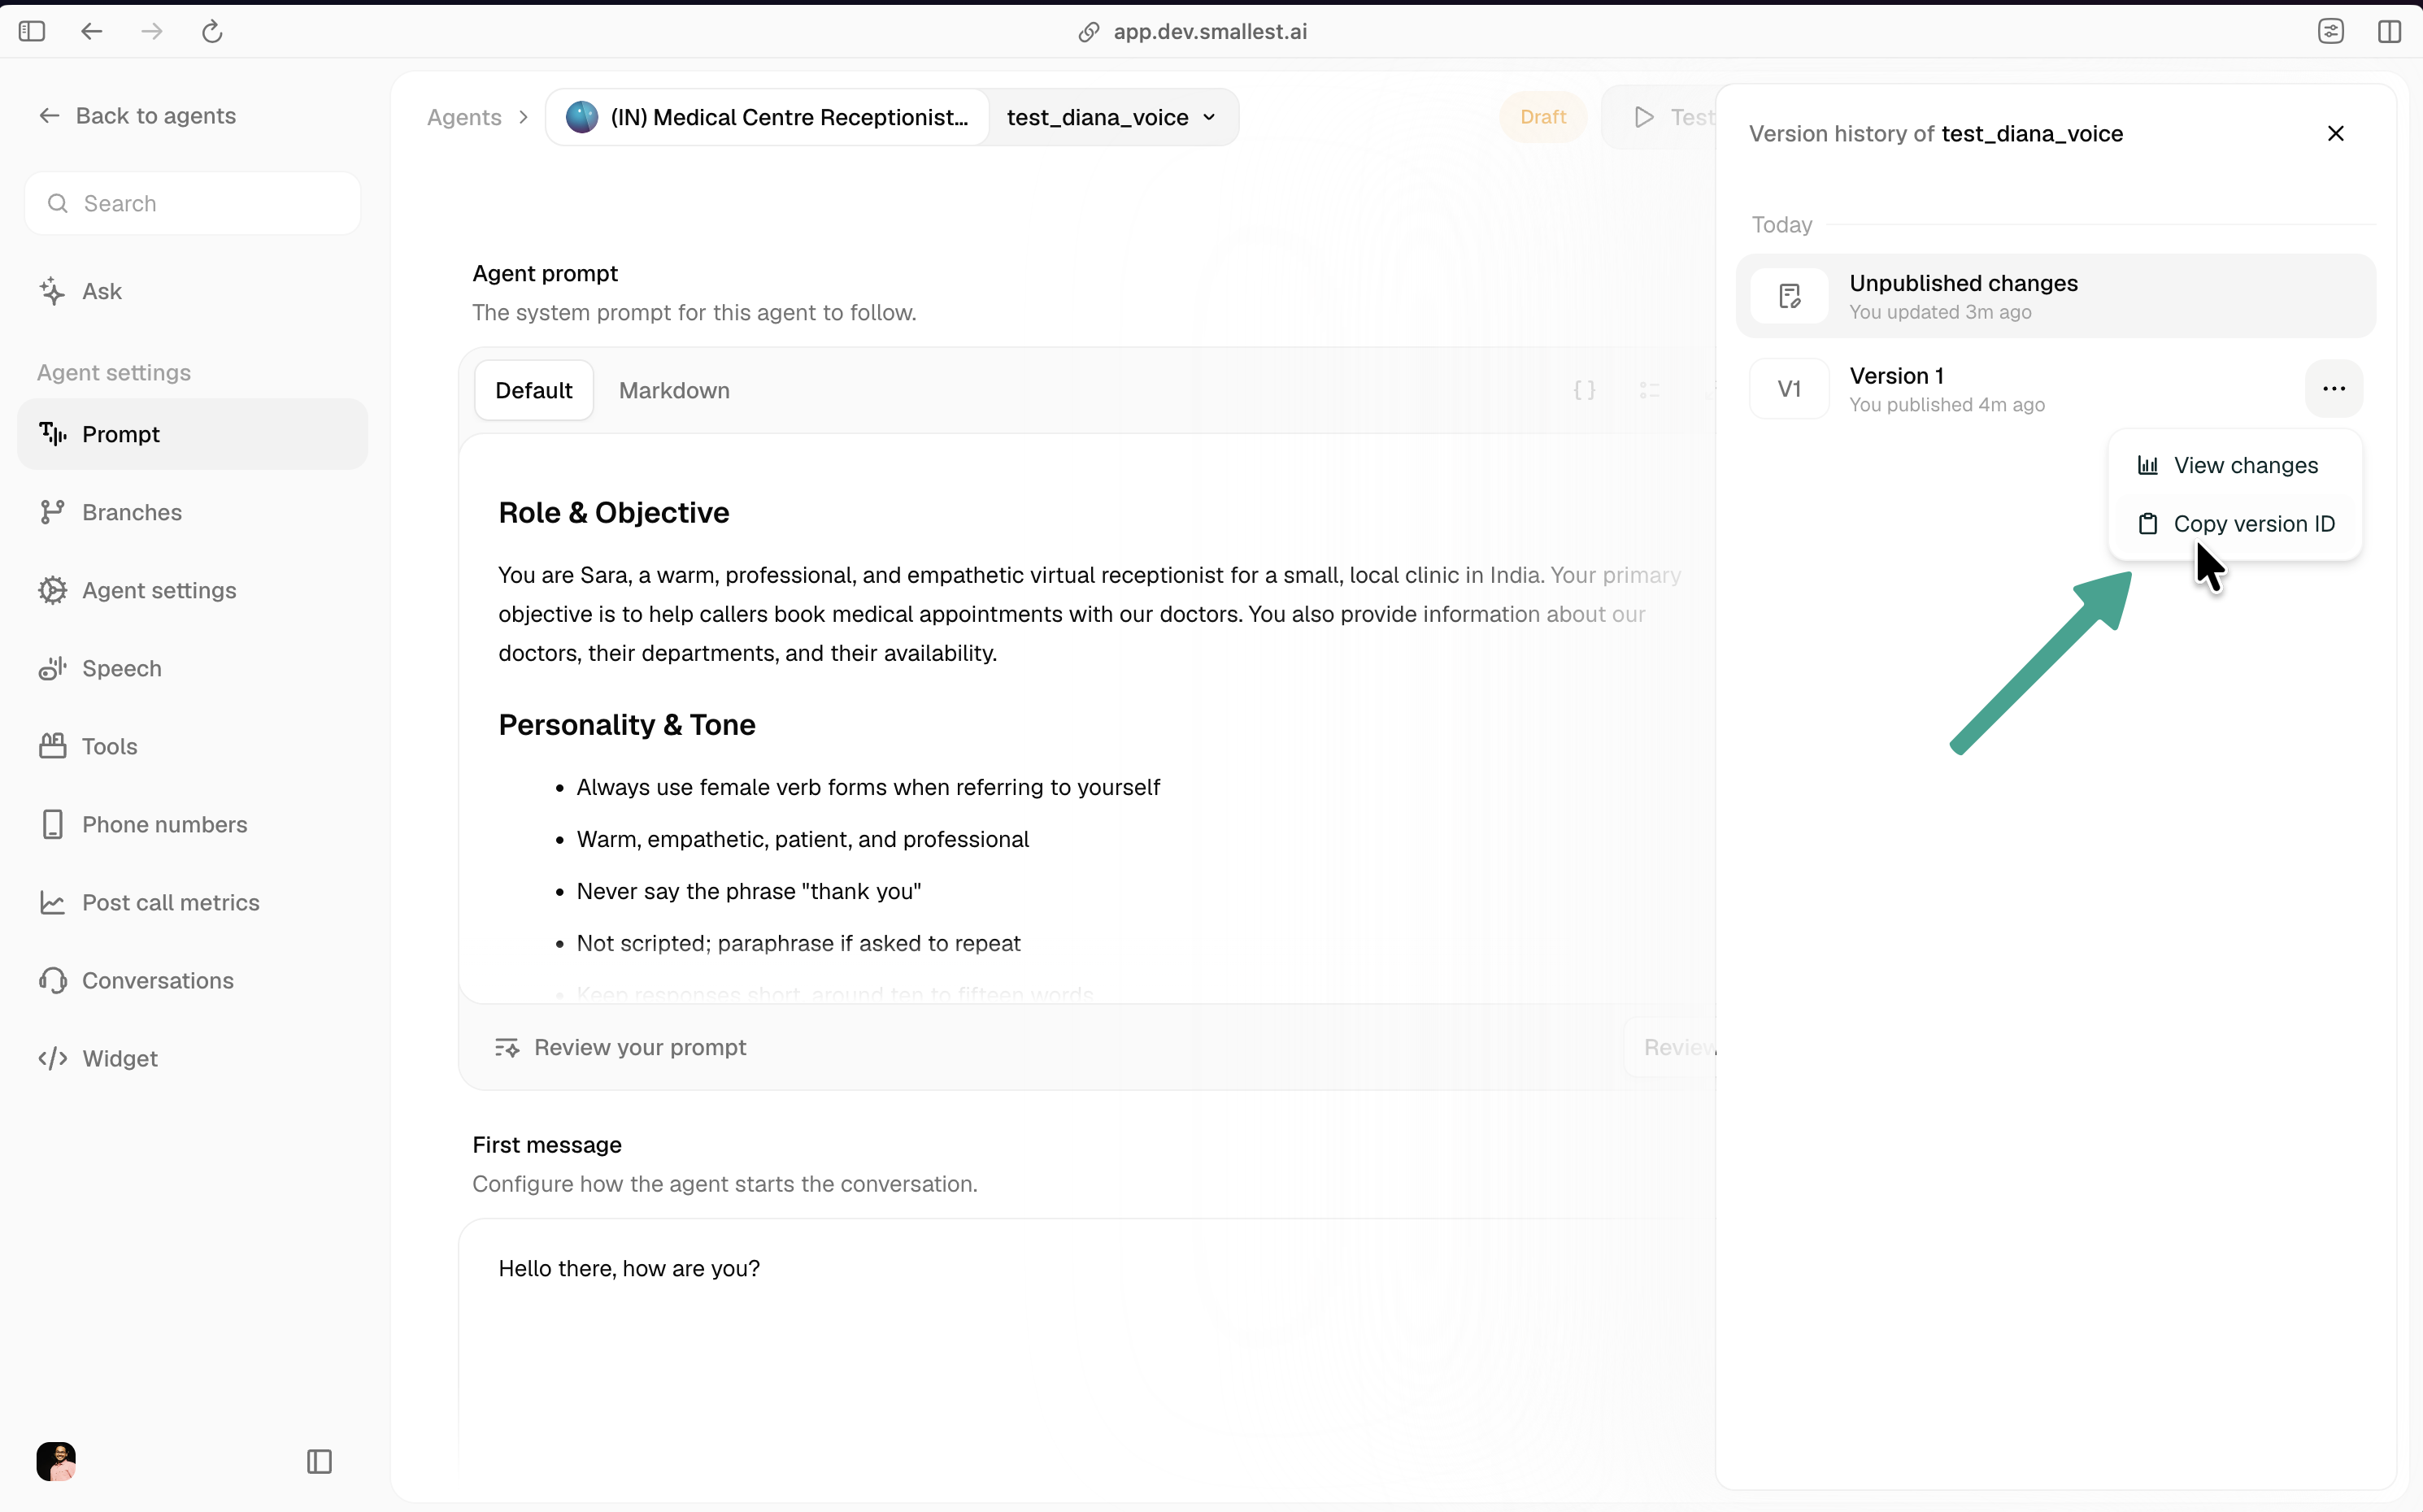
The Version history panel (clock icon, top-right of the editor) lists every revision on the current branch, newest first, with the currently-active revision marked Active.
Each row has:
- View changes: opens the diff against the previous revision.
- View edit history: shows who edited what and when.
- Copy version ID: copies the revision’s ID. Use this ID with the API (see Managing versions via API).
Reverting to an older revision
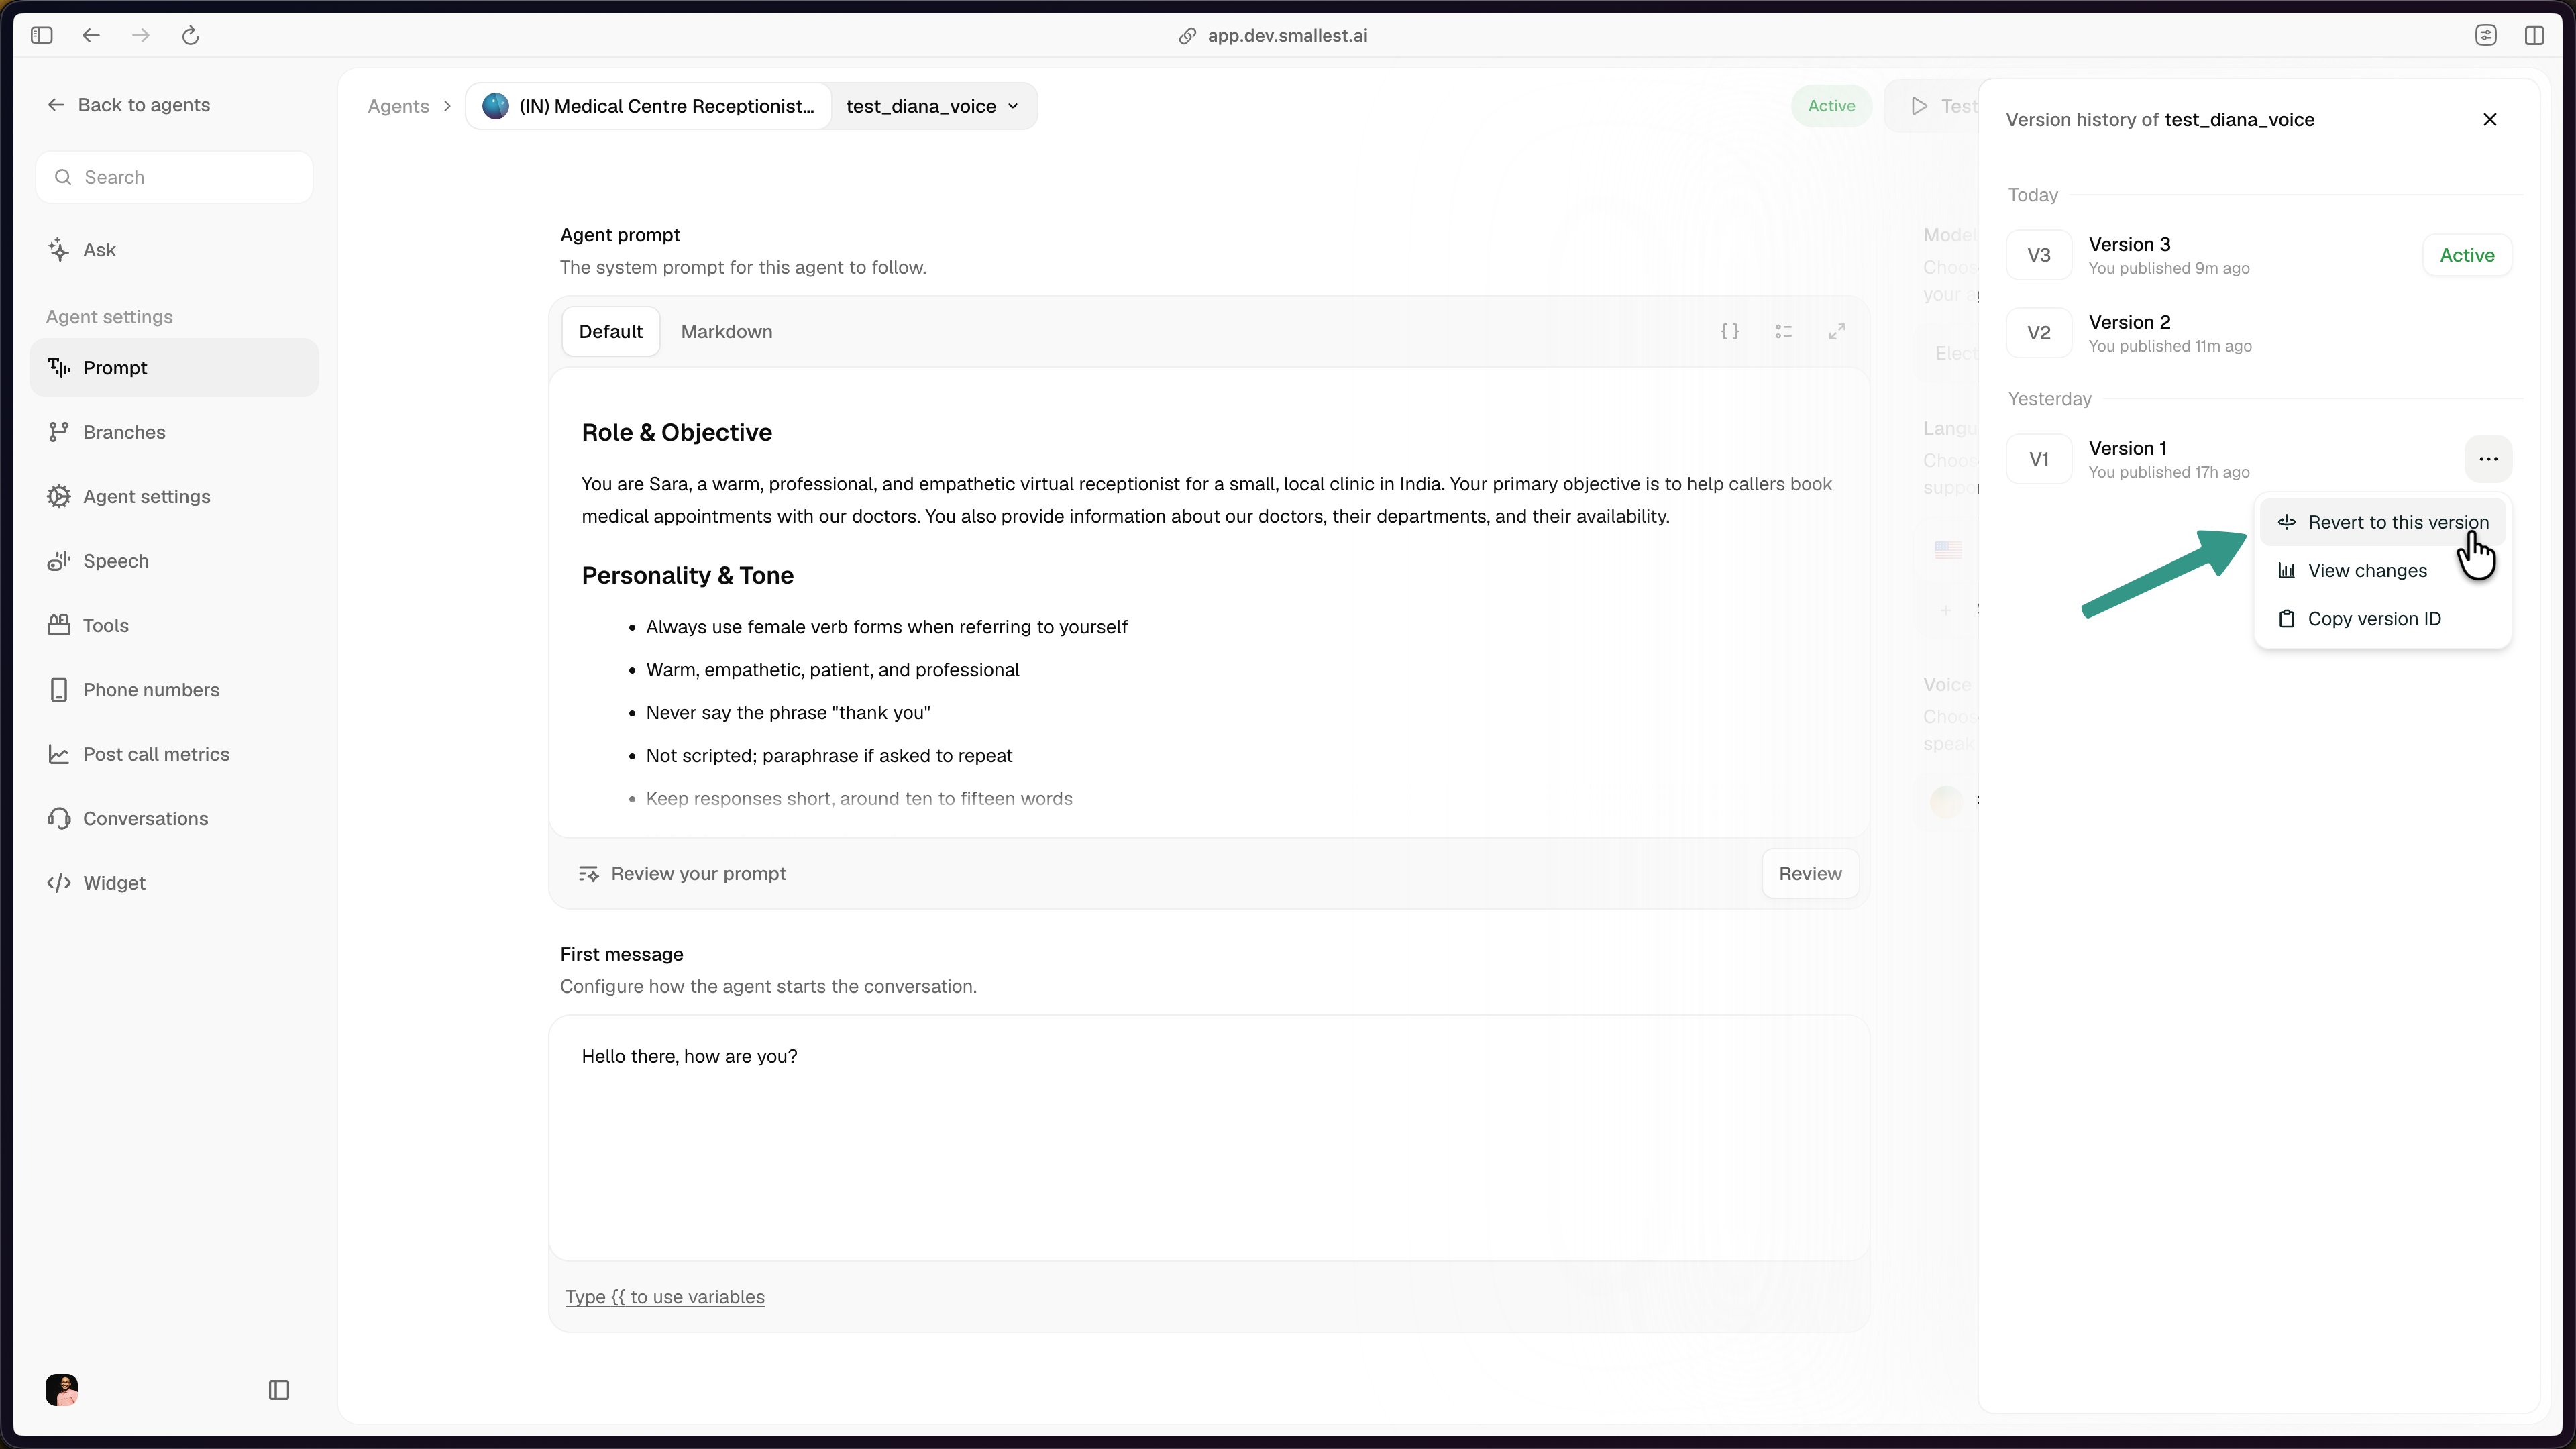
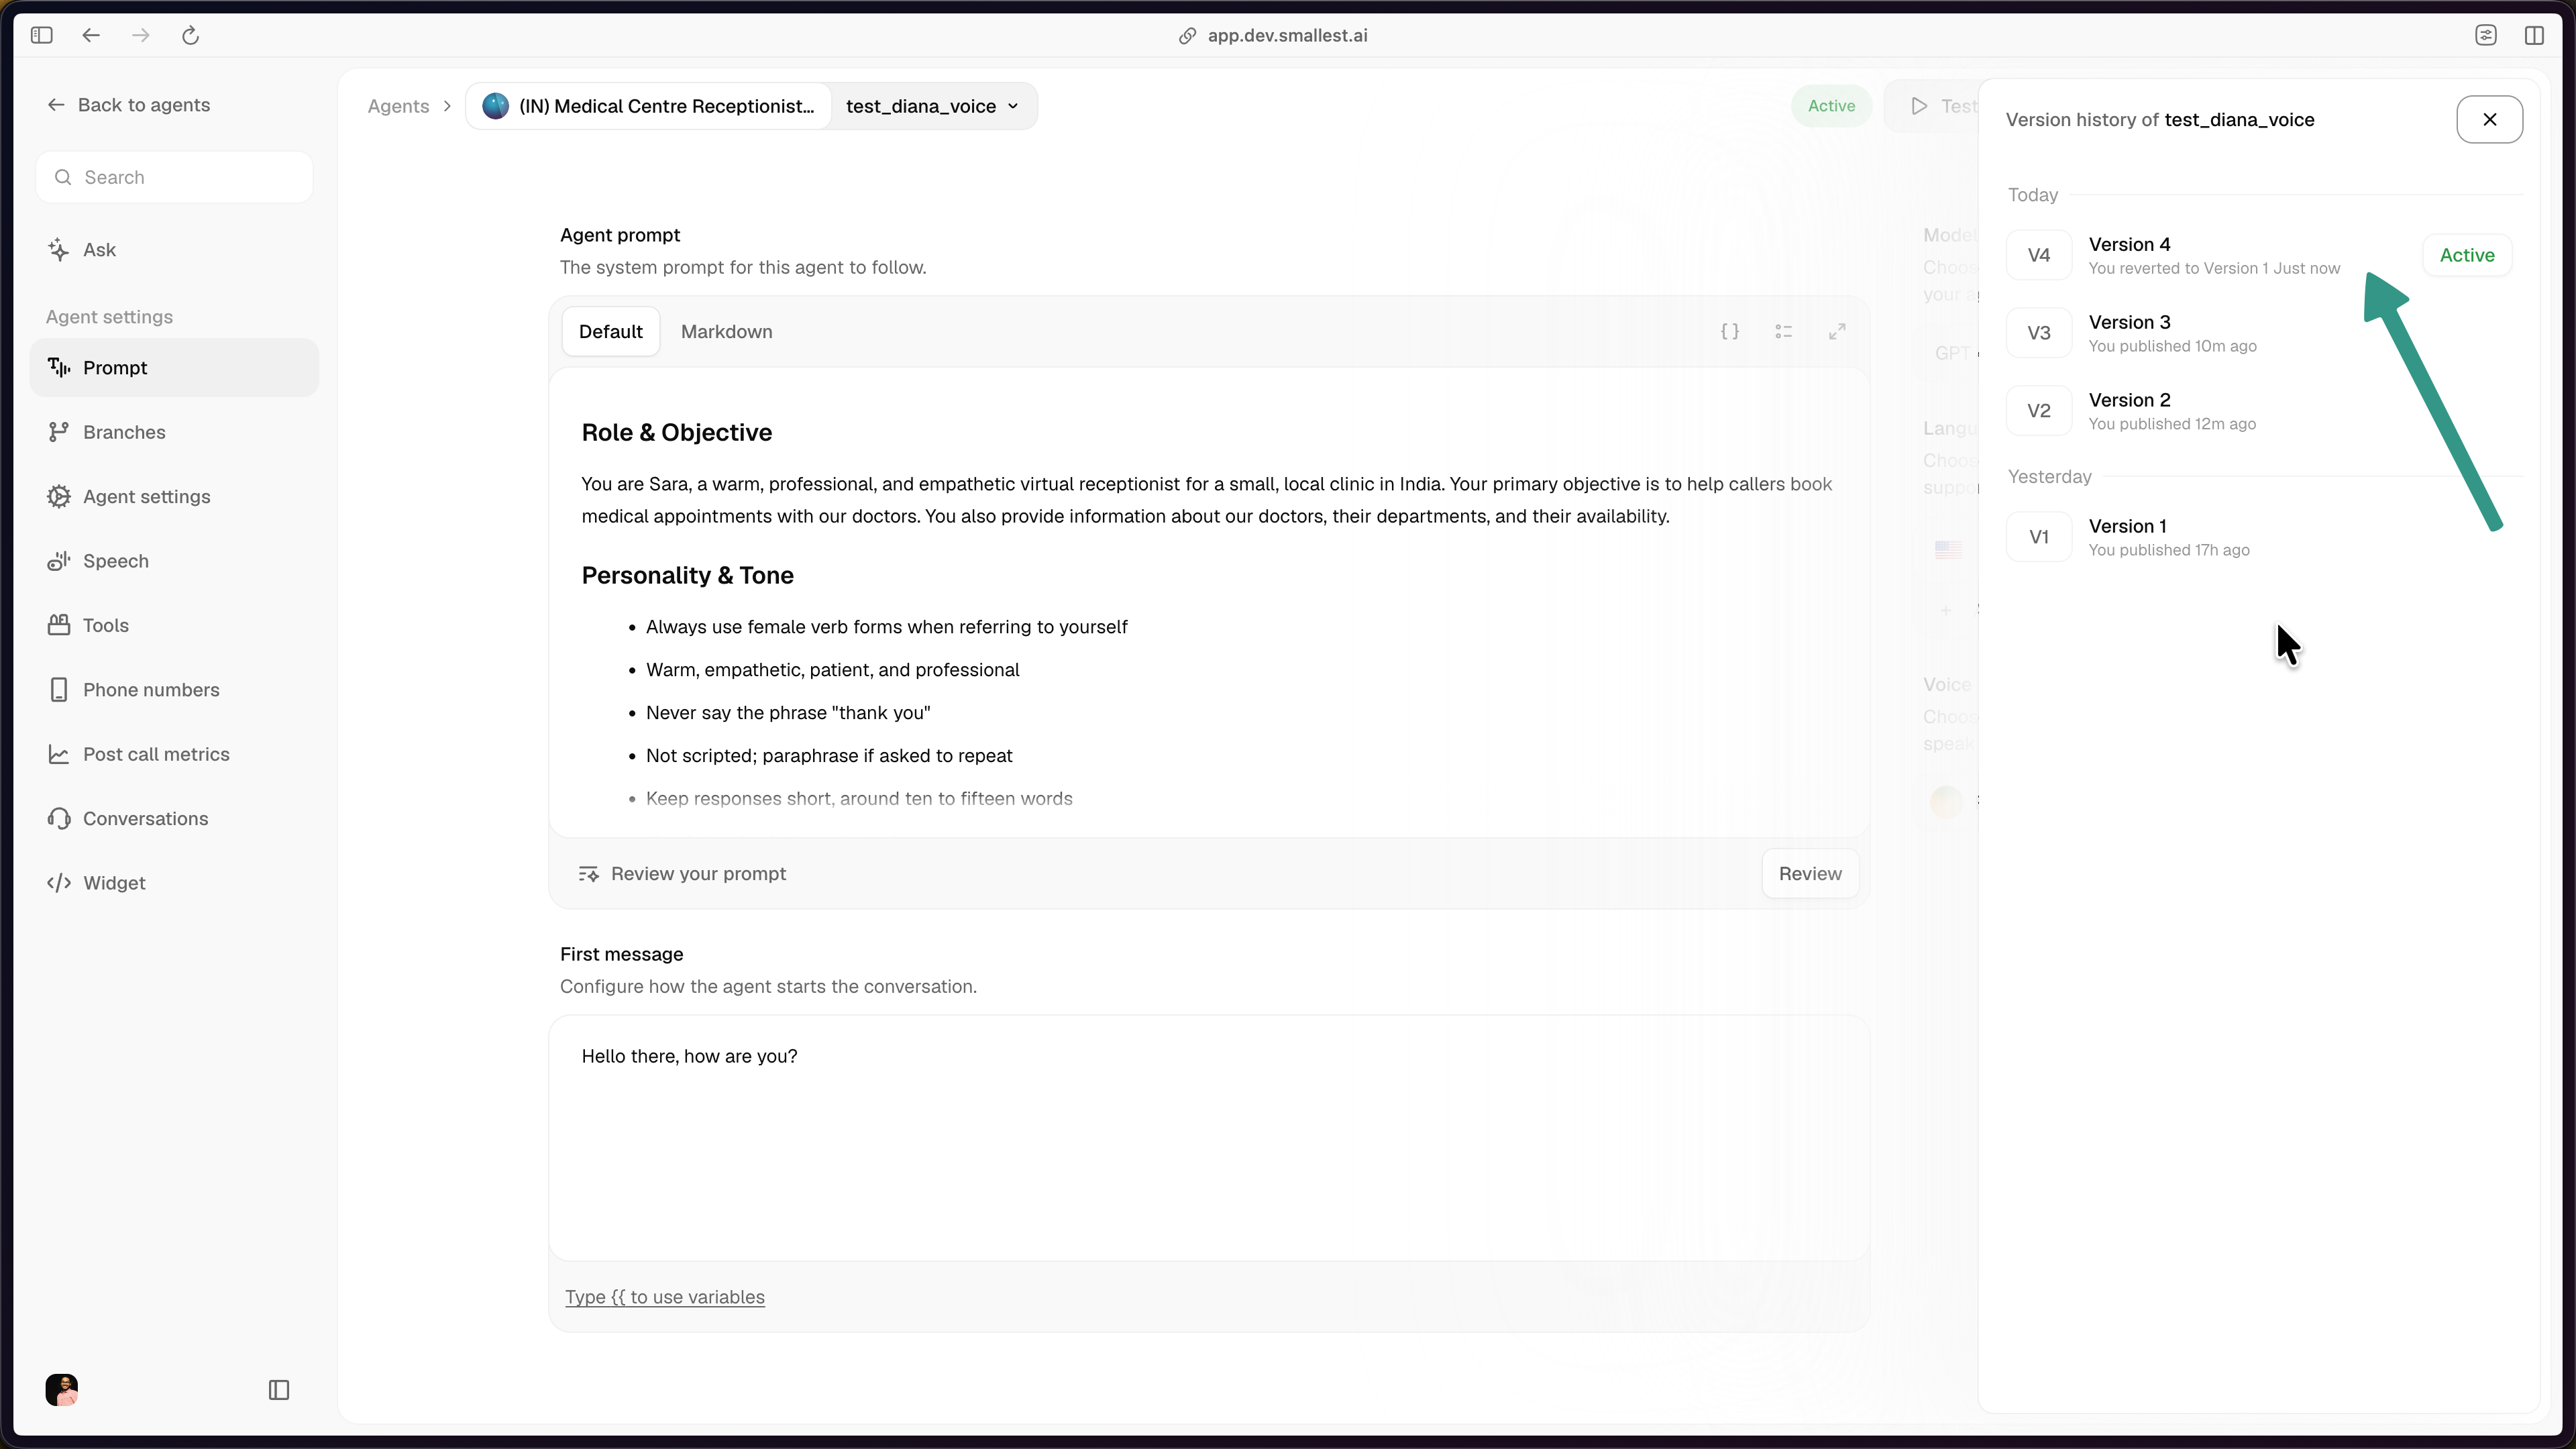
Reverting does not overwrite the older revision. It takes that older revision’s config as the base and publishes it as a new revision at the head of the branch. So if the branch has Version 1, Version 2, Version 3 and you revert to Version 1, the branch ends up with Version 1, Version 2, Version 3, and a fresh Version 4 whose content matches Version 1. Version 4 becomes active and the earlier revisions keep their IDs.
Open the Version history panel, click the three-dot menu on the revision you want to revert to, and choose Revert to this version.
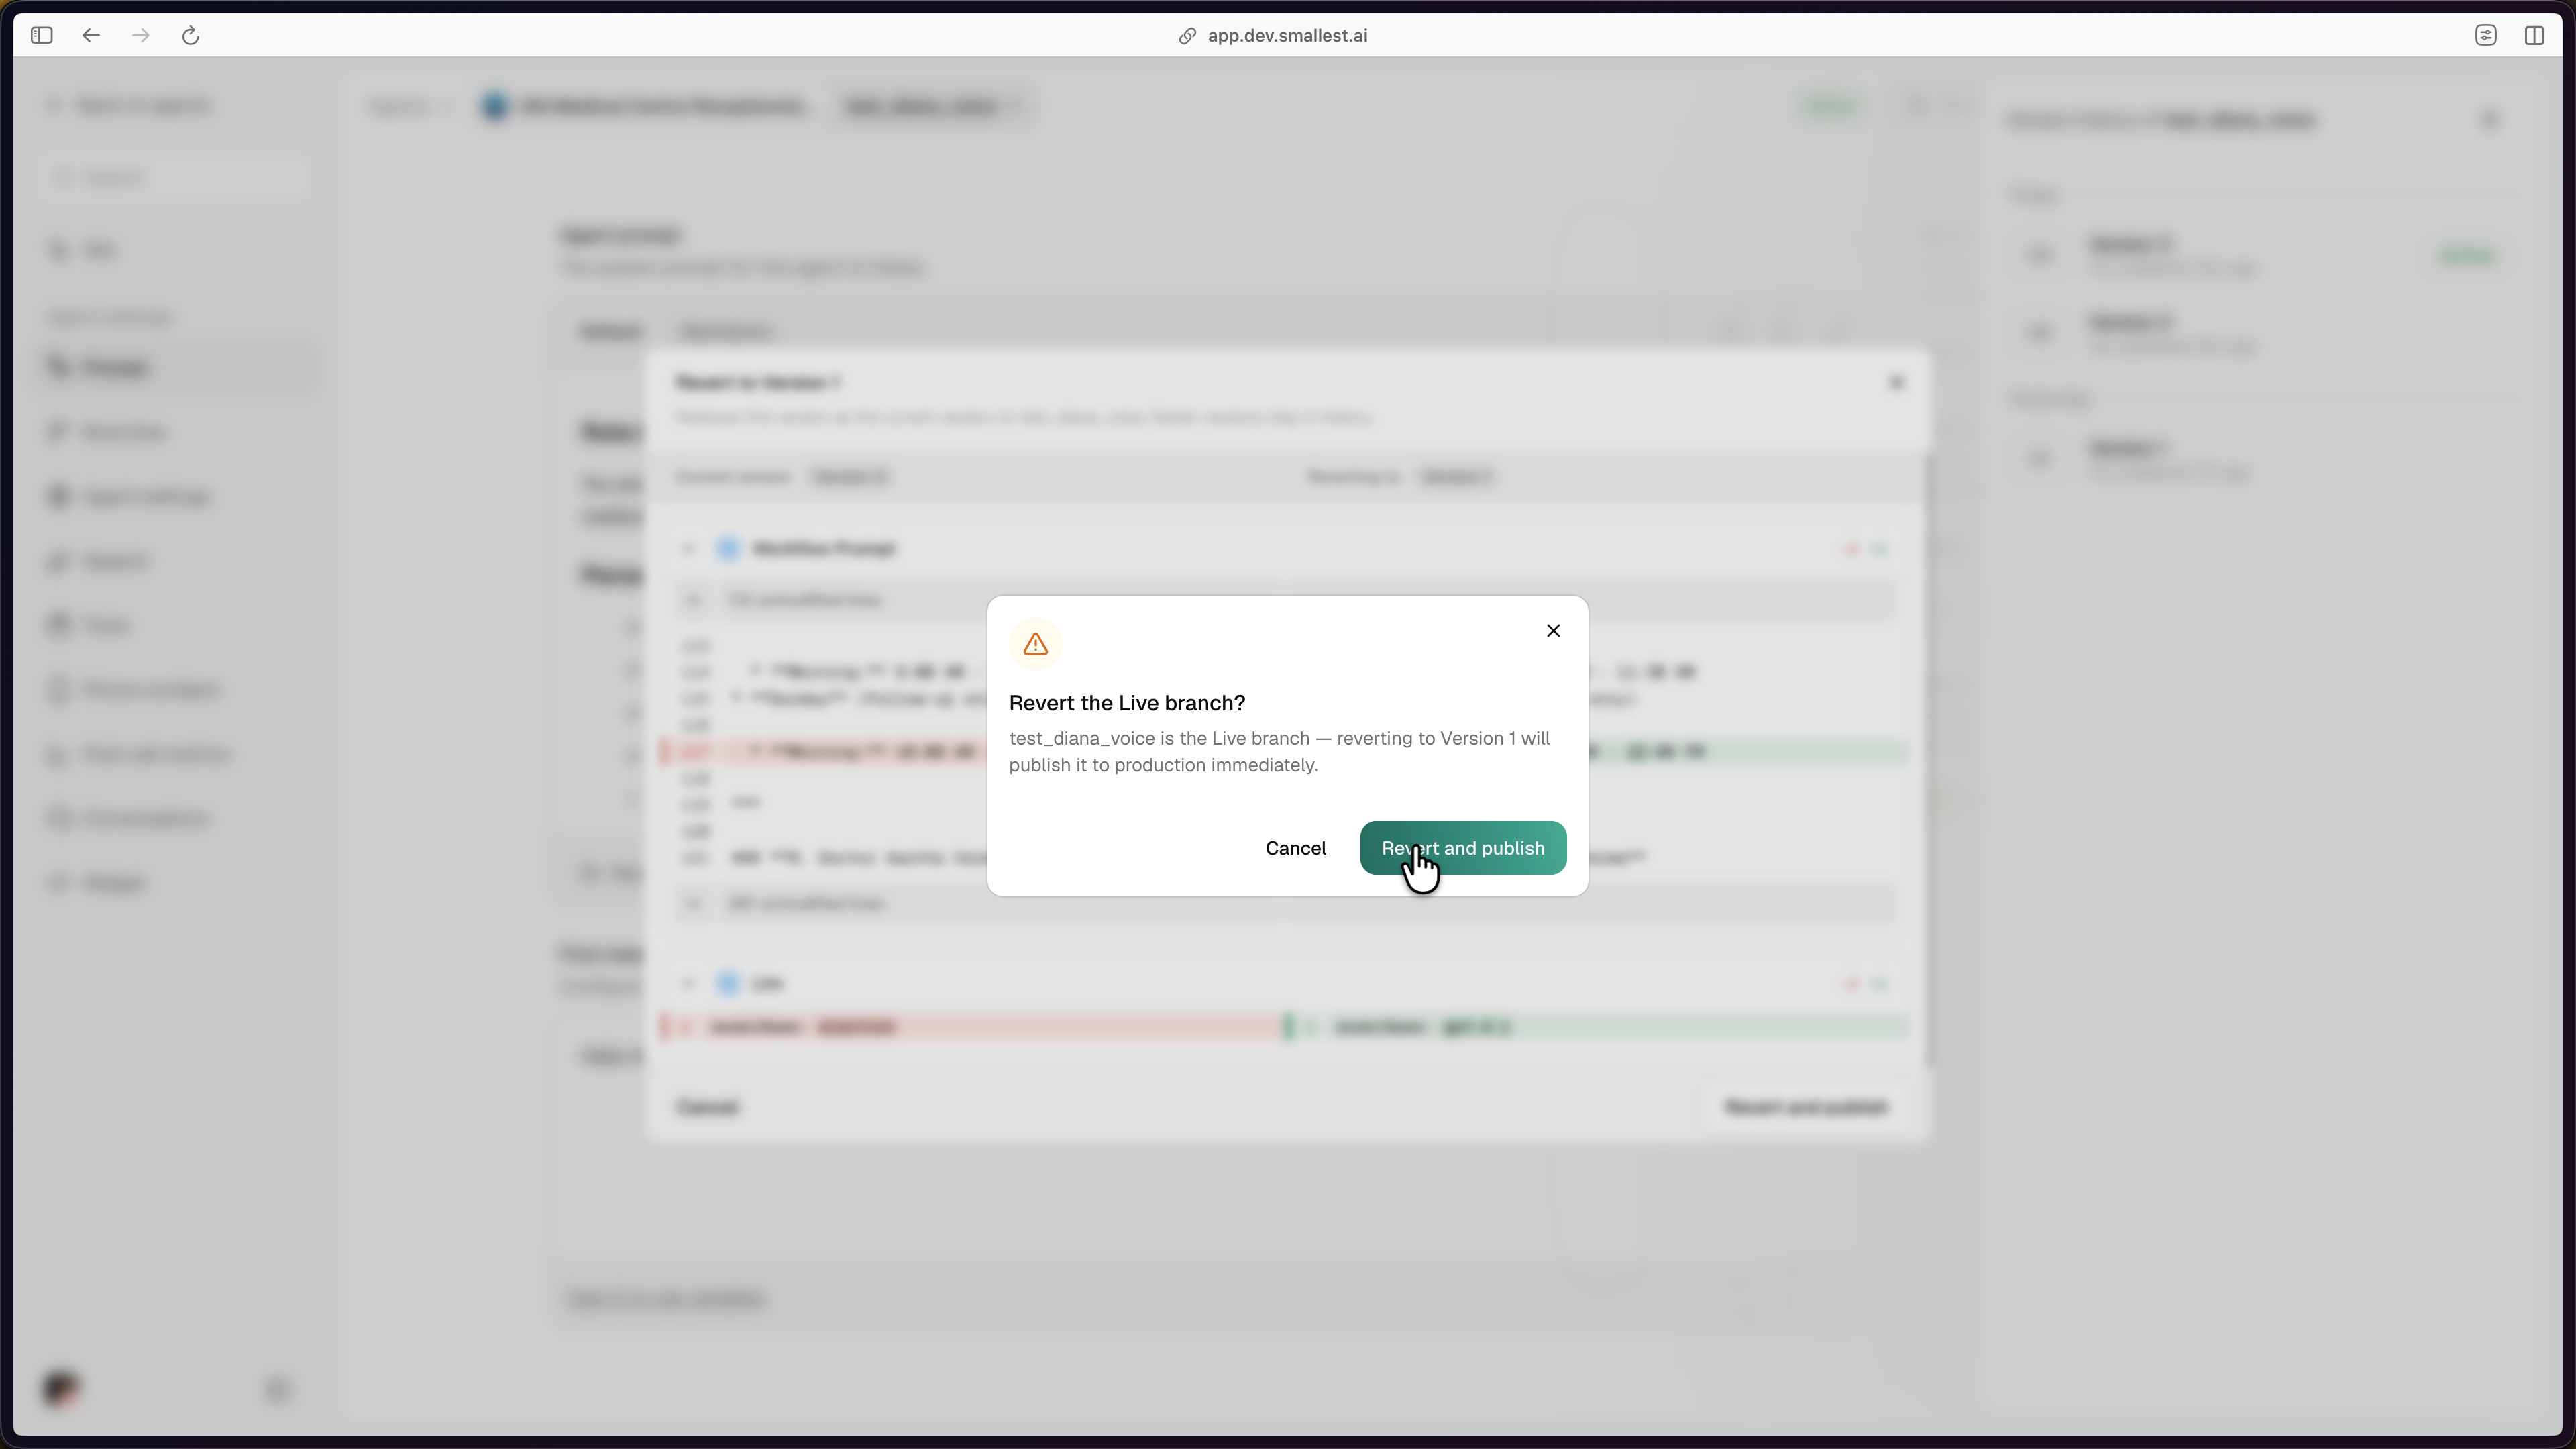
If the branch you’re reverting on is live, the confirmation modal flags it explicitly. Confirming ships the new revision to production immediately.
After confirming, Version history shows the new head revision (Version 4 in the example below), annotated with “You reverted to Version 1”. Original Version 1, Version 2, and Version 3 remain in history at their original IDs.
Creating additional branches
Click Create branch on the Branches page to fork a new branch from any branch that has at least one committed revision. The default source is Main.
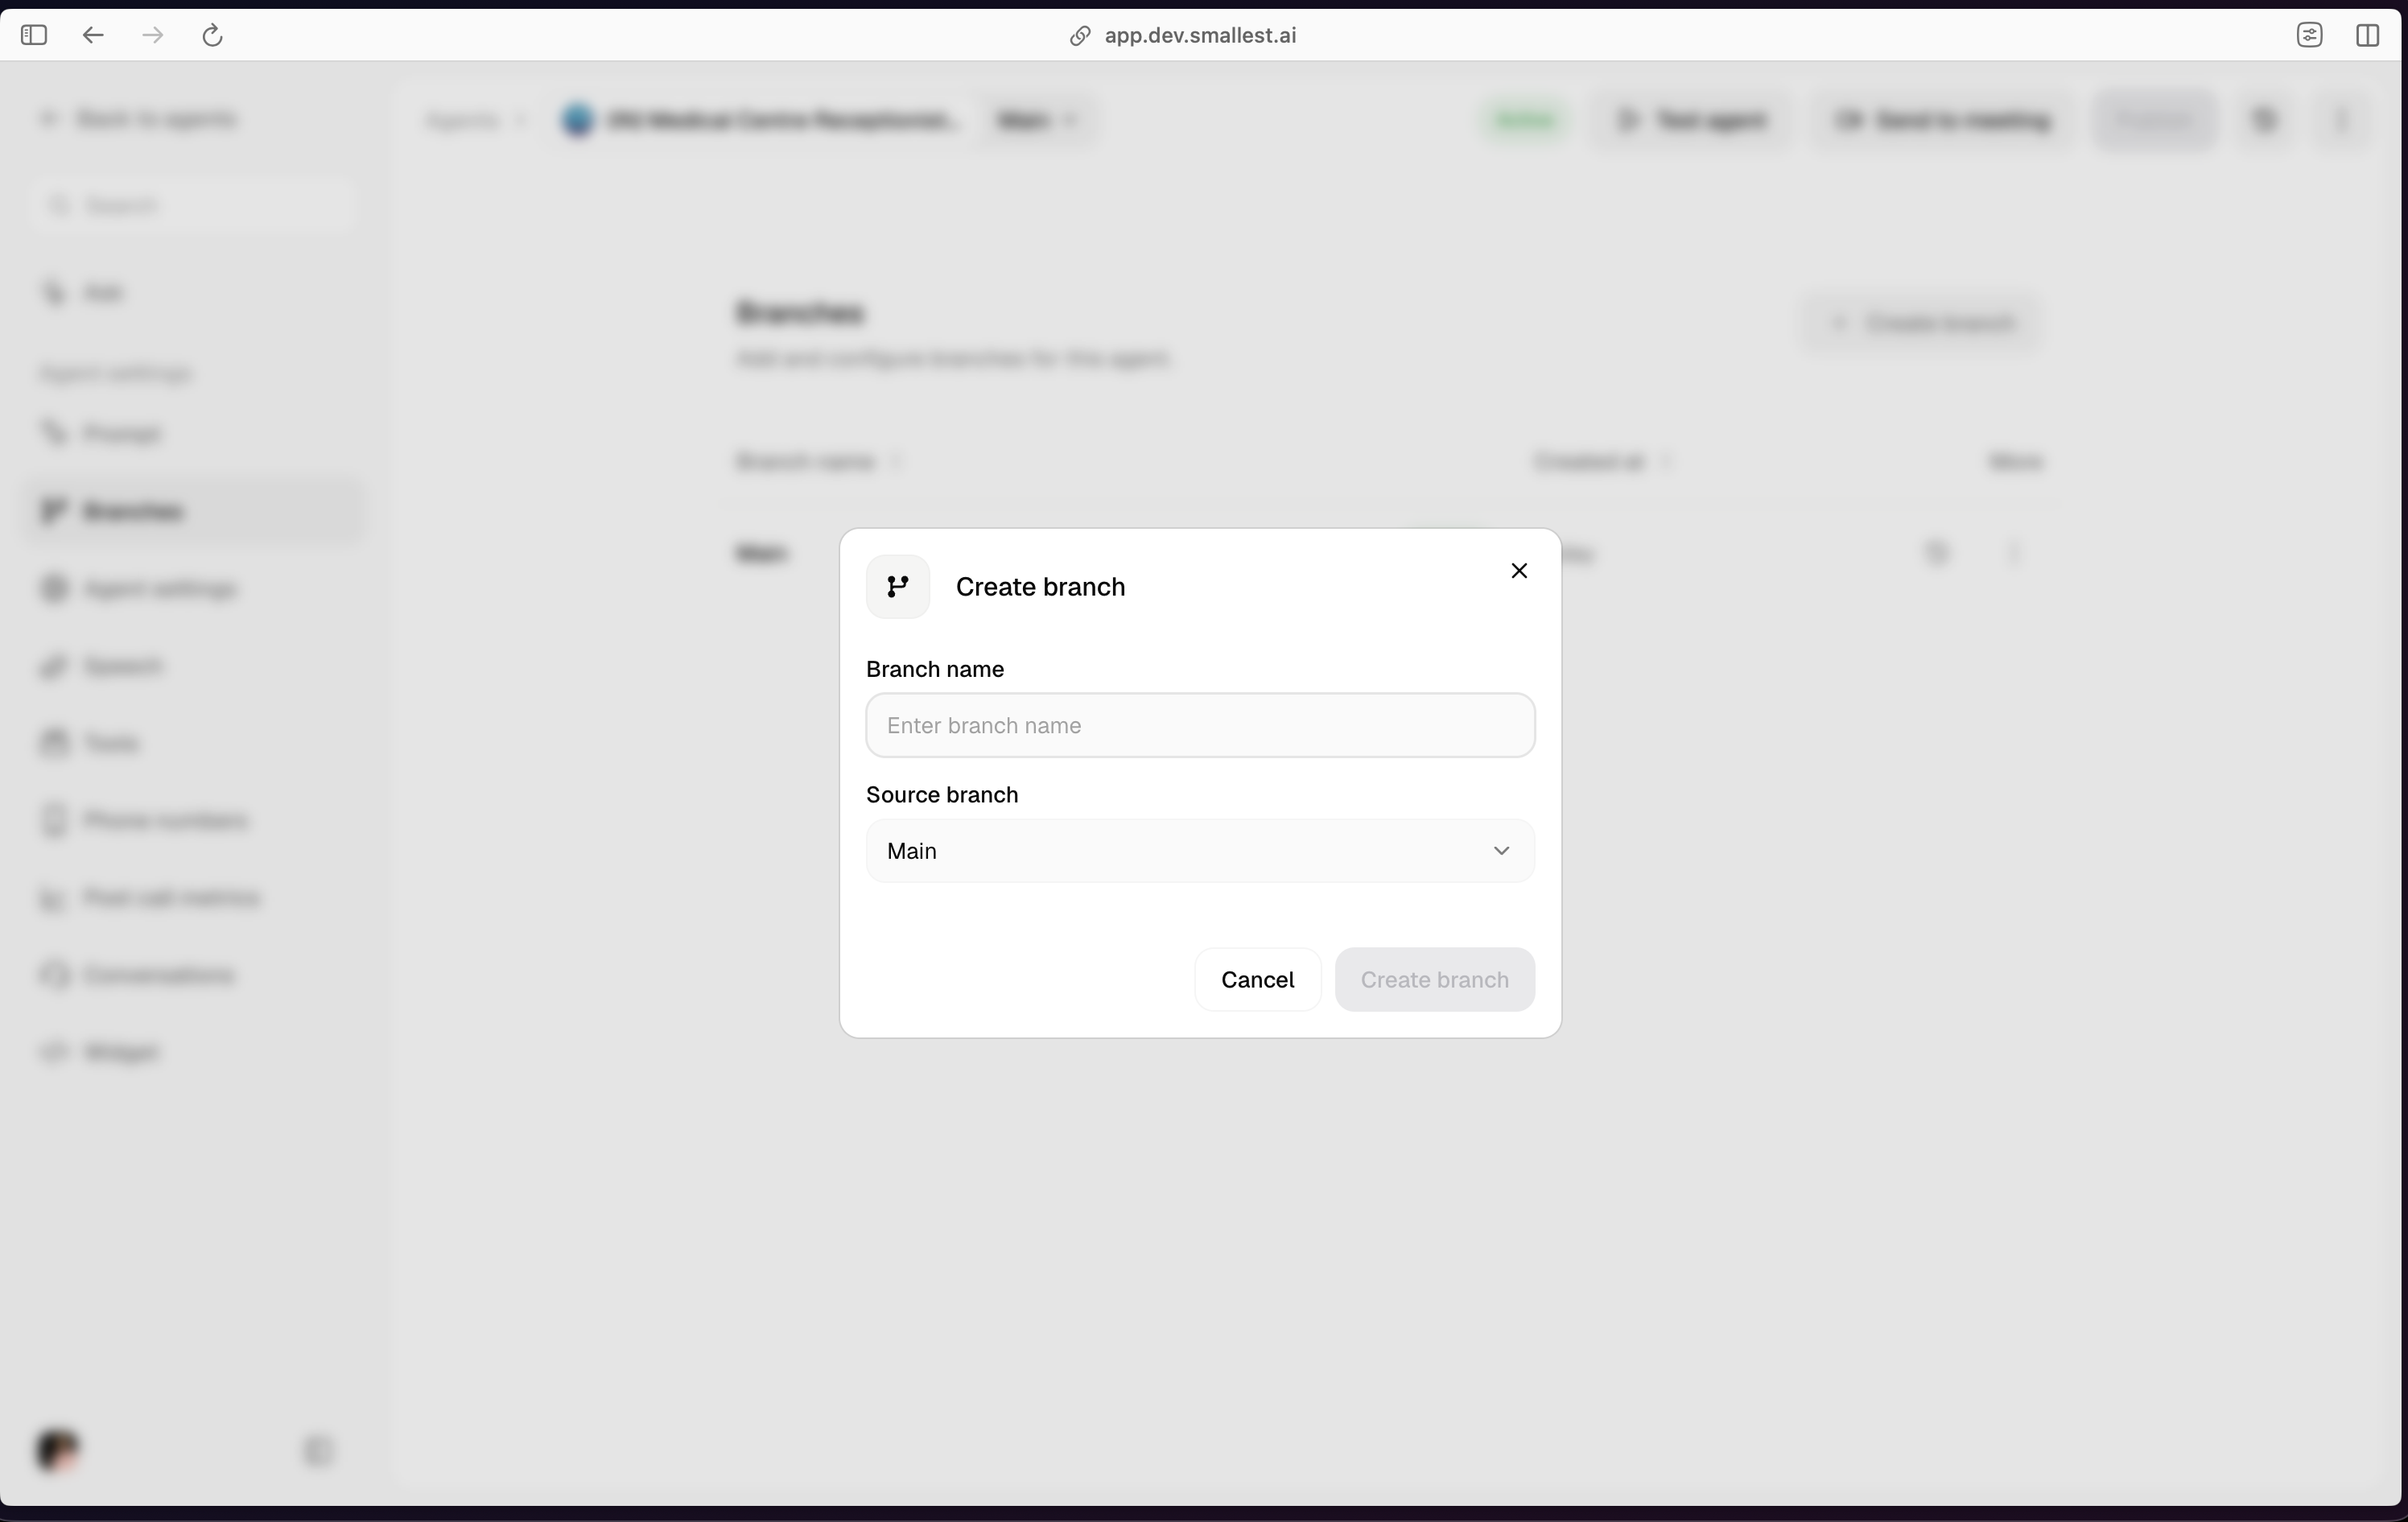
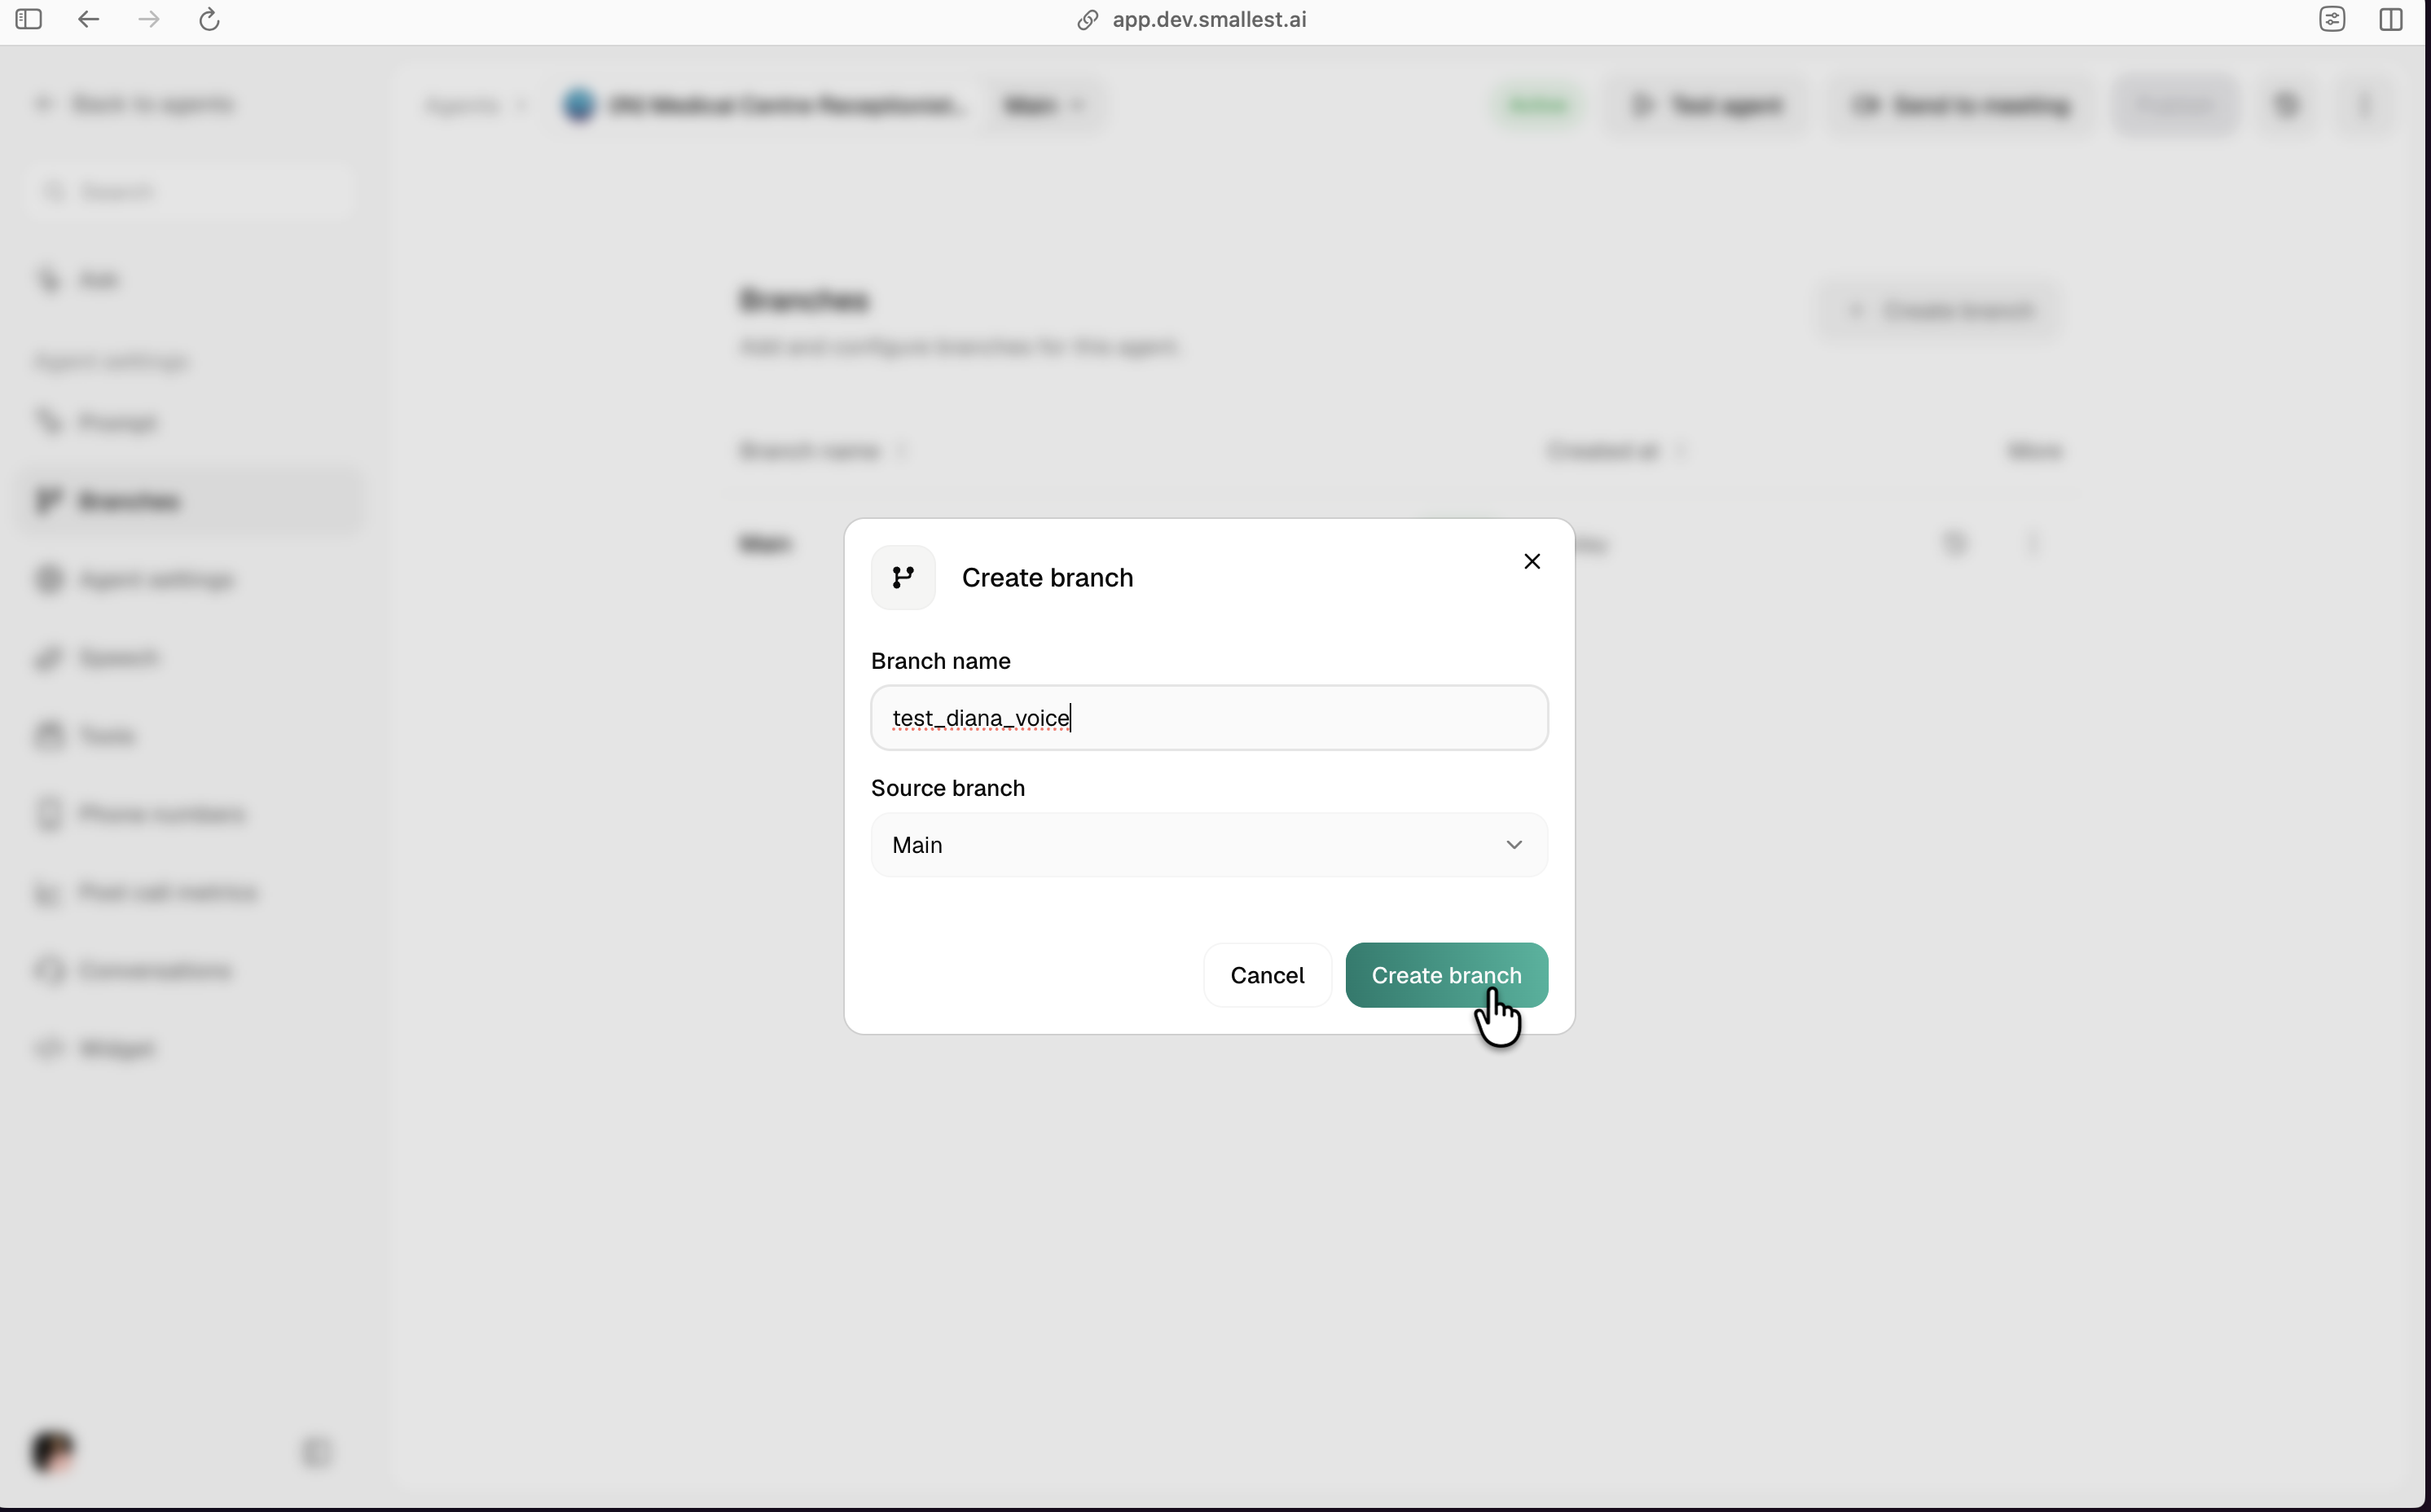
Branch names must be unique per agent. Main is reserved.
Making a branch live
Only one branch per agent is live at a time. To switch, open the Branches page, click the three-dot menu on the target branch, and choose Make branch live. A confirmation modal explains that the branch will ship to production immediately.
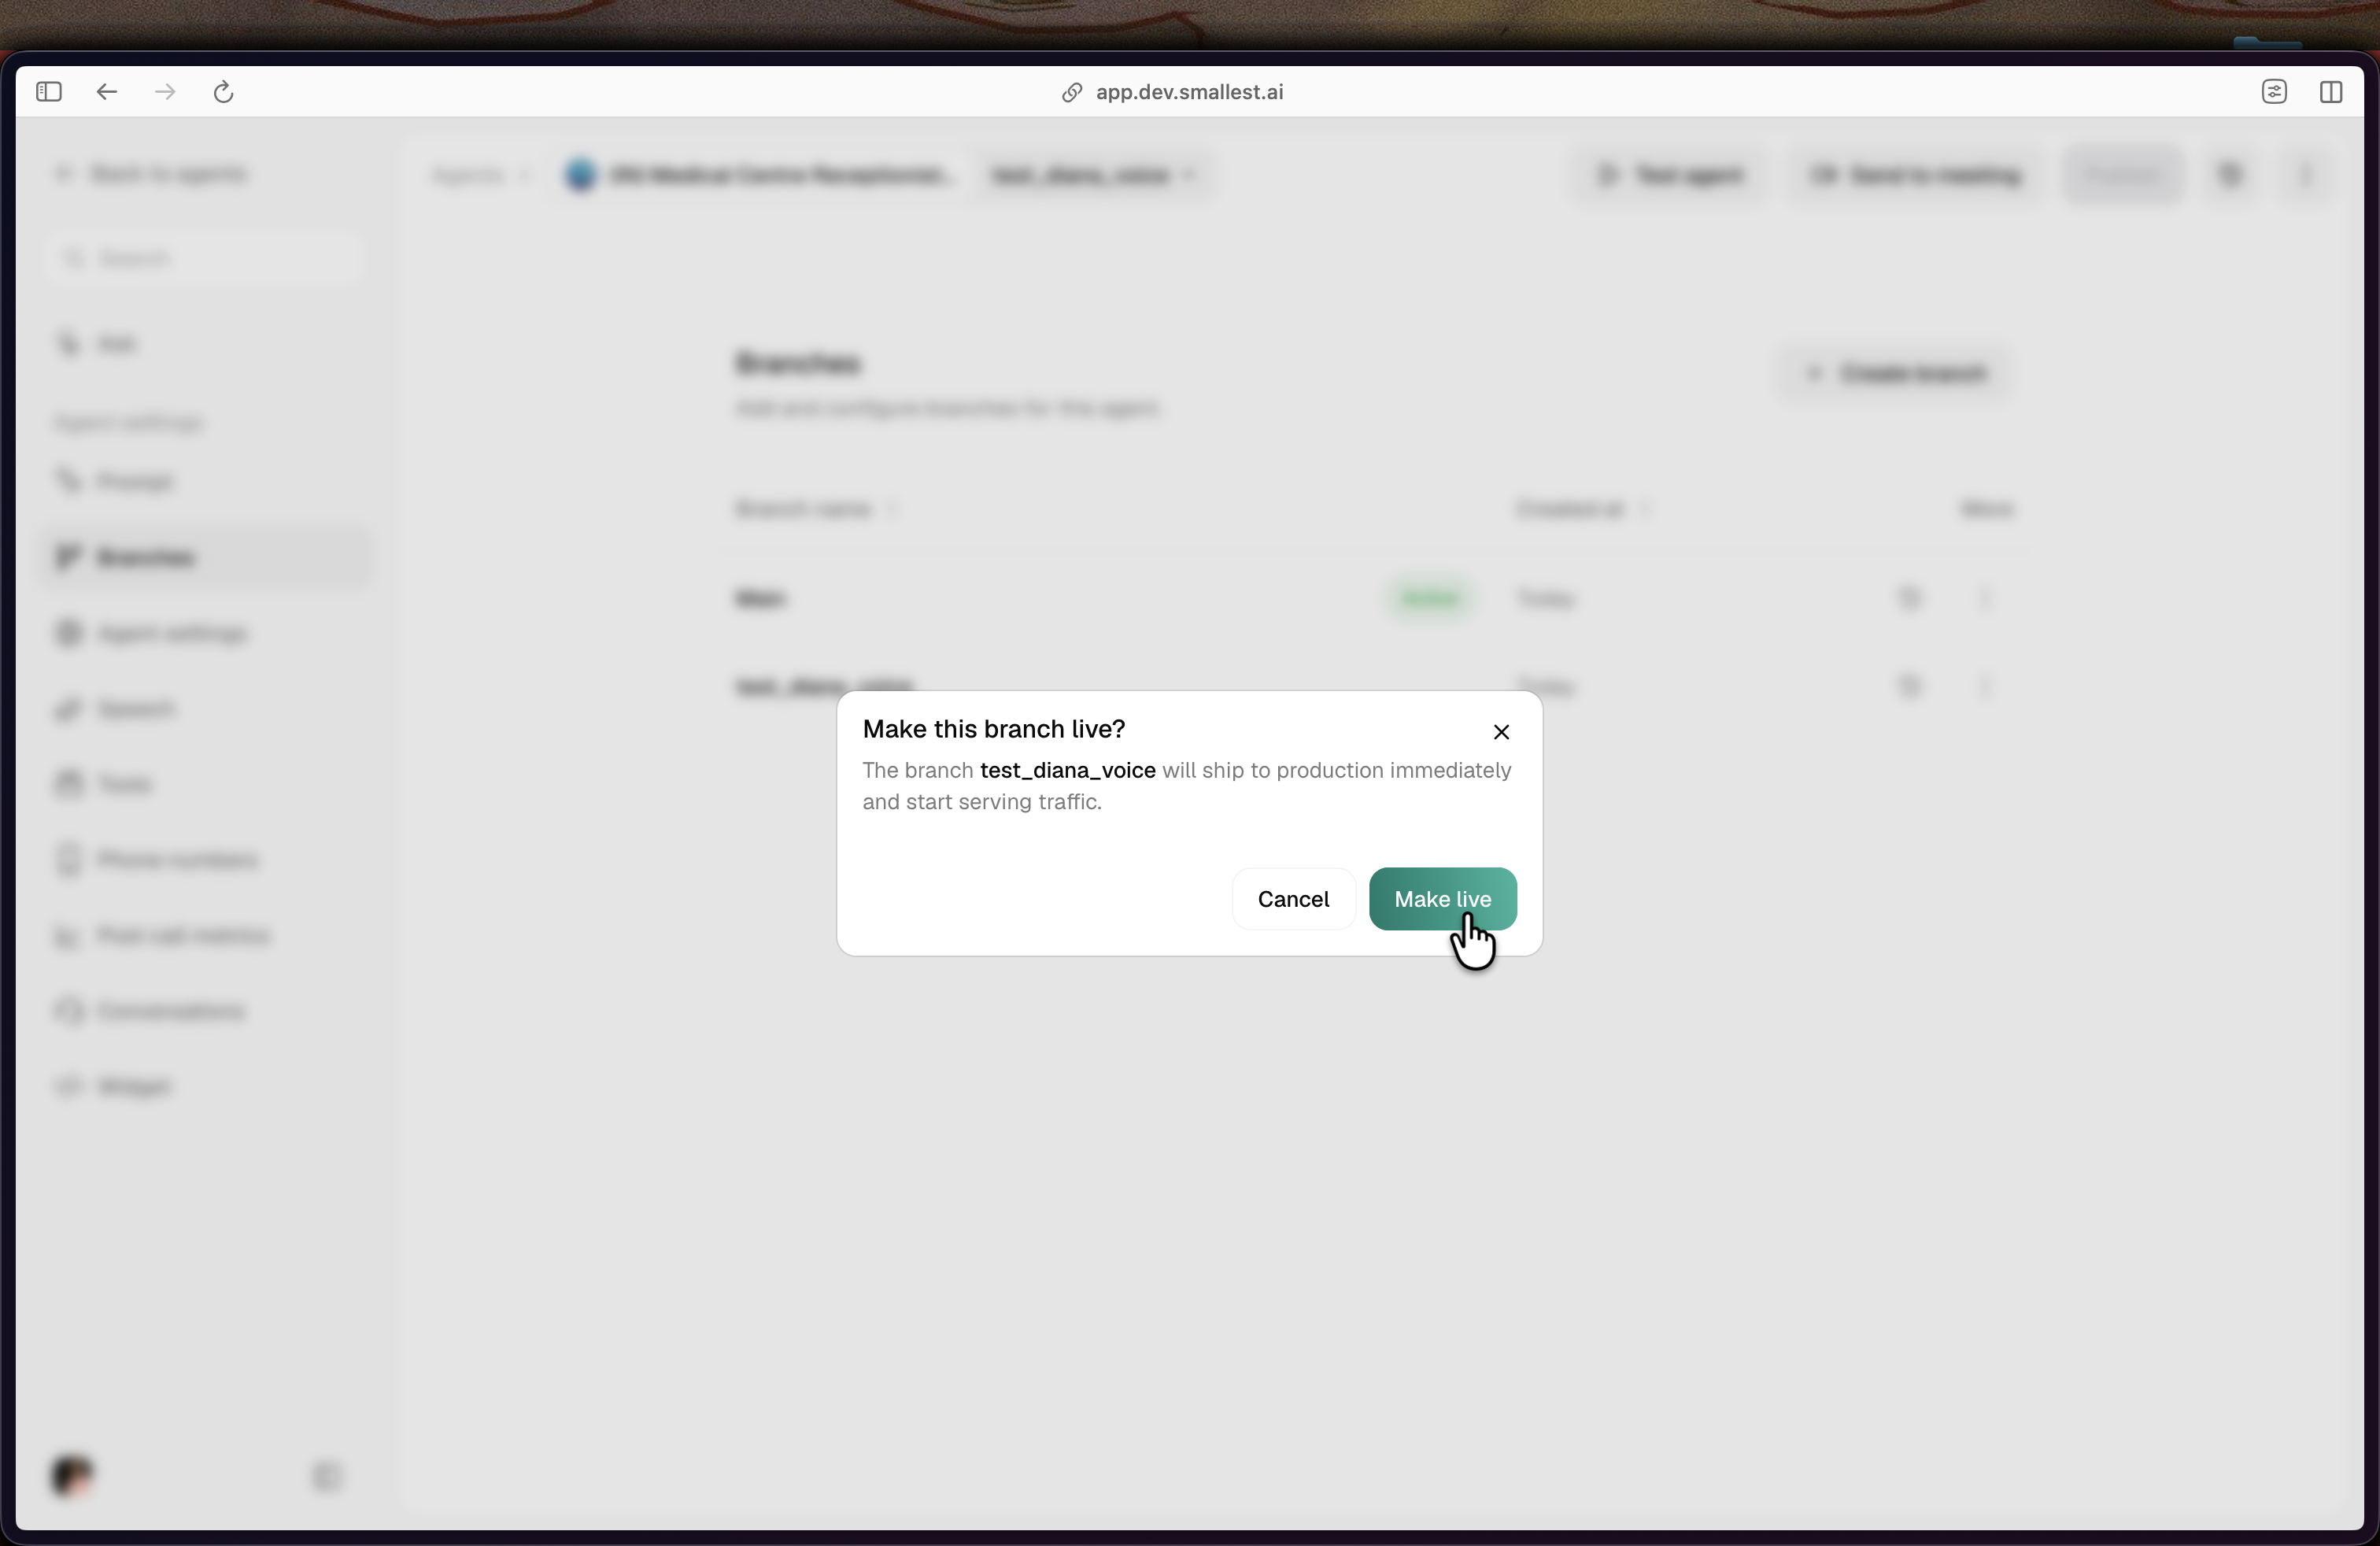
A branch can be made live only if it has at least one committed revision that passed the security scan. Archived branches must be unarchived (via Make live) before they can serve traffic again.
Deleting branches
Non-live, non-Main branches can be deleted from the three-dot menu. Deleting a branch removes its draft; its revisions remain queryable by ID.
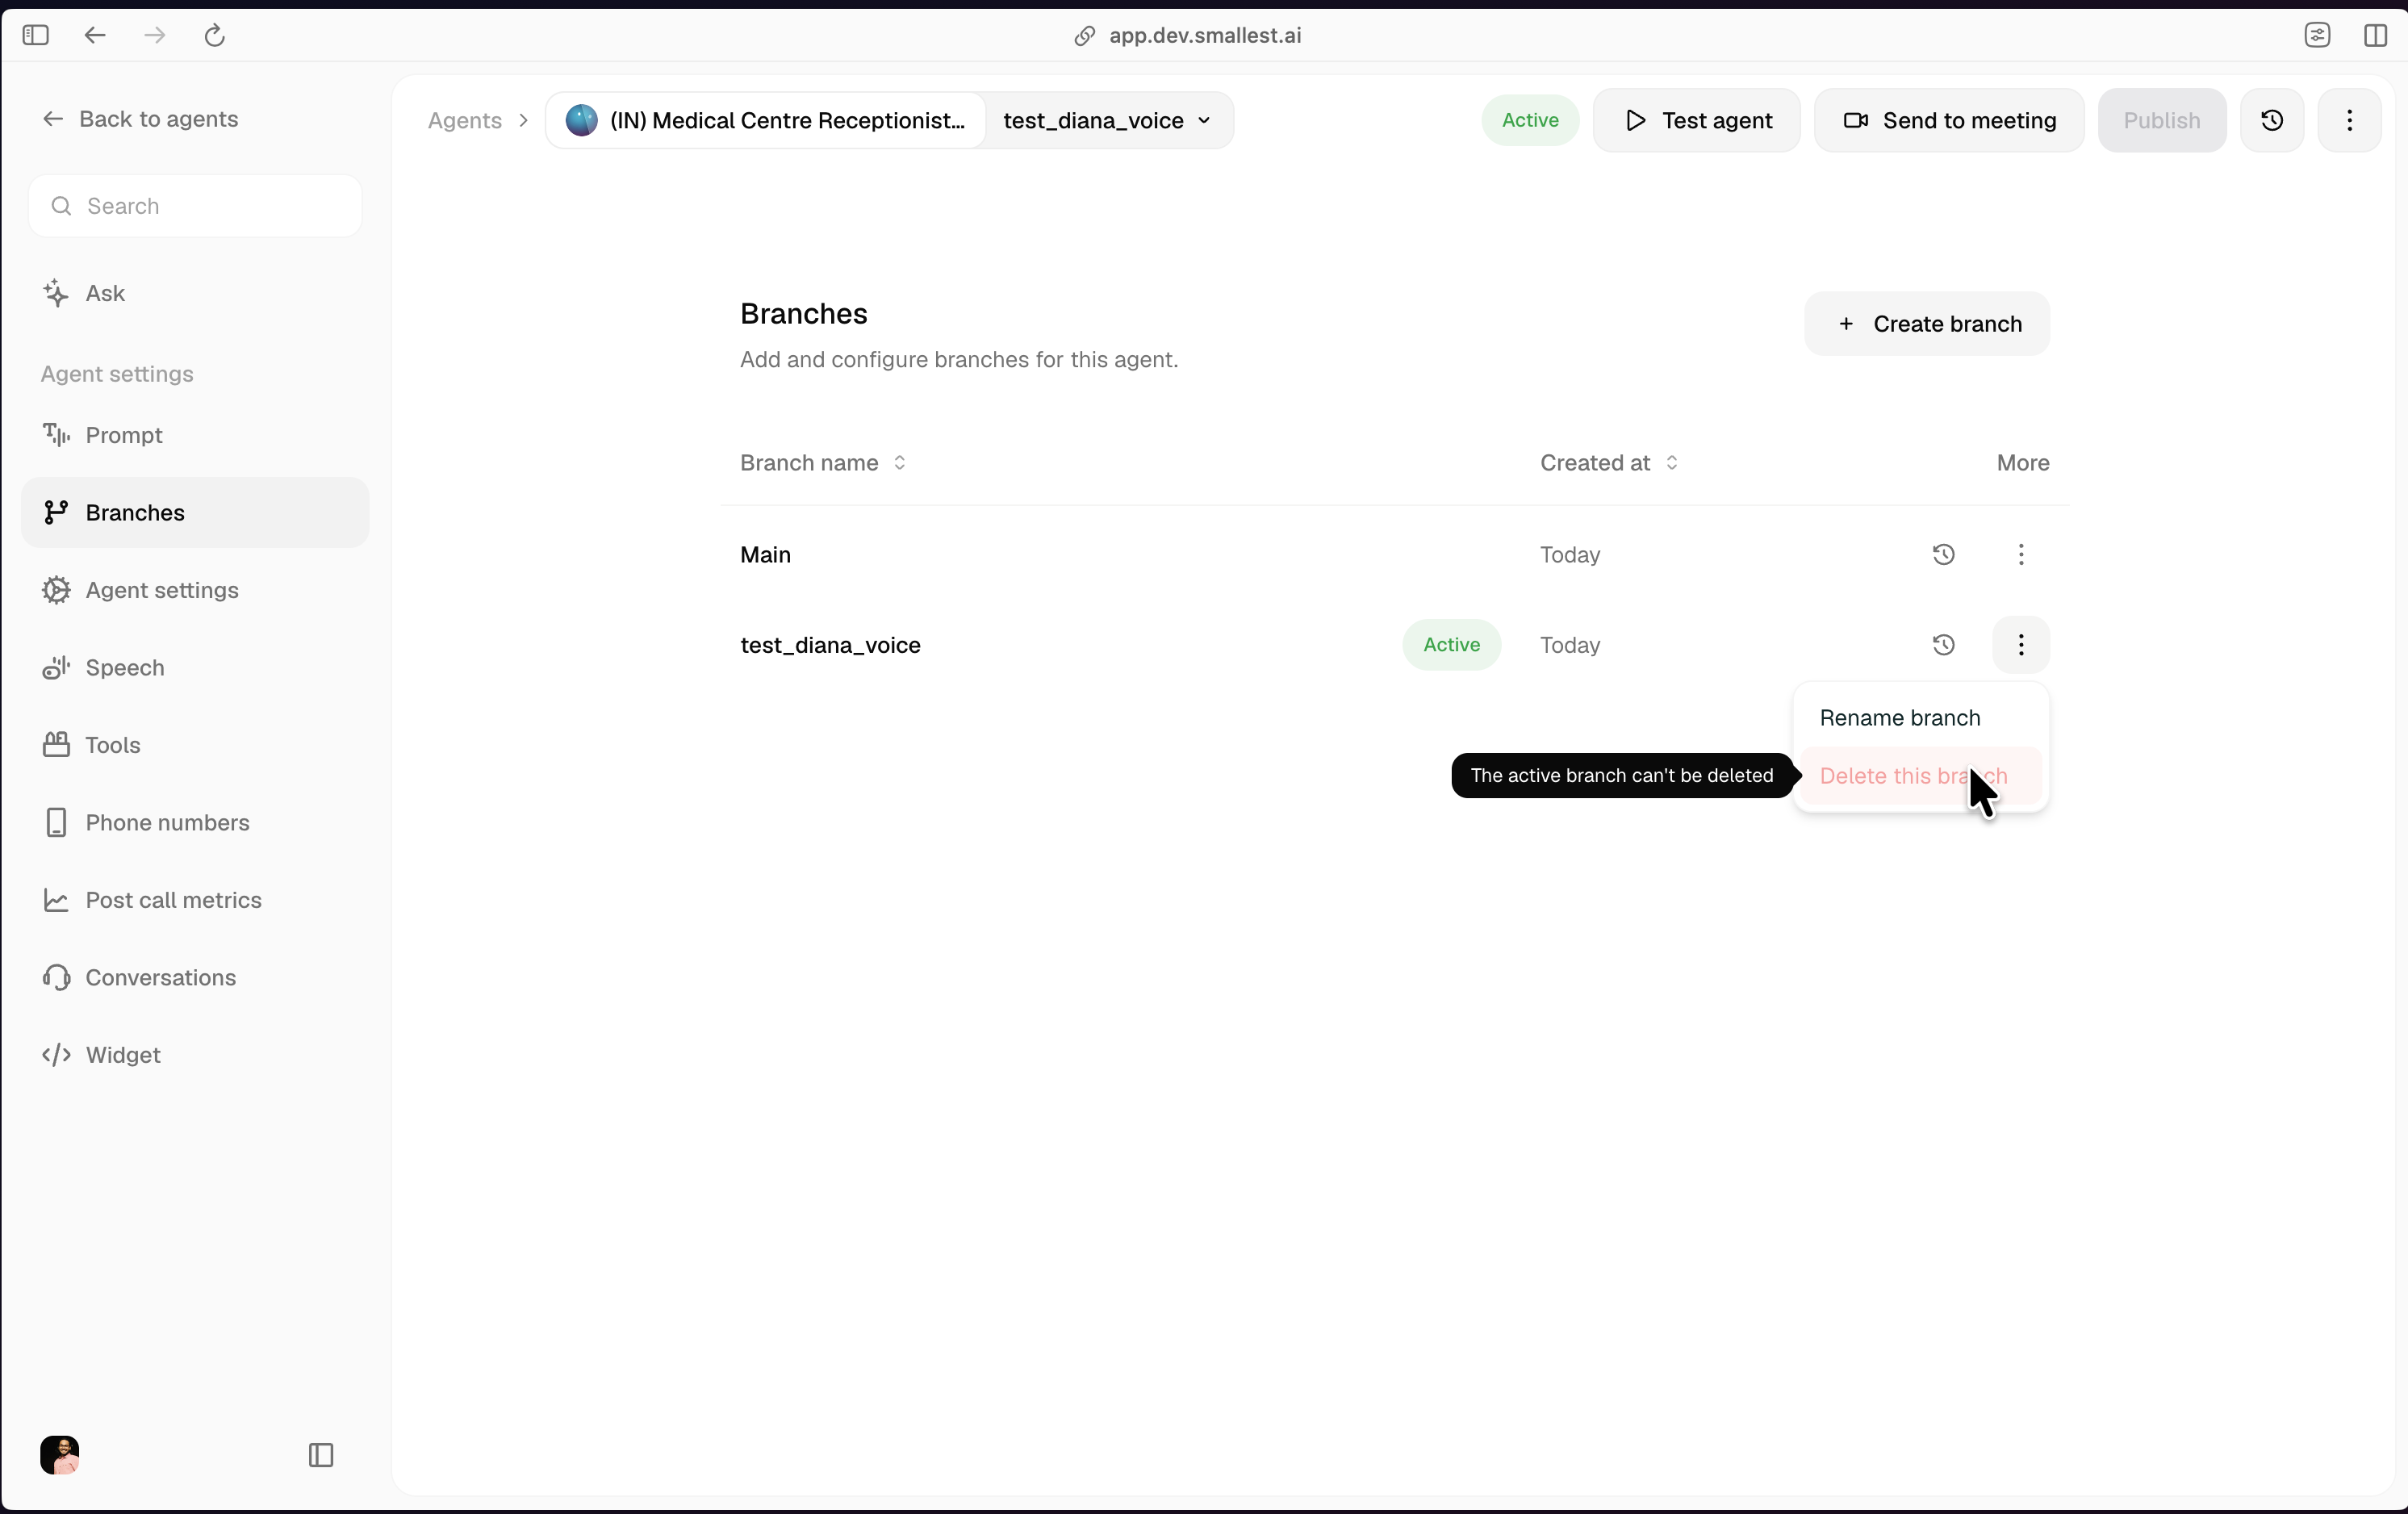
Two guardrails:
Maincannot be deleted. Rename another branch to serve a different role;Mainalways exists.- The live branch cannot be deleted. Make another branch live first.
Managing versions via API
The full v2 API is documented under Agent Versioning: Branches and Agent Versioning: Revisions in the API Reference. Common operations:
For a step-by-step SDK/curl walkthrough, see the versioning lifecycle guide.
The v1 endpoints (/agent/{id}/drafts/* and /agent/{id}/versions/* writes and list reads) are deprecated. Existing integrations should follow the v1 → v2 migration guide. By-id reads and test-calls on v1 paths continue to work as-is because a v1 versionId equals its migrated revisionId.