***
title: Quick Start
subtitle: >-
Talk to your Atoms voice agents, debug calls, and view analytics — all without
leaving your editor.
--------------------
The Atoms MCP Server connects your AI editor to the Atoms platform. No console tab-switching — just type what you want in natural language.
***
## Setup
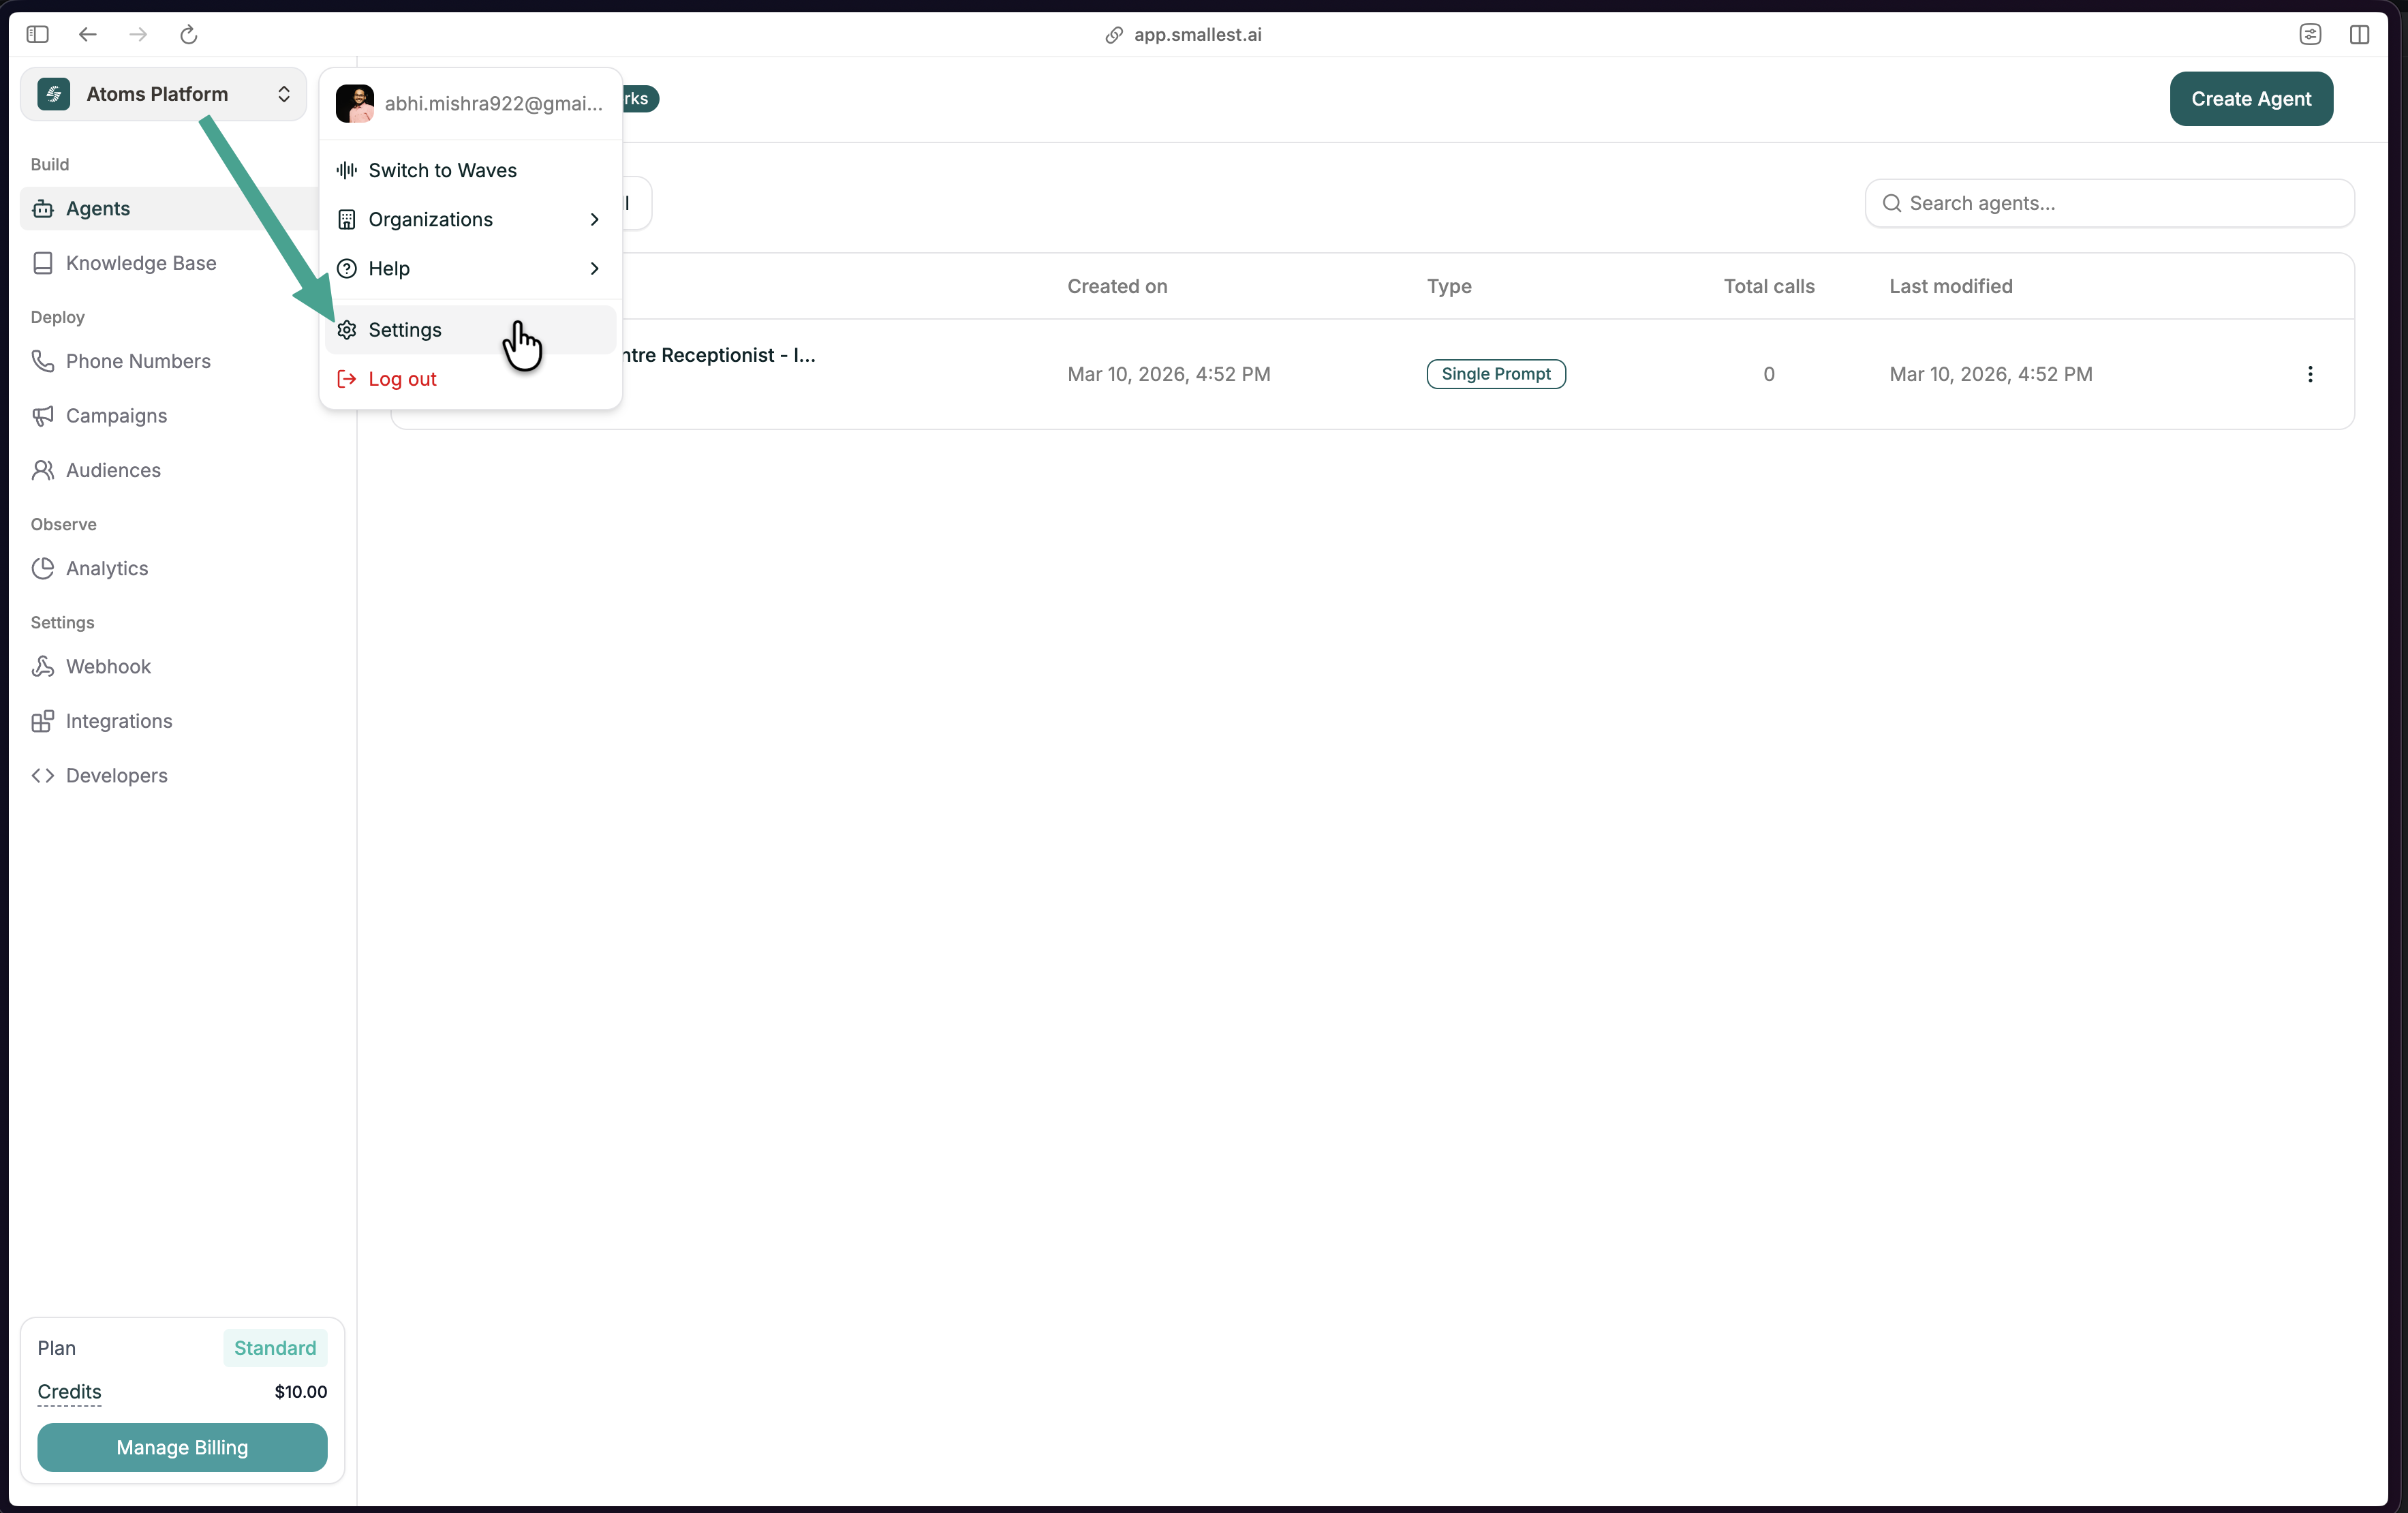
Open [app.smallest.ai](https://app.smallest.ai?utm_source=documentation\&utm_medium=docs), click your profile in the top-left, and go to **Settings**.
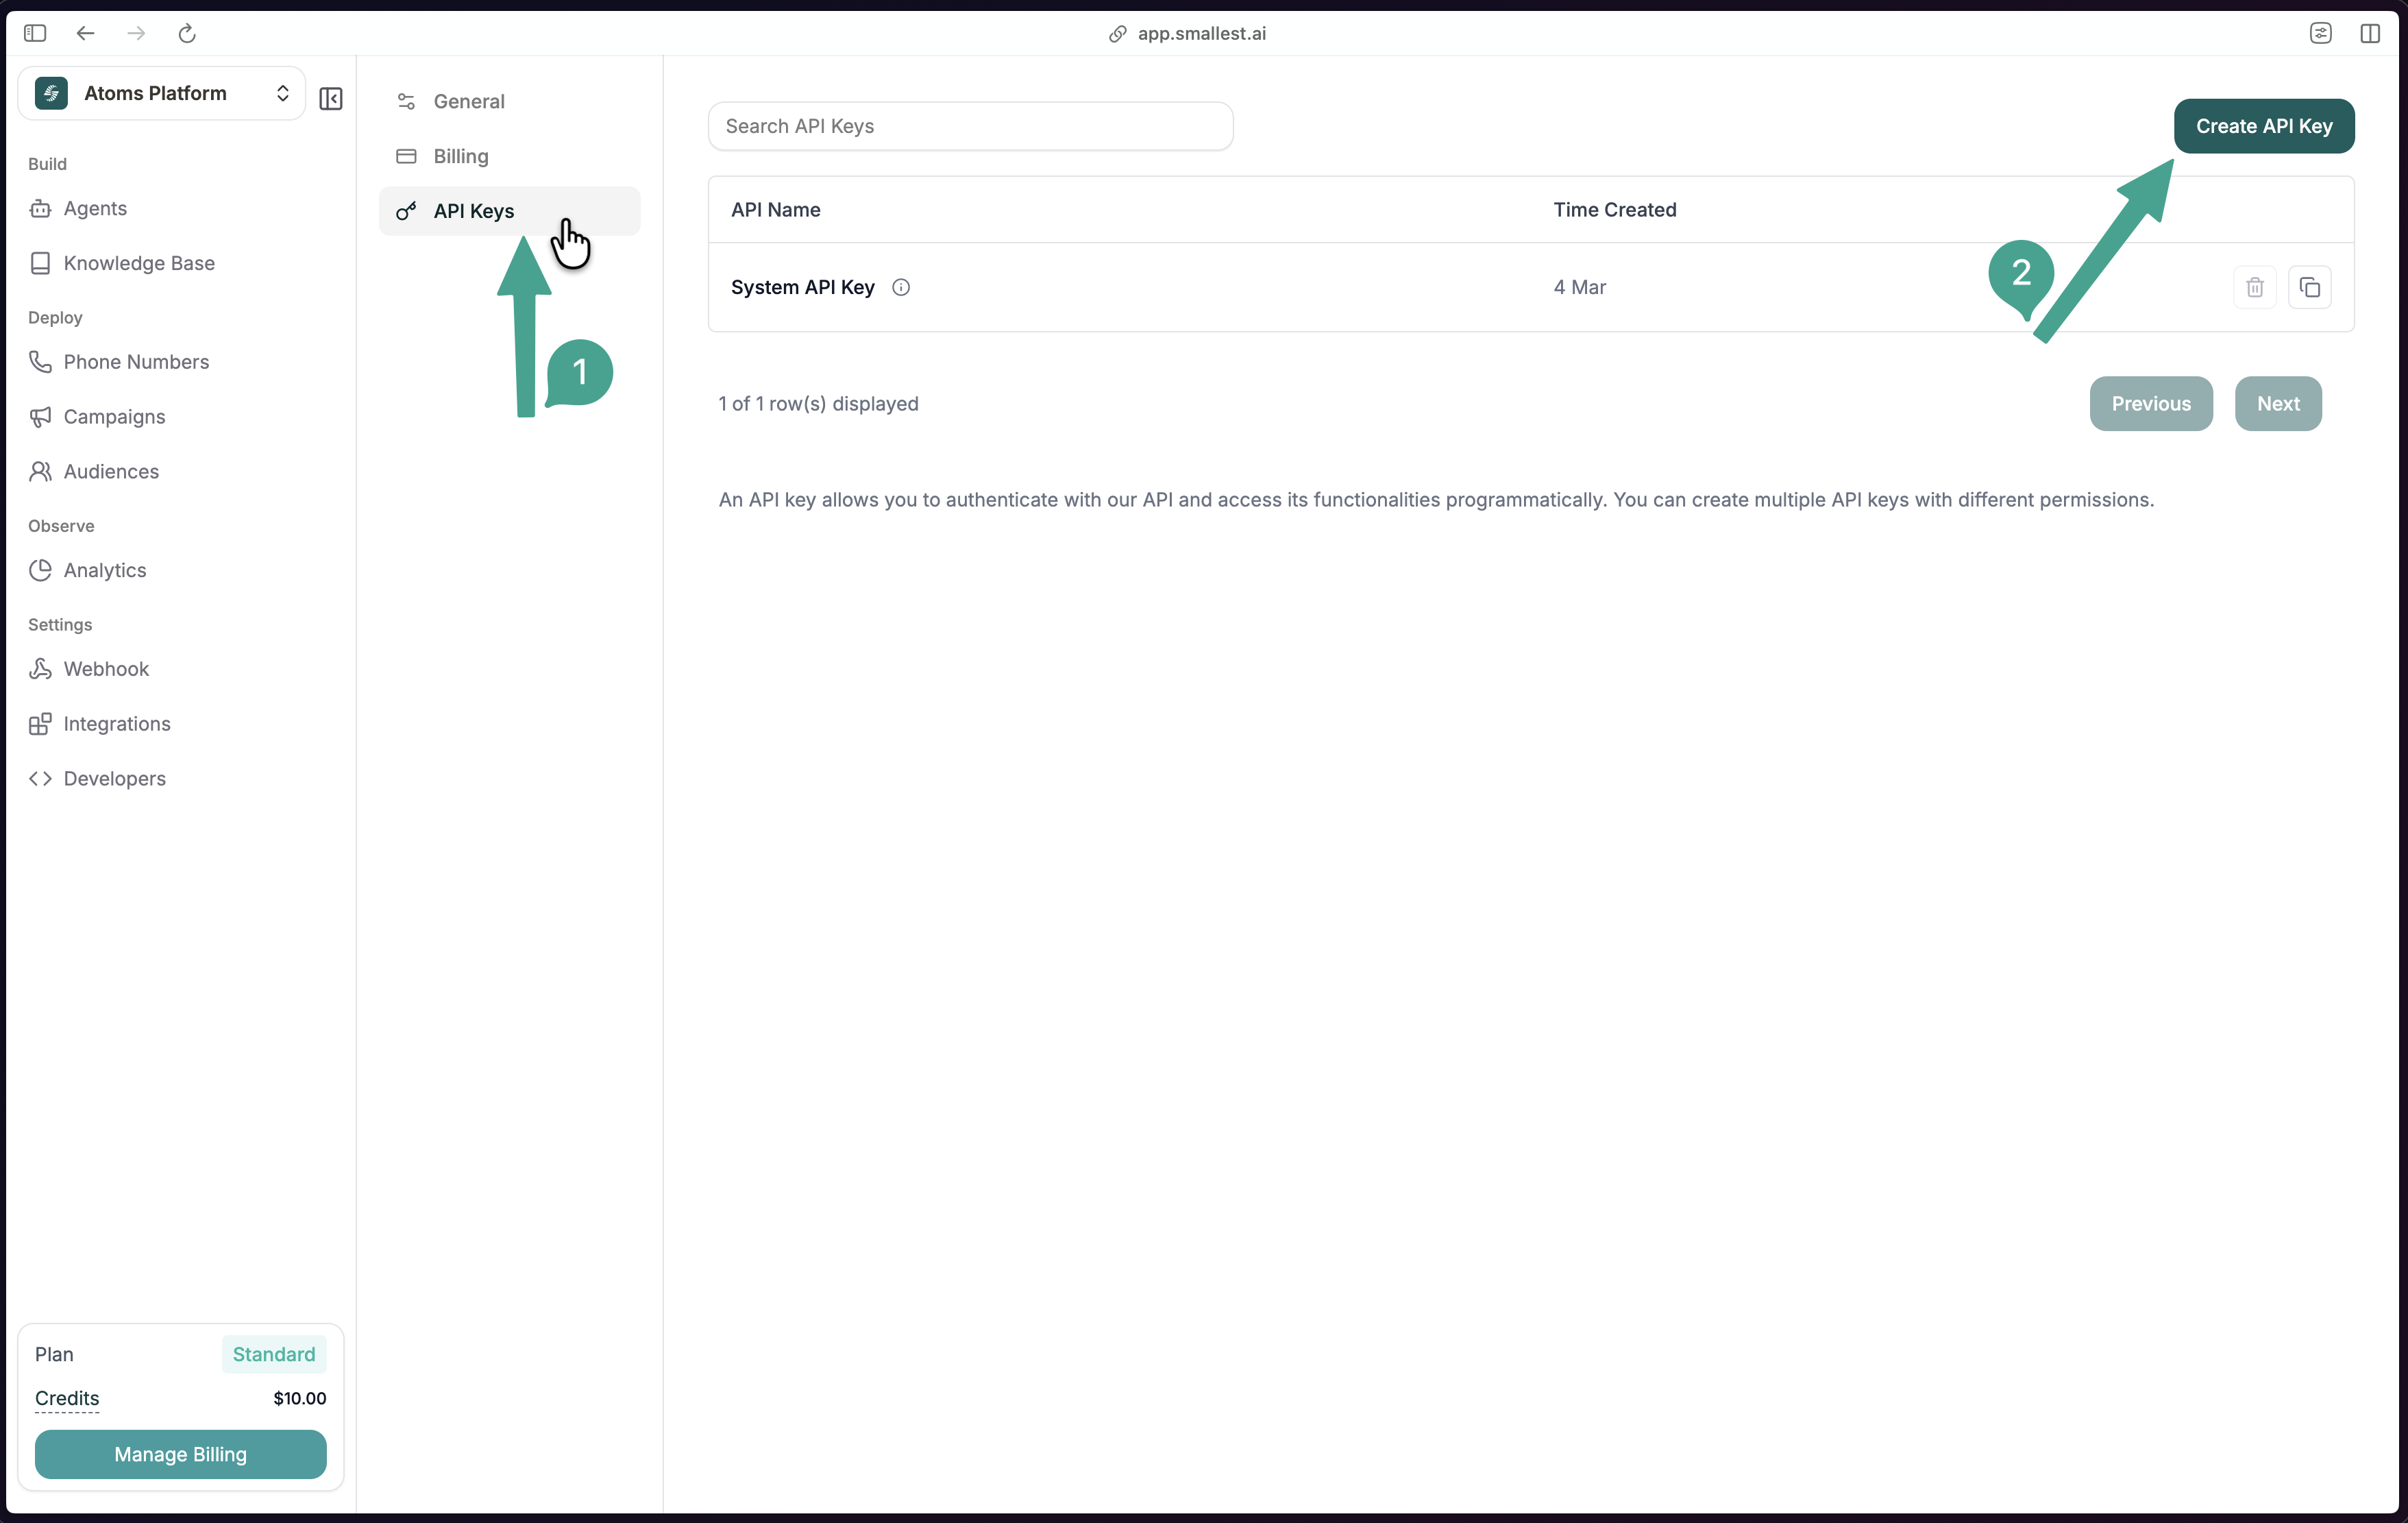
 Click **API Keys** in the sidebar, then **Create API Key**.
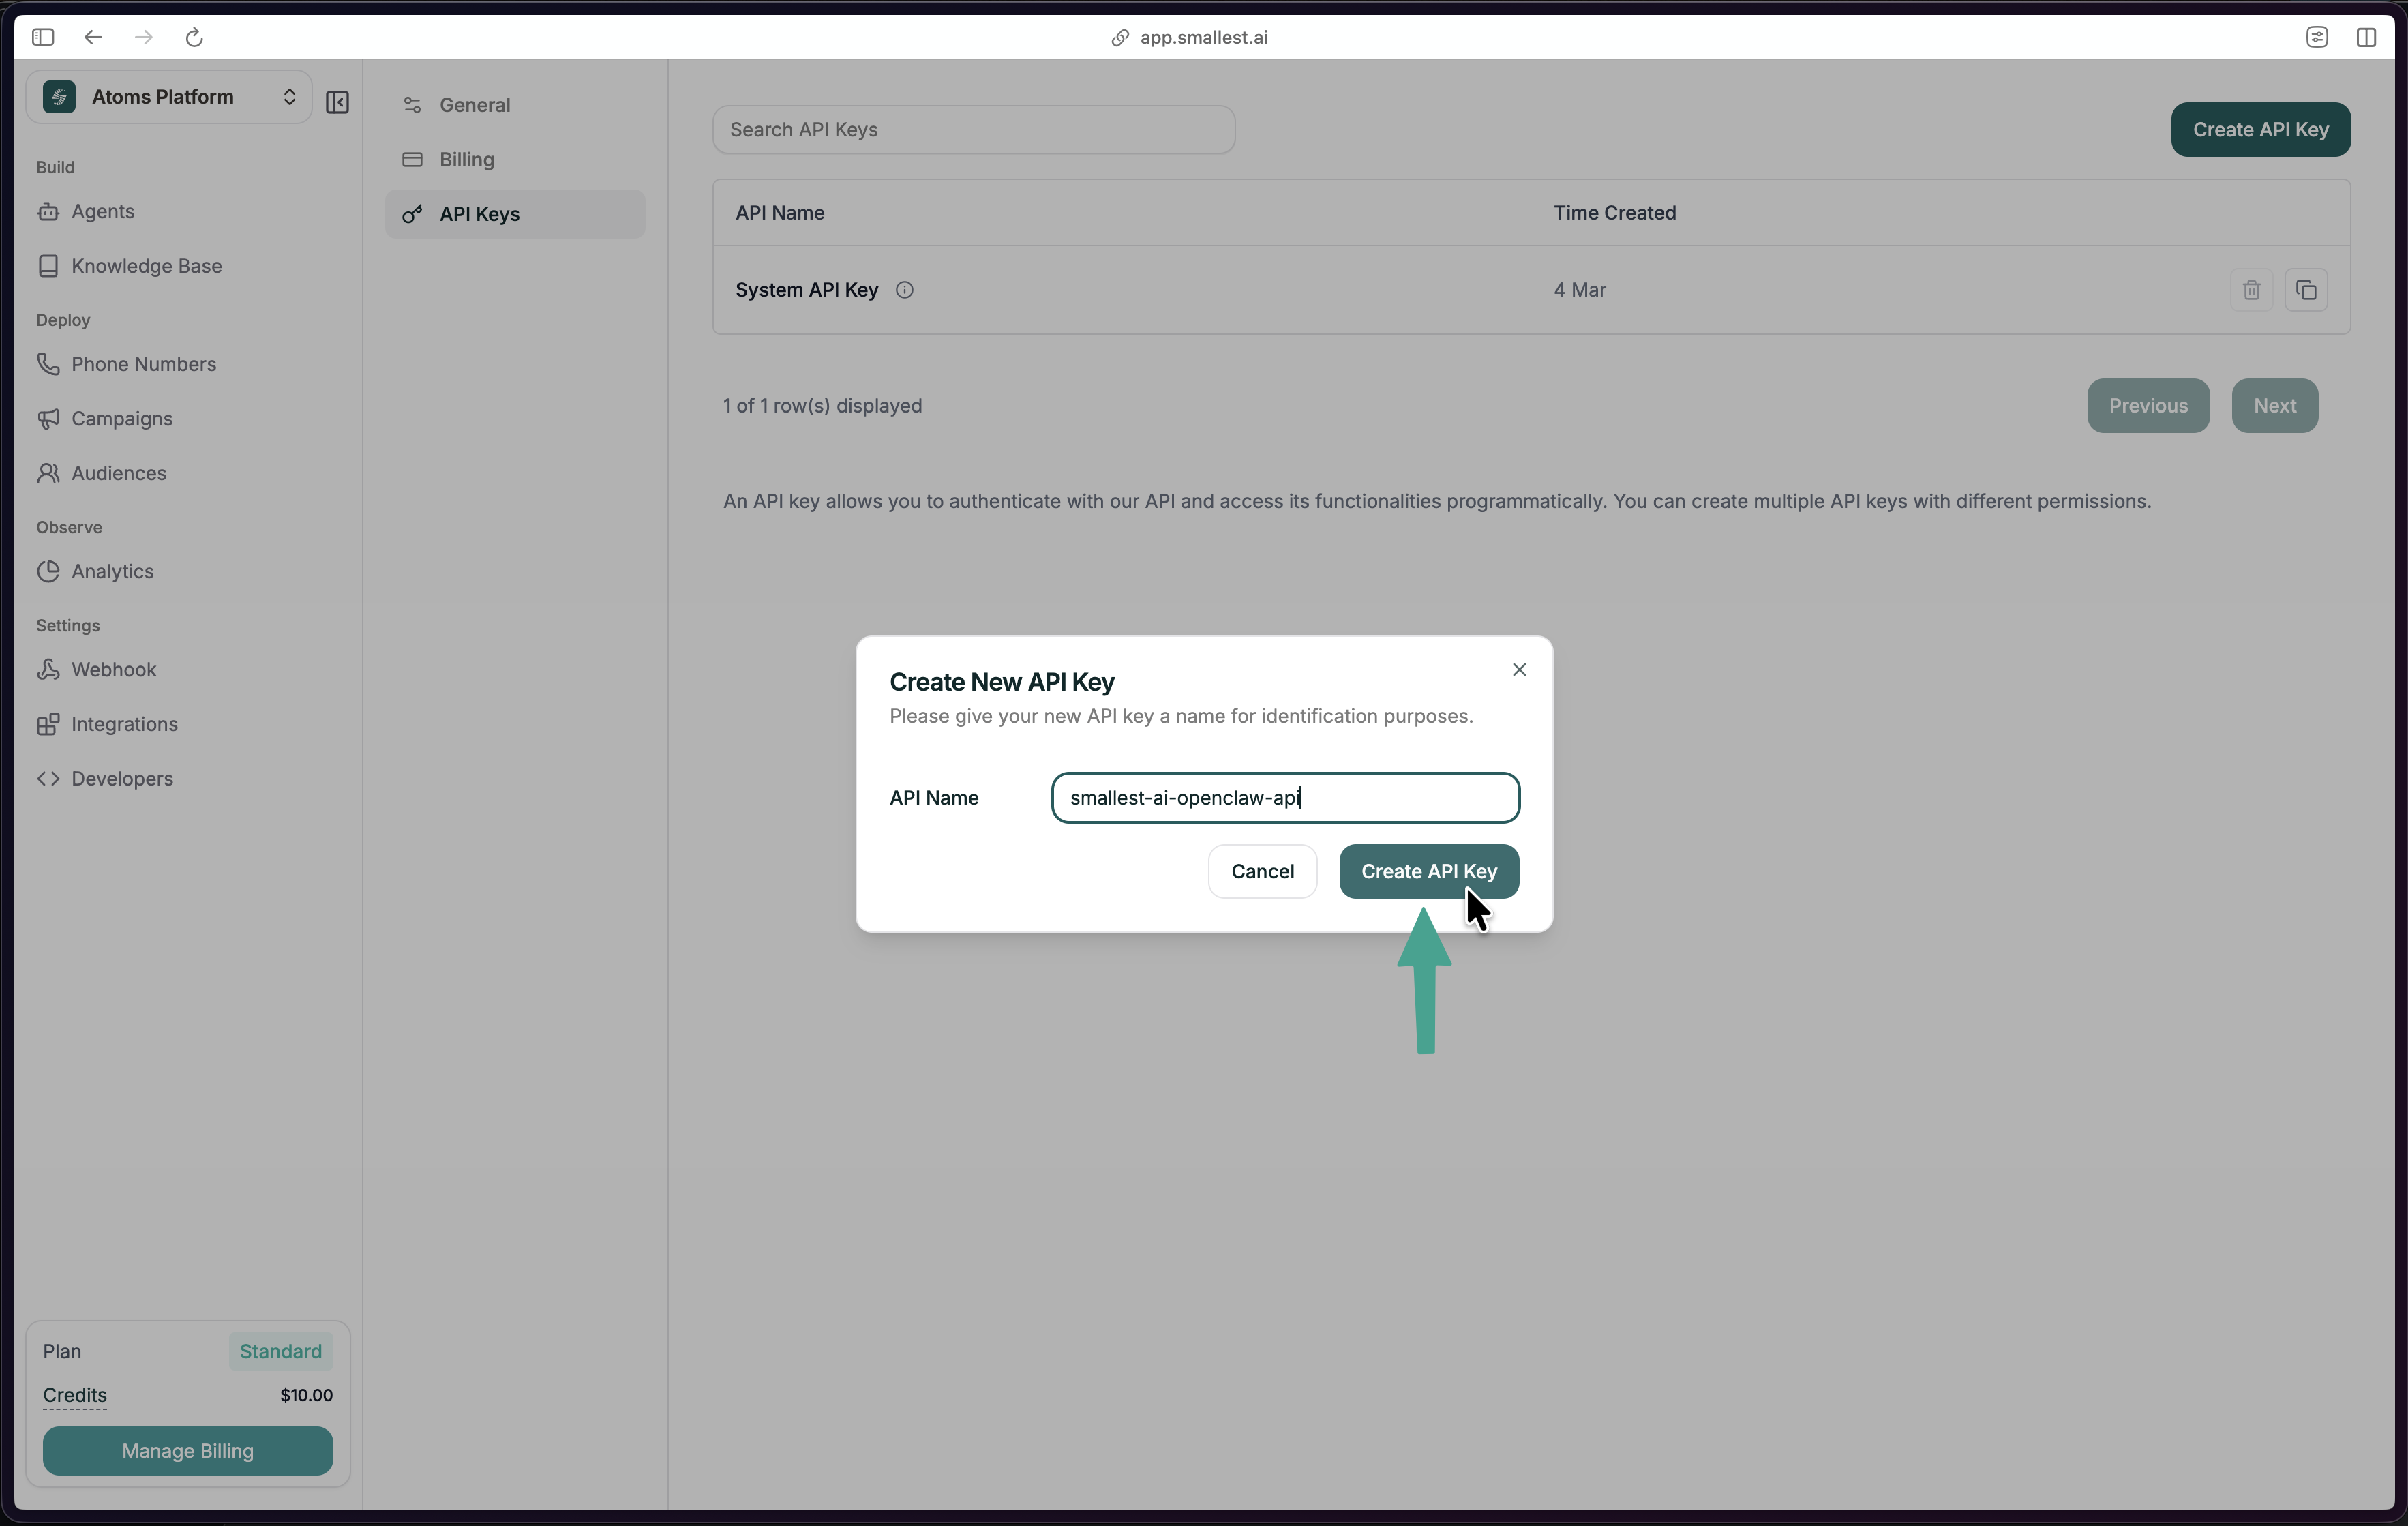
 Name your key and click **Create API Key**. Copy it — it starts with `sk_`.
 Open a chat in **Cursor** or **Claude Desktop** and paste one of these:
Zero dependencies — no Node.js needed.
```
Set up the Atoms MCP server for me using the curl installer.
Run: curl -fsSL https://raw.githubusercontent.com/smallest-inc/mcp-server/main/install.sh | bash
My API key is: sk_paste_your_key_here
```
```
Set up the Atoms MCP server for me using the PowerShell installer.
Run: irm https://raw.githubusercontent.com/smallest-inc/mcp-server/main/install.ps1 | iex
My API key is: sk_paste_your_key_here
```
Requires **Node.js 18+**.
```
Set up the Atoms MCP server for me.
The npm package is @developer-smallestai/atoms-mcp-server.
My API key is: sk_paste_your_key_here
```
Your assistant configures everything for you.
`Cmd+Shift+P` (Mac) or `Ctrl+Shift+P` (Windows) → **Developer: Reload Window**
Fully quit and reopen the app.
Type this in chat:
```
List all my agents
```
You should see your agents listed back. You're set up.
Prefer to set things up yourself? See the **[Manual Setup](manual-setup)** guide.
***
## What can you do?
Just type in your editor's chat — the AI picks the right tool:
```
Show me all failed calls from this week
```
```
What's our total call spend this month?
```
```
List all my agents
```
```
Debug call CALL-1234567890-abc123
```
Returns the full transcript, errors, timing, costs, and post-call analytics.
```
Create a new agent called "Support Bot"
```
```
Update its prompt to: "You are a helpful support agent..."
```
```
Call +14155551234 using the "Sales" agent
```
Triggers a real outbound call — the agent follows its configured prompt.
See the full list in the **[Prompt Cookbook](/atoms/mcp/using-the-mcp/prompt-cookbook)**.
Open a chat in **Cursor** or **Claude Desktop** and paste one of these:
Zero dependencies — no Node.js needed.
```
Set up the Atoms MCP server for me using the curl installer.
Run: curl -fsSL https://raw.githubusercontent.com/smallest-inc/mcp-server/main/install.sh | bash
My API key is: sk_paste_your_key_here
```
```
Set up the Atoms MCP server for me using the PowerShell installer.
Run: irm https://raw.githubusercontent.com/smallest-inc/mcp-server/main/install.ps1 | iex
My API key is: sk_paste_your_key_here
```
Requires **Node.js 18+**.
```
Set up the Atoms MCP server for me.
The npm package is @developer-smallestai/atoms-mcp-server.
My API key is: sk_paste_your_key_here
```
Your assistant configures everything for you.
`Cmd+Shift+P` (Mac) or `Ctrl+Shift+P` (Windows) → **Developer: Reload Window**
Fully quit and reopen the app.
Type this in chat:
```
List all my agents
```
You should see your agents listed back. You're set up.
Prefer to set things up yourself? See the **[Manual Setup](manual-setup)** guide.
***
## What can you do?
Just type in your editor's chat — the AI picks the right tool:
```
Show me all failed calls from this week
```
```
What's our total call spend this month?
```
```
List all my agents
```
```
Debug call CALL-1234567890-abc123
```
Returns the full transcript, errors, timing, costs, and post-call analytics.
```
Create a new agent called "Support Bot"
```
```
Update its prompt to: "You are a helpful support agent..."
```
```
Call +14155551234 using the "Sales" agent
```
Triggers a real outbound call — the agent follows its configured prompt.
See the full list in the **[Prompt Cookbook](/atoms/mcp/using-the-mcp/prompt-cookbook)**.